- Made by AppCoda
- Contact us / Support
- Tweet this book
- Preface
- 1. The Development Tools, the Learning Approach, and the App Idea
- 2. Your First Taste of Swift with Playgrounds
- 3. Build Your First App in Swift and SwiftUI
- 4. Designing UI Using Stack Views
- 5. Introduction to Prototyping
- 6. Understanding List and ForEach
- 7. Customizing List Views
- 8. Displaying Confirmations and Handling List View Selection
- 9. Understanding Struct, Project Organization and Code Documentation
- 10. List Deletion, Swipe Actions, Context Menus and Activity Controller
- 11. Working with Navigation View
- 12. Detail View Enhancement, Custom Fonts and Navigation Bar Customization
- 13. Understanding Colors, Swift Extensions and Dynamic Type
- 14. Working with Maps
- 15. View Animations and Blur Effect
- 16. Working with Observable Objects and Combine
- 17. Working with Forms and Camera
- 18. Working with Core Data
- 19. Adding a Search Bar Using Searchable
- 20. Building Walkthrough Screens Using TabView
- 21. Working with Tab View and Tab Bar Customizations
- 22. Displaying Web Content with WKWebView and SFSafariViewController
- 23. Working with CloudKit
- 24. Localizing Your App to Support Multiple Languages
- 25. Deploying and Testing Your App on a Real iOS Device
- 26. Beta Testing with TestFlight and CloudKit Production Deployment
- 27. Submit Your App to App Store
- 28. Adopting Haptic Touch
- 29. Working with User Notifications
- 30. Appendix - Swift Basics
- Published with GitBook
Chapter 29
Working with User Notifications
Prior to iOS 10, user notifications are plain and simple. No rich graphics or media. It is just in text format. Depending on the user's context, the notification can appear on the lock screen or home screen. If the user misses any of the notifications, they can bring up the Notification Center to reveal all pending notifications.
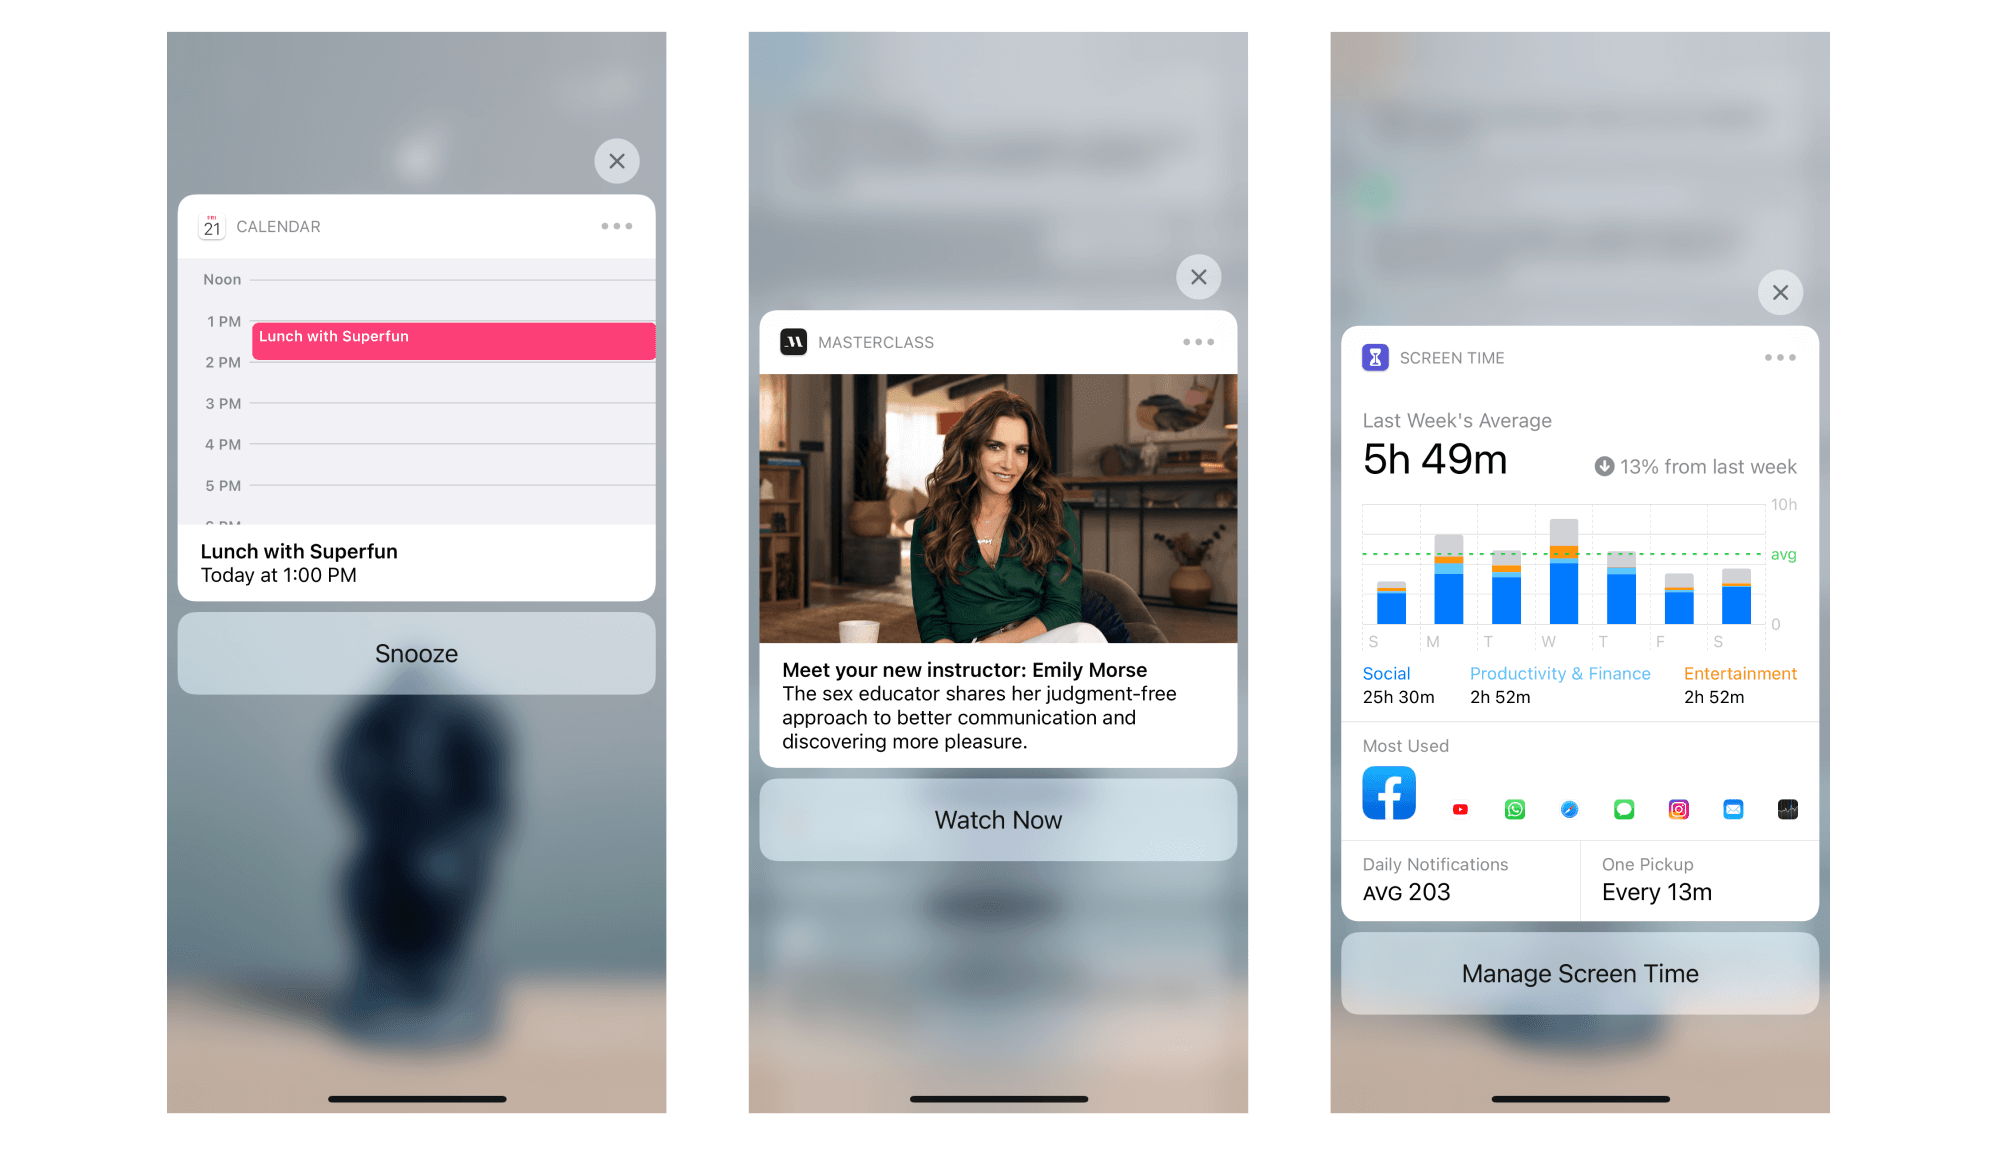
Since the release of iOS 10, Apple has revamped the notification system to support user notifications in rich content and custom notification UI. By rich content, it means you can include static images, animated GIFs, videos, and audios in the notifications. Figure 29-2 gives you an idea of rich content notifications.
You may have heard of push notifications, which have been widely adopted in messaging apps. Actually, user notifications can be classified into two types: local notifications and remote notifications. Local notifications are triggered by the application itself and contained on the user's device. For example, a location-based application will send users a notification when they are in a particular area. Or a to-do list app displays a notification when an item is close to the due date.
Remote notifications are usually initiated by server side applications that reside on remote servers. When the server application wants to send messages to users, it sends a notification to Apple Push Notification Service (or APNS for short). The service then forwards the notification to users' devices.
We're not going to talk about the implementation of remote notifications in this chapter. Instead, we will focus on discussing local notifications, and show you how to use the new User Notifications framework to implement the rich-content notifications.
Using User Notifications to Increase Customer Engagement
So what features are we going to add in the FoodPin app? Using local notifications is a great way to remind your users about your app. A recent study revealed that only less than 25% of people will use an app for more than one time. In other words, over 75% of users download an app, open it once, and then never return to it.
More than 75% of App Downloads Open an App Once And Never Come Back
by Erin Griffith
With over two million apps available in the App Store, it is hard to get people notice and download your app. Yet it is even harder to keep people using it. A smart use of user notifications can help you retain your users and improve the user experience of your app.
The User Notifications framework provides different triggers to initiate a local notification:
- Time-based trigger - triggers a local notification after a specific amount of time (say, after 10 minutes).
- Calendar-based trigger - triggers a local notification at a specified date and time.
- Location-based trigger - triggers a local notification when the user reaches a specific location.
The FoodPin app is designed for food lovers to bookmark their favorite restaurants. Wouldn't it be great if the app suggests one's favorite restaurants when the user reaches a particular location? For example, you've saved a few restaurants in Tokyo. At the time you arrive Tokyo, the app triggers a notification showing a list of your favorite restaurants in the city.
Or you can use a calendar-based trigger to initiate notifications at festival times (say, 10 days before Christmas). The notification can be something like this:
"Hey, Christmas is around the corner. It's time to plan for the holidays and try some good food with your friends. Here are some of your favorite restaurants you can check out."
These are a couple of sample use cases. It's more likely users will return to the app after seeing the notifications.
To keep things simple in this beginner book, we would not implement the above triggers. Instead, I will show you how to use time-based triggers to trigger local notifications. That said, it doesn't mean that the notifications are useless or spammy. And, once you understand the basics of the User Notifications framework, it is not too difficult for you to implement other types of triggers.
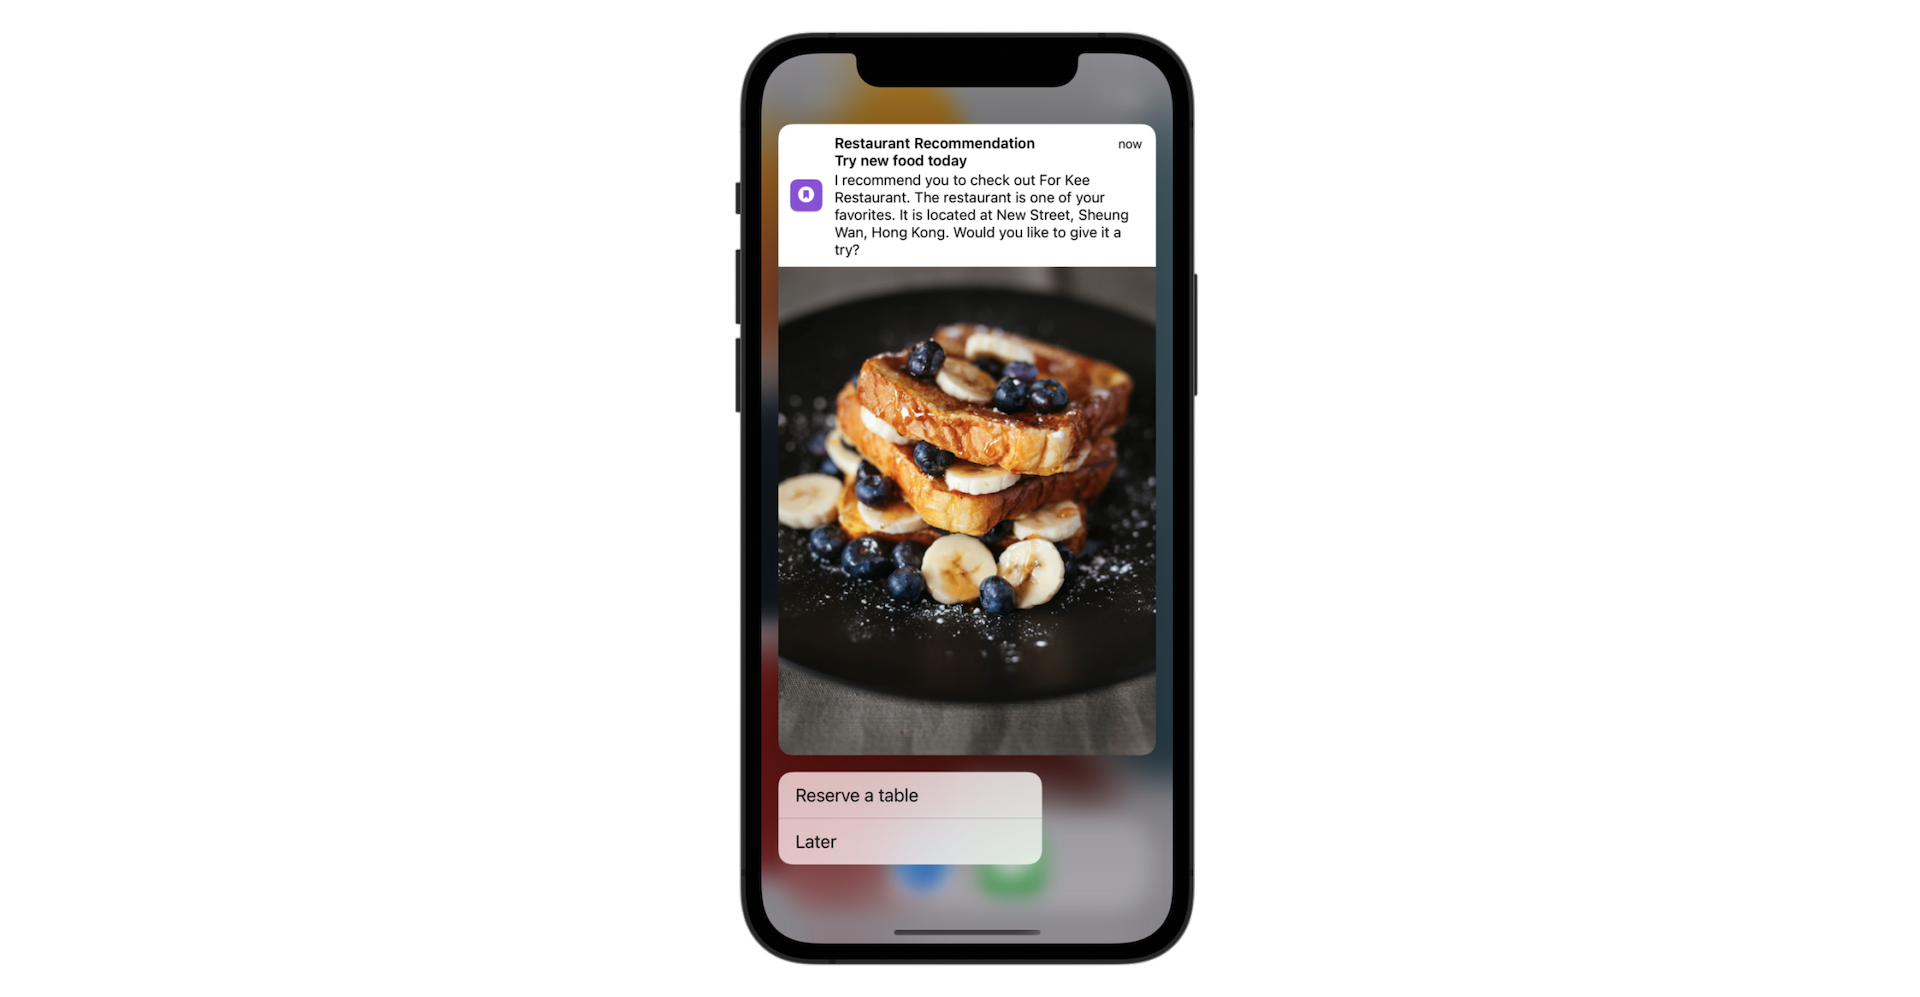
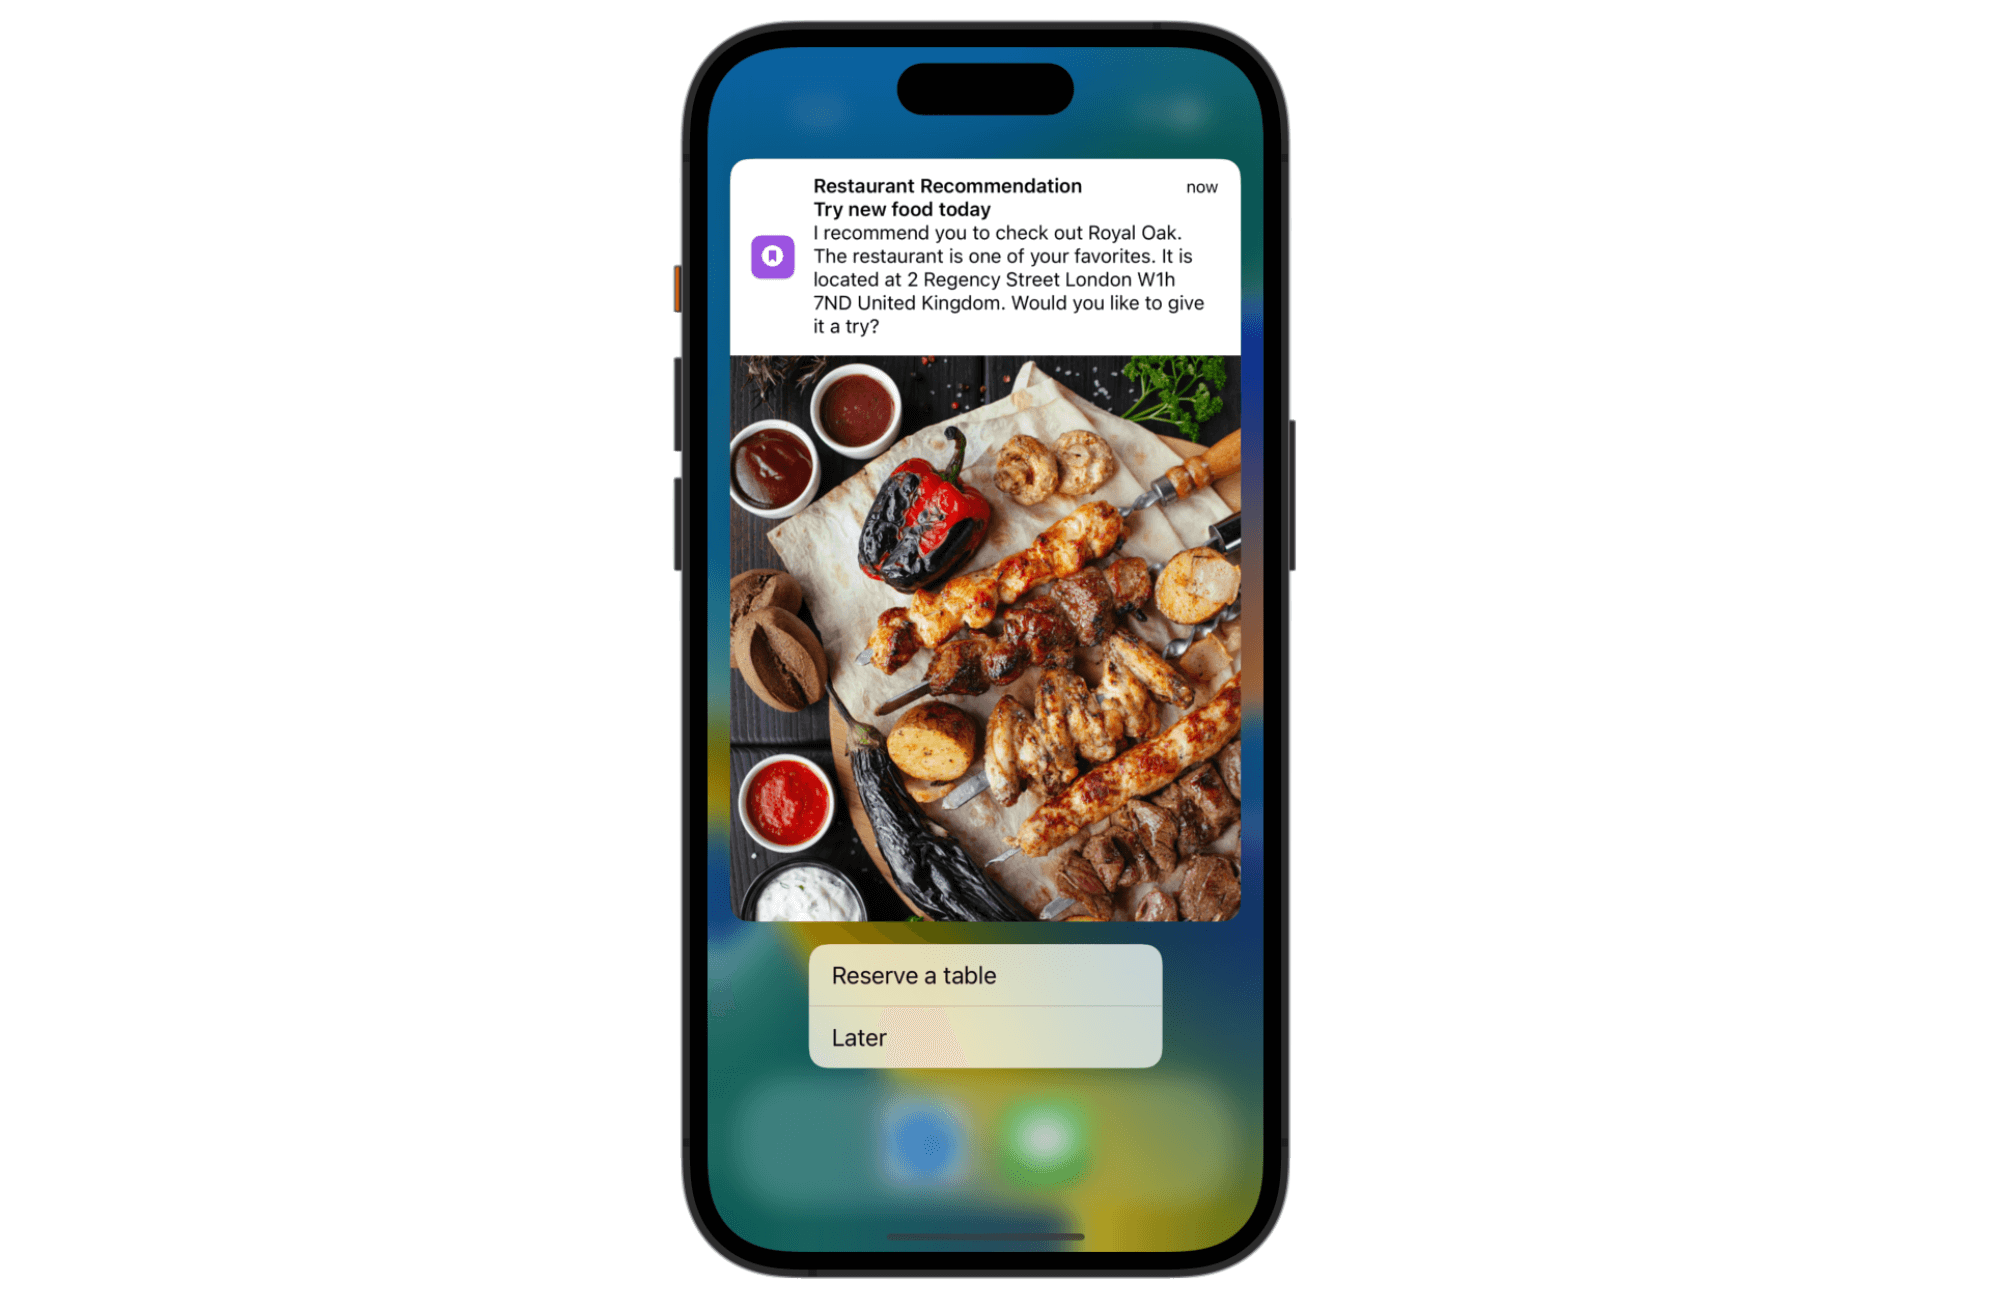
What we are going to do is that we will notify the user and recommend him/her a restaurant after a certain period of time (say, 24 hours) since he/she last used the app. Furthermore, we will allow users to interact with the notification. When the user sees the notification, he/she will be given an option to reserve a table. If the user taps the button, it will directly make a call to the restaurant. Figure 29-3 illustrates a sample notification.
Does it look great? Let's get started and see how you can make the notifications happen in your app.
Using the User Notifications Framework
The User Notifications framework is a framework for managing and scheduling notifications. To implement user facing notifications, the very first thing to do is import the framework in your code, so you can access the APIs bundled in the framework.
In FoodPinApp.swift,insert the following line of code:
import UserNotifications
Asking for User Permission
Regardless of the type of notifications, you have to ask for the user's authorization and permission before you can send notifications to the user's device. We usually implement the authorization request in the AppDelegate class by adopting the application(_:didFinishLaunchingWithOptions:) method. Insert the following code in the AppDelegate class:
func application(_ application: UIApplication, didFinishLaunchingWithOptions launchOptions: [UIApplication.LaunchOptionsKey : Any]? = nil) -> Bool {
    UNUserNotificationCenter.current().requestAuthorization(options: [.alert, .sound, .badge]) { (granted, error) in

        if granted {
            print("User notifications are allowed.")
        } else {
            print("User notifications are not allowed.")
        }
    }

    return true
}
It is very simple to prompt users with an authorization request. As you can see from the code above, we call requestAuthorization on the UNUserNotificationCenter object associated with the application. And we request the ability to display alerts, play sounds, and update the app's badge.
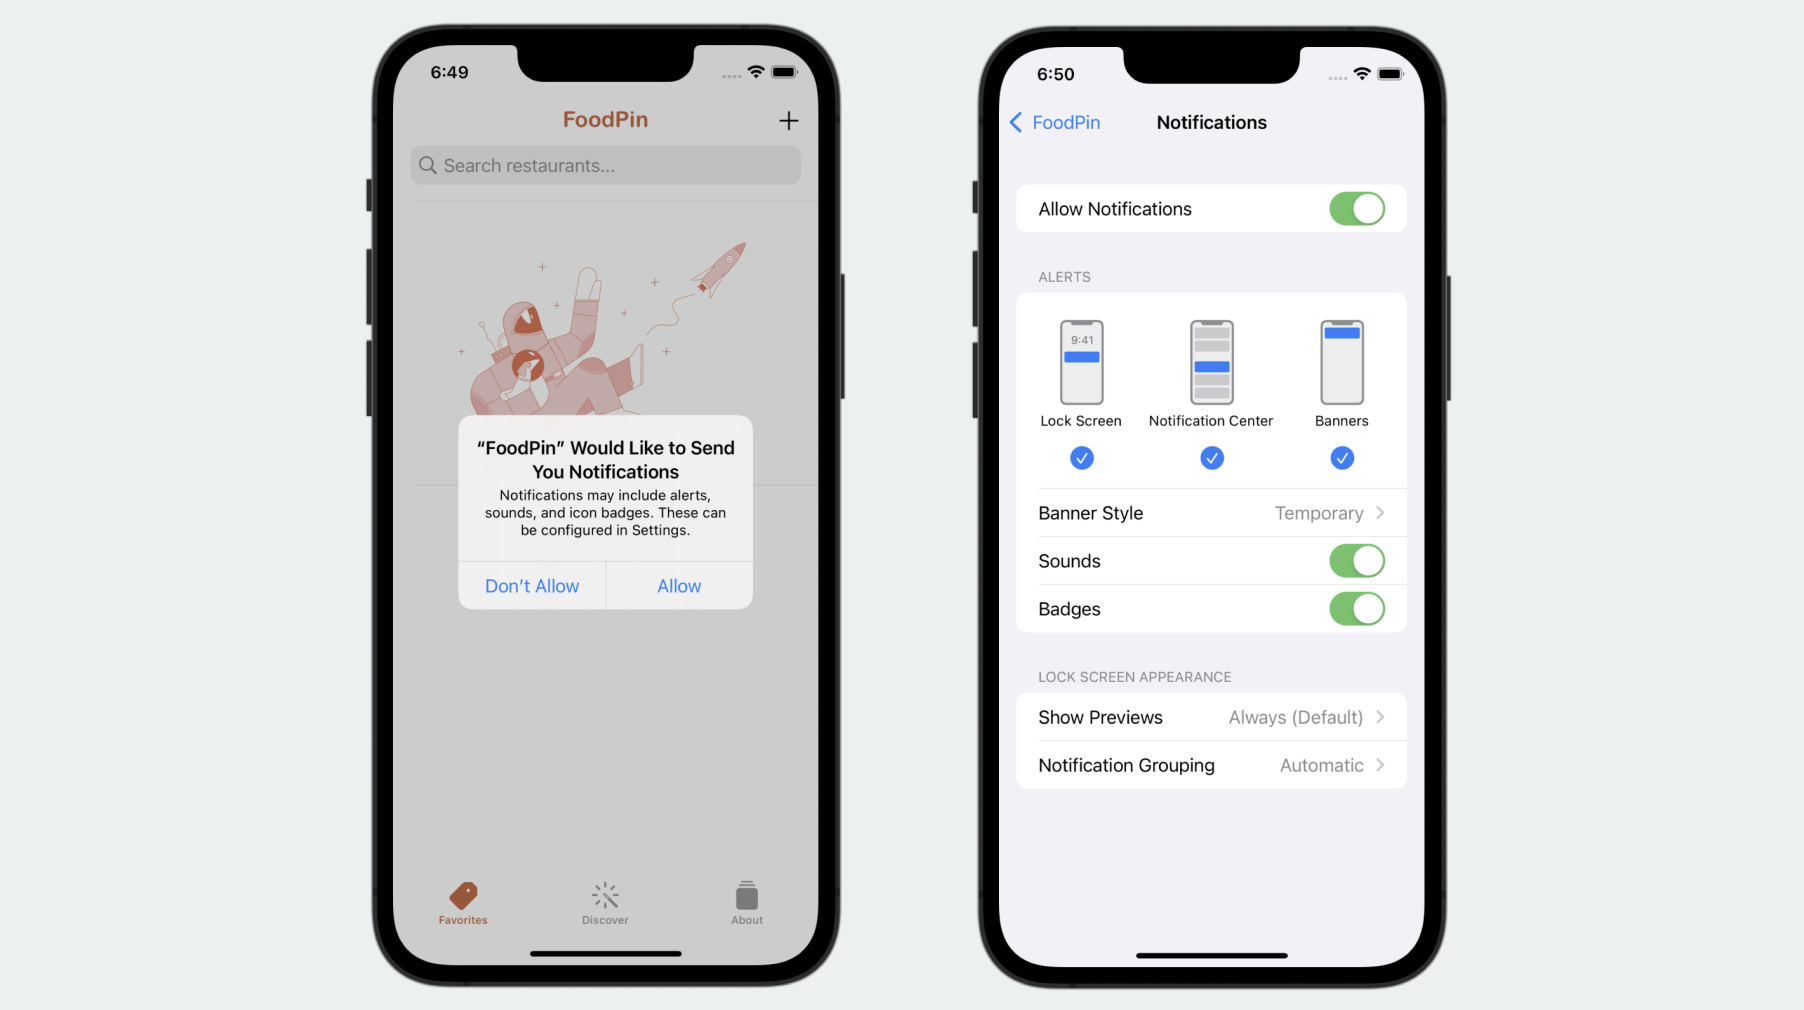
Now run the project to test it out. When the app is launched, you should see the authorization request. Once you accept it, the app is allowed to send notifications to the device. To verify the notification settings, you can go to Setting > FoodPin > Notifications.
Creating and Scheduling Notifications
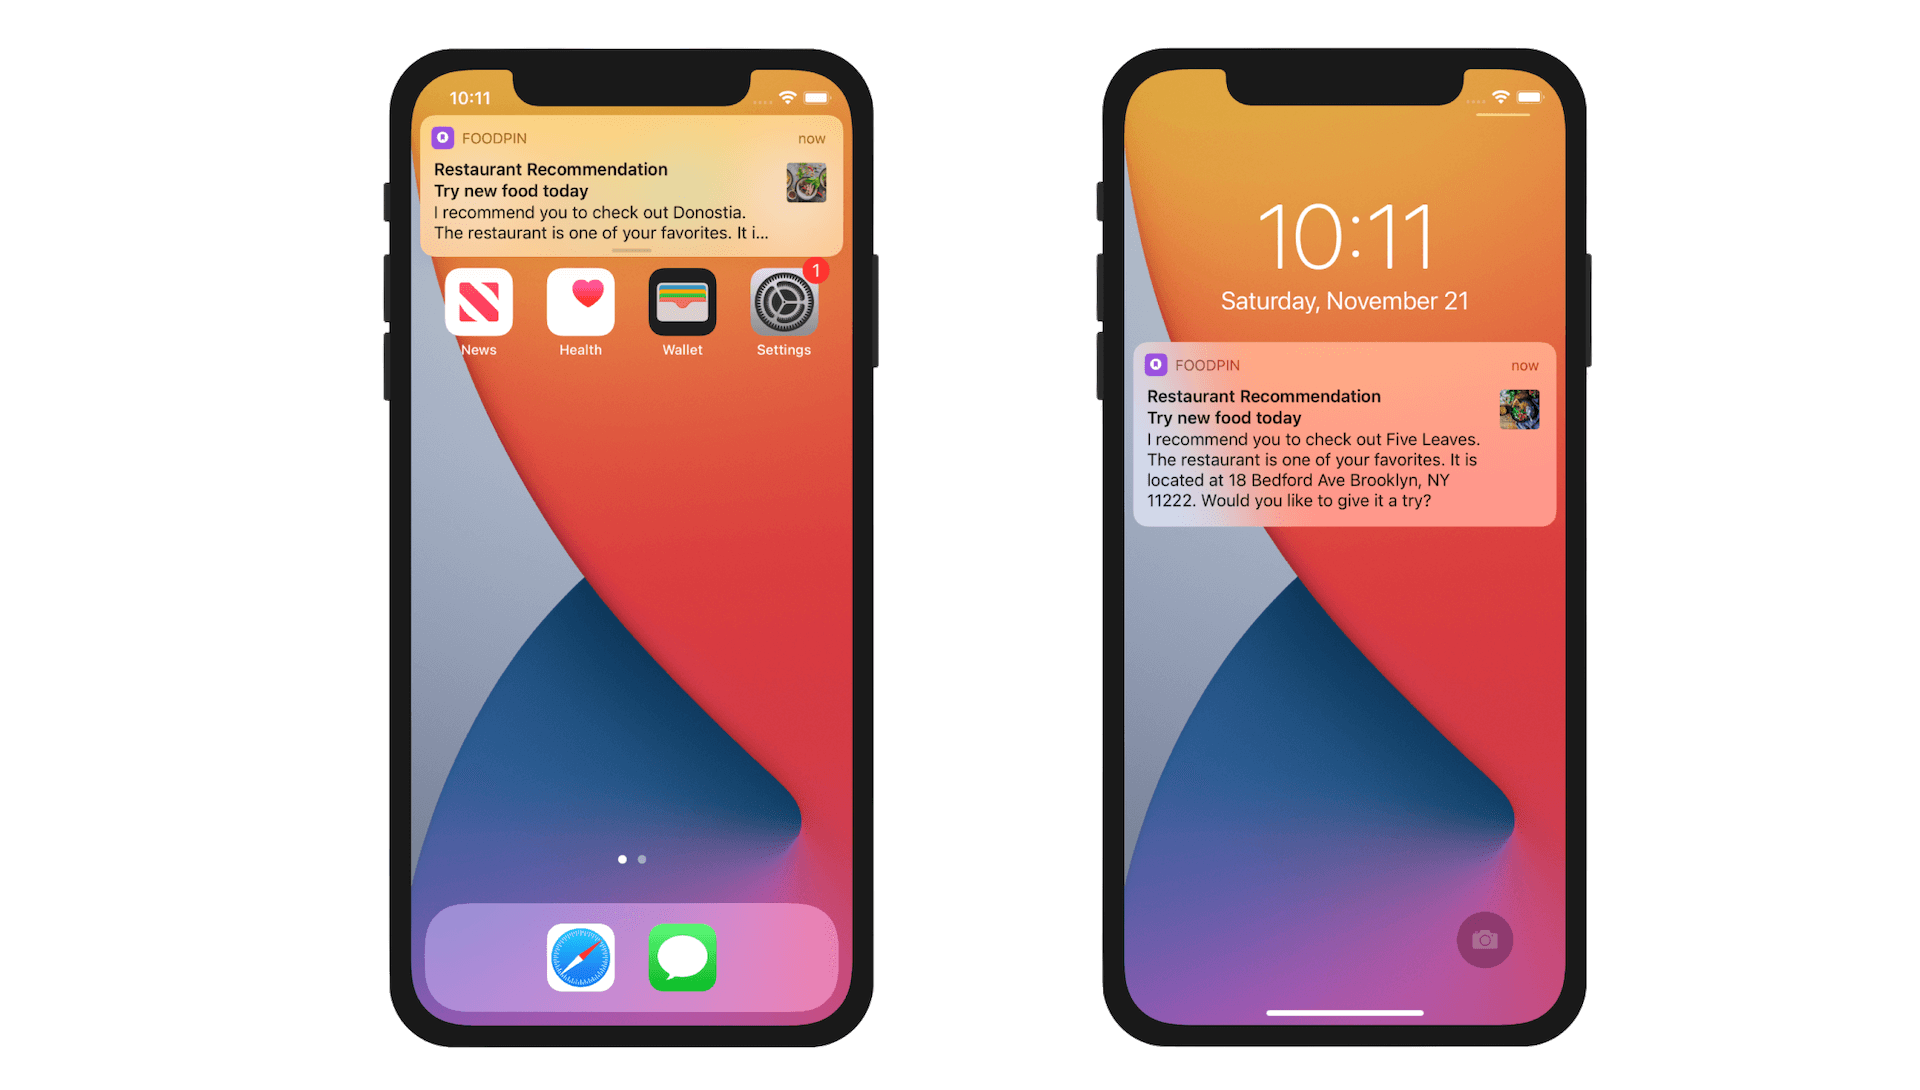
Now the FoodPin app is ready to send notifications to the users. Let's first check out the basic look & feel of a notification in iOS. At the top, it is the title of the notification. The next line is the subtitle, followed by the body of the message. Figure 29-5 is an example.

The content of a user notification is represented by UNMutableNotificationContent. To create the content, you instantiate an UNMutableNotificationContent object and set its properties to the appropriate data. Here is an example:
let content = UNMutableNotificationContent()
content.title = "Restaurant Recommendation"
content.subtitle = "Try new food today"
content.body = "I recommend you to check out Cafe Deadend."
If you want to play a sound when the notification is triggered, you can also set the sound property of the content:
content.sound = UNNotificationSound.default()
Scheduling the notification is as simple as creating the UNNotificationRequest object with your preferred trigger, and then adding the request to UNUserNotificationCenter. Take a look at the code snippet below. This is the code you need to schedule a notification.
let trigger = UNTimeIntervalNotificationTrigger(timeInterval: 10, repeats: false)
let request = UNNotificationRequest(identifier: "foodpin.restaurantSuggestion", content: content, trigger: trigger)

// Schedule the notification
UNUserNotificationCenter.current().add(request, withCompletionHandler: nil)
As said before, we want to trigger the notification after a certain period of time. We create a UNTimeIntervalNotificationTrigger object and set the time interval to a specific value (e.g. 10 seconds). Then we construct a UNNotificationRequest object with the notification content and the trigger. You have to assign the request with a unique identifier. Later, if you want to remove or update the notification, you use this identifier to identify the notification. Finally, you call the add method of UNUserNotificationCenter with the notification request to schedule the notification.
Now that you should have some ideas about how to create and schedule the notifications, let's implement the Restaurant Recommendation notification. Open RestaurantListView.swift and insert the following method in the RestaurantListView struct:
private func prepareNotification() {
    // Make sure the restaurant array is not empty
    if restaurants.count <= 0 {
        return
    }

    // Pick a restaurant randomly
    let randomNum = Int.random(in: 0..<restaurants.count)
    let suggestedRestaurant = restaurants[randomNum]

    // Create the user notification
    let content = UNMutableNotificationContent()
    content.title = "Restaurant Recommendation"
    content.subtitle = "Try new food today"
    content.body = "I recommend you to check out \(suggestedRestaurant.name). The restaurant is one of your favorites. It is located at \(suggestedRestaurant.location). Would you like to give it a try?"
    content.sound = UNNotificationSound.default

    let trigger = UNTimeIntervalNotificationTrigger(timeInterval: 10, repeats: false)
    let request = UNNotificationRequest(identifier: "foodpin.restaurantSuggestion", content: content, trigger: trigger)

    // Schedule the notification
    UNUserNotificationCenter.current().add(request, withCompletionHandler: nil)
}
To better manage the code, we create the prepareNotification() method for handling user notifications. We have gone through most of the code before. But the first line of code is new to you. Here we want to randomly pick a restaurant from the favorites and recommend it to the user. This line of code is used to generate a random number:
let randomNum = Int.random(in: 0..<restaurants.count)
The random(in:) function is used for generating a random number. It takes in a range of numbers and generates a random number within that range. In the code above, let's say you have 10 restaurants in the favorites. The function will generate a number between 0 and 9. With the random number, we can choose a suggested restaurant from the array, and create the notification content.
One thing you have to take note is that we now set the time interval to 10 seconds. This is for demo purpose and ease of testing. In reality, this is too short. You may want to trigger the notification after 24 hours (24 60 60 seconds) of use or even longer:
let trigger = UNTimeIntervalNotificationTrigger(timeInterval: 86400, repeats: false)
Now that the prepareNotification method is ready, you can call it by attaching the task modifier to the NavigationStack like this:
.task {
    prepareNotification()
}
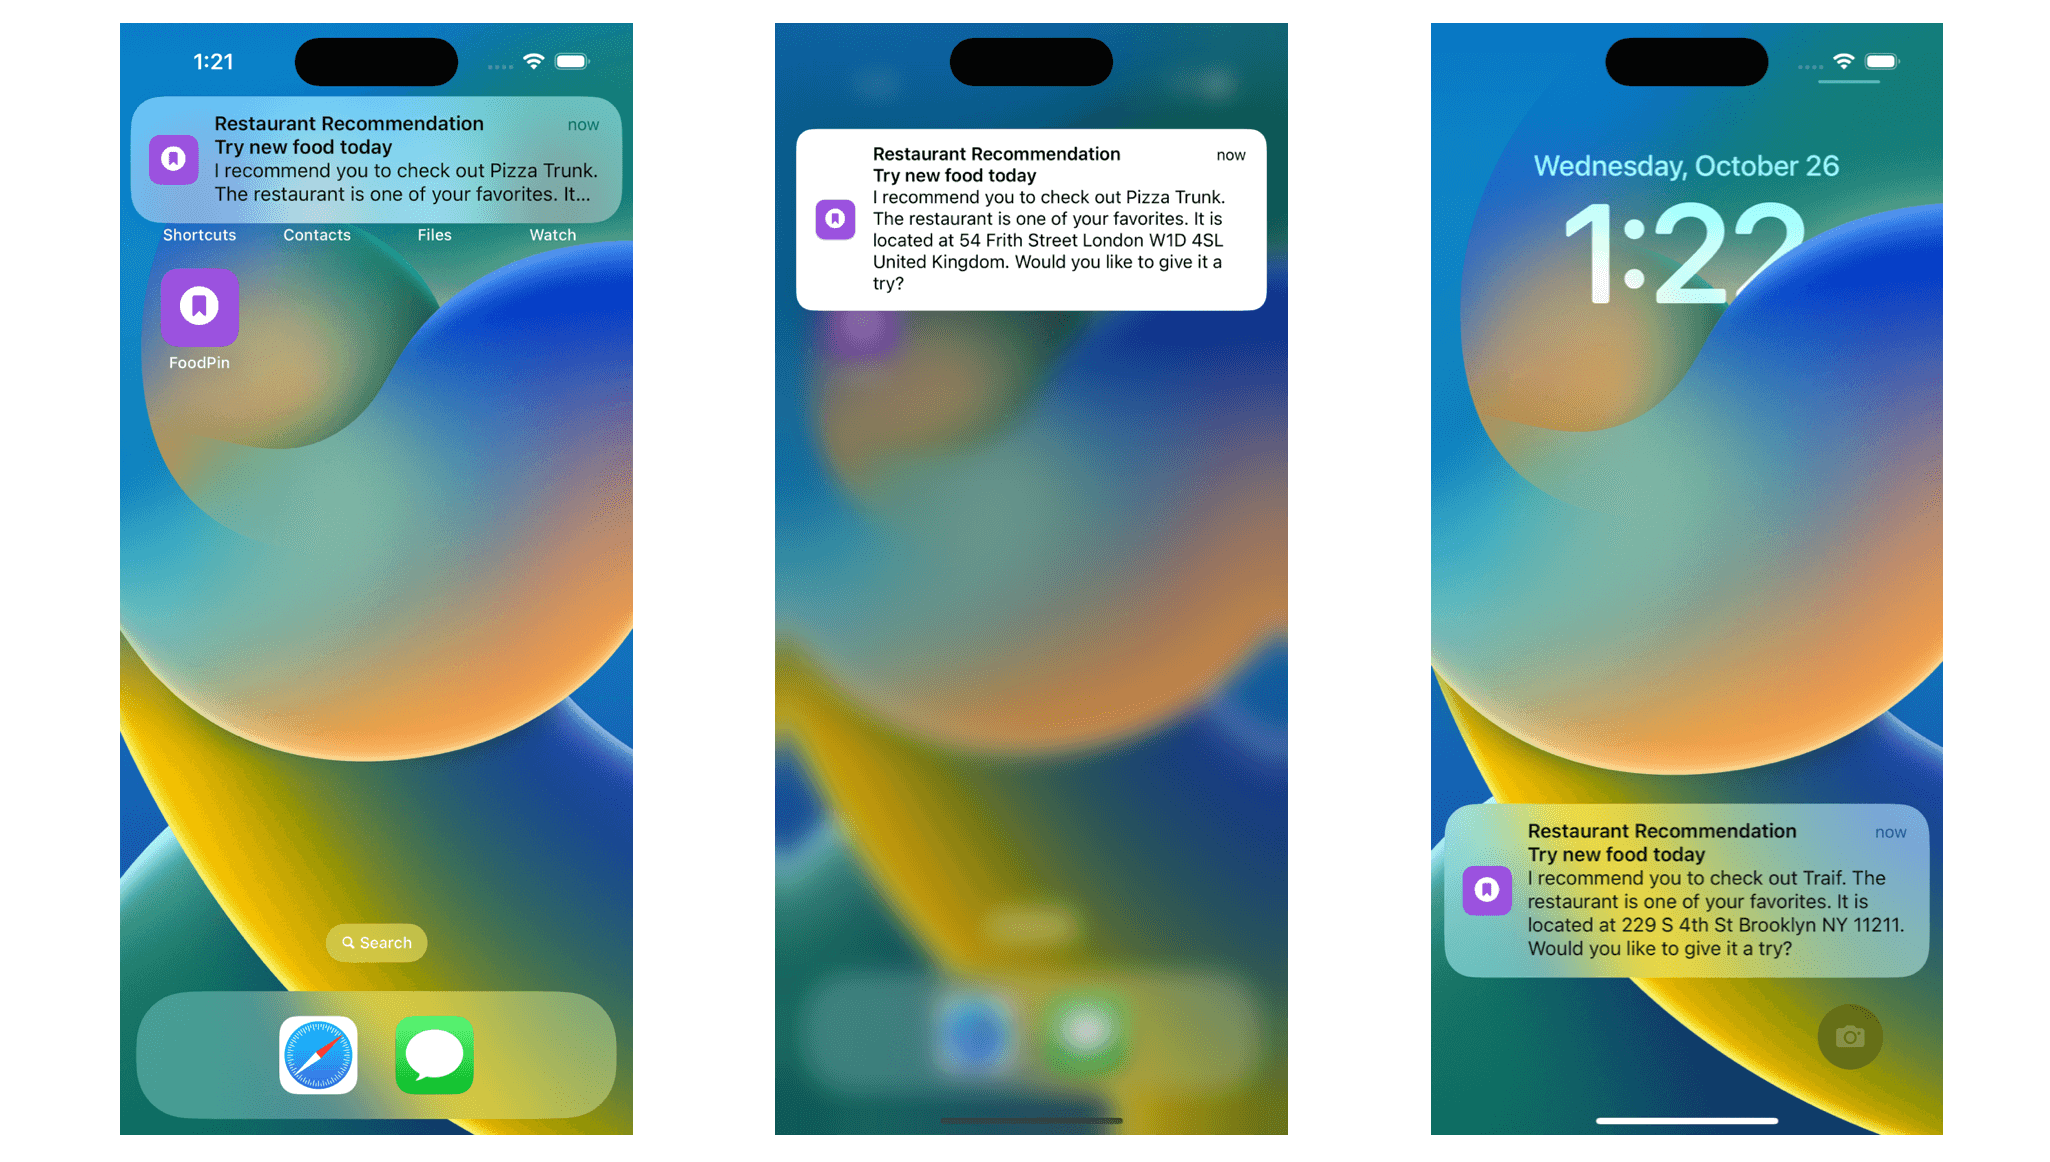
Great! Let's run the project and have a quick test. The notification is not presented in app. Therefore, after you launch the app, go back to Home Screen or Lock Screen. Wait for 10 seconds and you should see the notification.
If the notification appears on the lock screen, you can slide the notification to return to the FoodPin app. And when the device is unlocked, the notification rolls down from the top as a banner. You can swipe it further down to reveal the full content or simply tap it to jump back to the app.
Adding Images to the Notification
We've talked about notifications with rich content from the beginning of the chapter. So far the notification we have created is in plain text. How can we bundle the image of the suggested restaurant in the notification?
It is as simple as setting the attachment property of the UNMutableNotificationContent object:
content.attachments = [attachment]
The attachments property accepts an array of UNNotificationAttachment objects to display with the notification. Attachment can be images, sounds, audio, and movie files.
Note that you should provide the file URL of the attachment. In our case, it's the image file of the suggested restaurant.
If you're not forgetful, you probably remember that the image property of Restaurant is of type Data. So how can we create the image file from the image data in order to create the attachment object?
Let's first check out the code for creating attachment. You can insert the following in the prepareNotification method (before the instantiation of the trigger):
// Adding the image
let tempDirURL = URL(fileURLWithPath: NSTemporaryDirectory(), isDirectory: true)
let tempFileURL = tempDirURL.appendingPathComponent("suggested-restaurant.jpg")

if let image = UIImage(data: suggestedRestaurant.image as Data) {

    try? image.jpegData(compressionQuality: 1.0)?.write(to: tempFileURL)
    if let restaurantImage = try? UNNotificationAttachment(identifier: "restaurantImage", url: tempFileURL, options: nil) {
        content.attachments = [restaurantImage]
    }
}
The iOS SDK provides a built-in function called jpegData(compressionQuality:) to convert image data into a JPEG image file. What's going on in the code is that we first find the temporary directory for saving the image. The NSTemporaryDirectory() function returns you the directory for temporary files. And, we set the temporary file name as suggested-restaurant.jpg. If you print the file path to console, it will be something like this:
file:///Users/simon/Library/Developer/CoreSimulator/Devices/DC573158-103F-4D1B-8489-742E3C651D33/data/Containers/Data/Application/C2386E9A-48F7-411B-B485-95EC07CA0D8E/tmp/suggested-restaurant.jpg
The jpegData(compressionQuality:) function returns you the image's data in JPEG format and then we write the data to a JPEG file. With the image file created in the temporary directory, we can create the UNNotificationAttachment object and assign it to the attachments property of the notification.
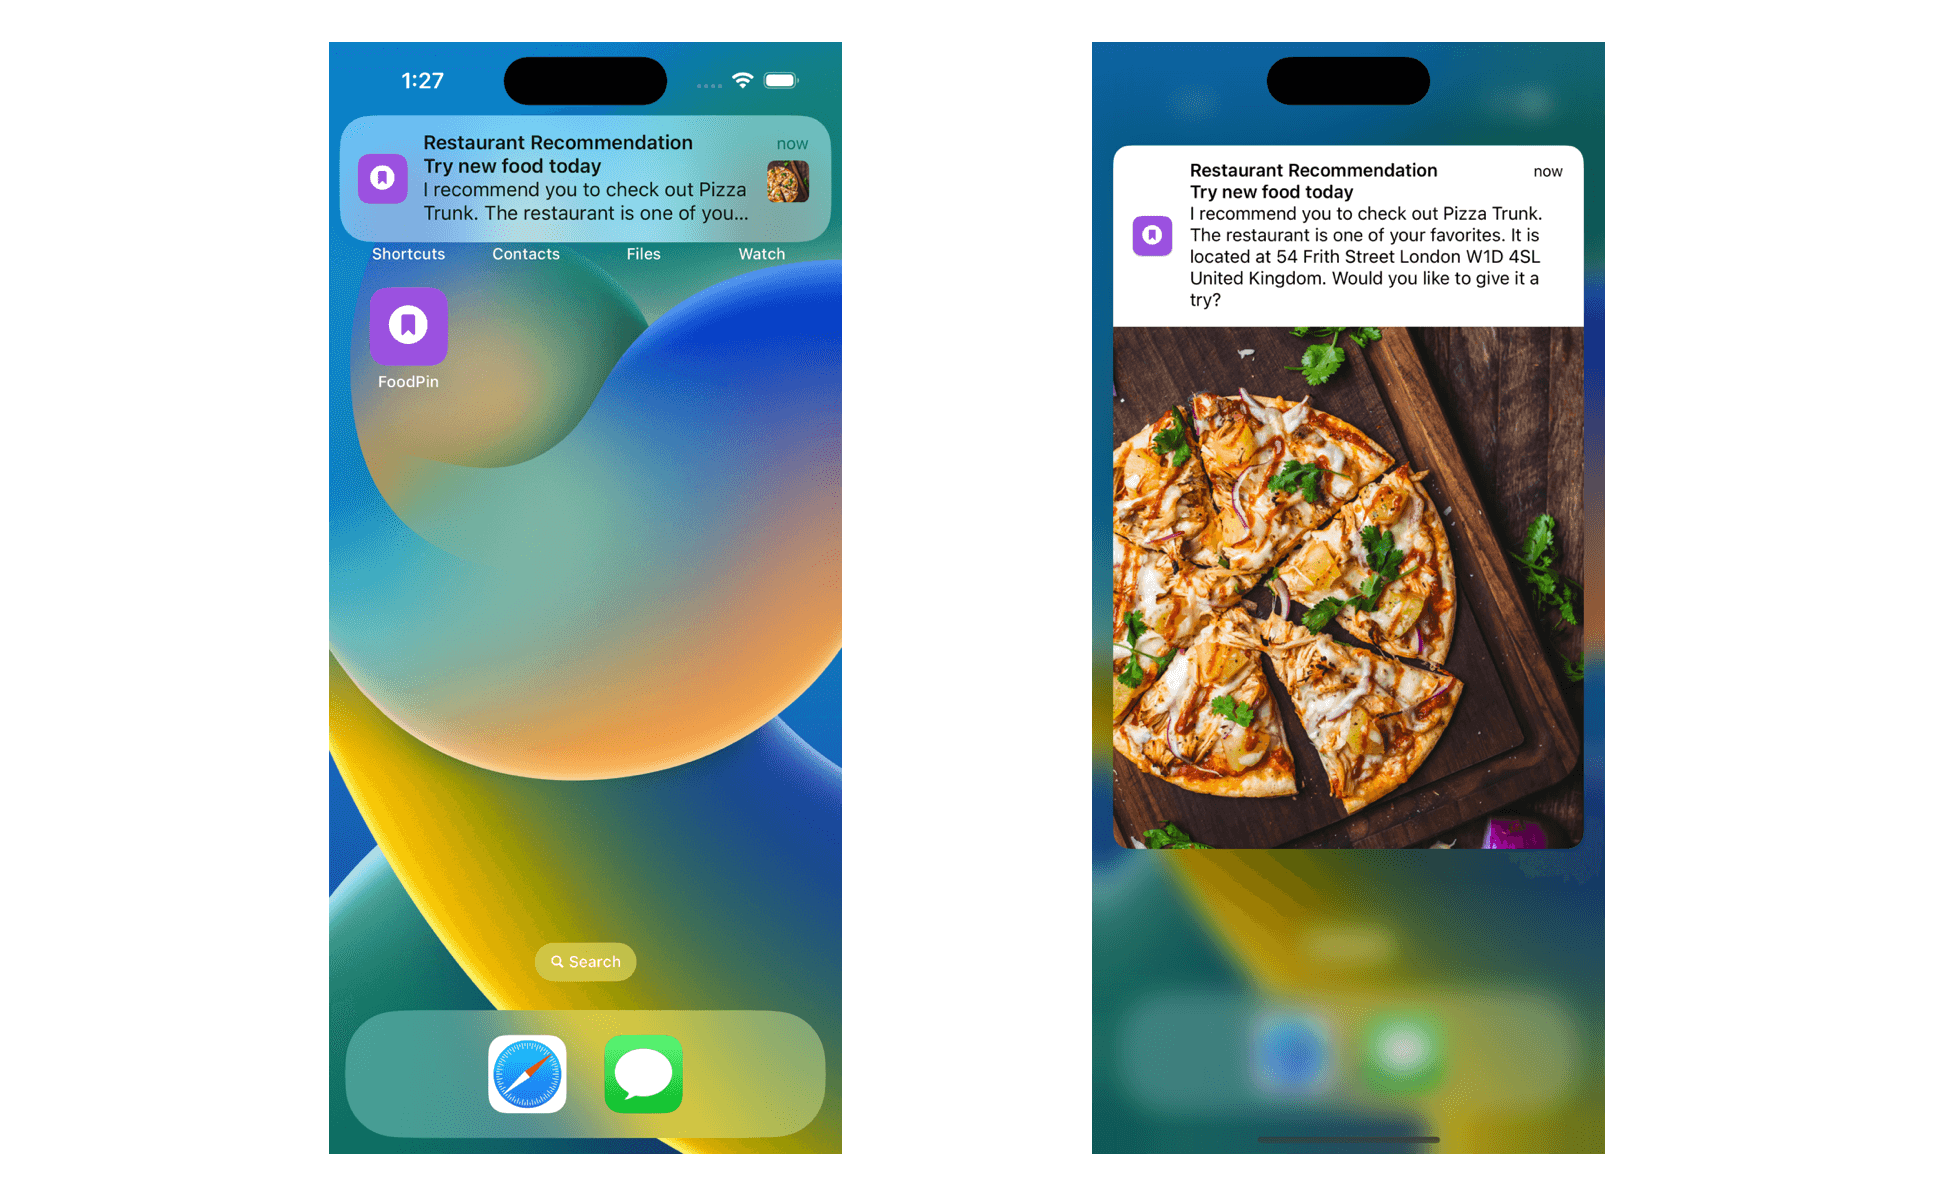
It's time to test the app again. Run the project to open the app in the simulator. Remember to go back to home screen and wait for the notification to appear. This time you should see a small thumbnail in the notification. Swipe it down to view a large version of the image.
Interacting with User Notifications
Now users have only one way to interact with the notification: tap to launch the app. This is the default action if you do not provide any custom implementation.
Actionable notifications let users respond to the notification without having to switch to the app. One great example of actionable notifications is reminders. When you receive a notification from the Reminders app, you will have the option to manage the reminder directly from the notification. You can either mark it as completed or reschedule the reminder. All these can be done without the need of launching the app.
With the User Notifications framework, we can implement custom actions for notifications from the FoodPin app. When a notification appears on screen, it provides two options for users to choose:
- Reserve a table - if the user selects this option, the app will make a call to the suggested restaurant so the user can reserve a table.
- Later - for this option, we just dismiss the notification.
To implement custom actions, you need to create a UNNotificationAction object and associate it with a notification category. The action object has a unique identifier and a title (e.g. Reserve a table), which appears on the action button. Optionally, you can specify how the action should be performed. By default, action will be a background action, which means it dismisses the notification and performs your custom task in background. For example, if we write the Later action in code, it looks like this:
let laterAction = UNNotificationAction(identifier: "foodpin.cancel", title: "Later", options: [])
If the Later option is selected, the action is to dismiss the notification. Thus, we do not provide additional options when creating the action object.
On the other hand, the Reserve a table action will be a foreground action because we have to bring the app to foreground in order to make a call. Thus, the action will be implemented like this:
let makeReservationAction = UNNotificationAction(identifier: "foodpin.makeReservation", title: "Reserve a table", options: [.foreground])
Once you set up the action objects, you associate it with a category:
let category = UNNotificationCategory(identifier: "foodpin.restaurantaction", actions: [makeReservationAction, cancelAction], intentIdentifiers: [], options: [])
You give the category a unique identifier and pass the action objects to associate with the category. Once you have the category ready, register it to the UNUserNotificationCenter object like this:
UNUserNotificationCenter.current().setNotificationCategories(["foodpin.restaurantaction"])
Now that we have created the actions and registered them to the notification center, but these actions are not yet associated with the notification. To do that, all you need to do is set the category identifier to the categoryIdentifier property of the notification content.
content.categoryIdentifier = "foodpin.restaurantaction"
That's the code you need to implement custom actions for user notifications. Insert the following code snippet to the prepareNotification method (before the trigger variable):
// Adding actions
let categoryIdentifer = "foodpin.restaurantaction"
let makeReservationAction = UNNotificationAction(identifier: "foodpin.makeReservation", title: "Reserve a table", options: [.foreground])
let cancelAction = UNNotificationAction(identifier: "foodpin.cancel", title: "Later", options: [])
let category = UNNotificationCategory(identifier: categoryIdentifer, actions: [makeReservationAction, cancelAction], intentIdentifiers: [], options: [])
UNUserNotificationCenter.current().setNotificationCategories([category])
content.categoryIdentifier = categoryIdentifer
The code above is exactly the same as what we have just discussed. It's time to run the app to try out the notification actions. When the notification banner appears, swipe it down and you should see the custom actions just implemented.
Handling the Actions
If you tap the Reserve a table button, it brings up the FoodPin app. However, it will not call the restaurant for you. As explained in the earlier section, the action object has an option that indicates how the action should be performed. For the Later button, we did not provide any additional options, so it defaults to dismiss the notification. For the Reserve a table button, we set the option to .foreground, that will bring the app to foreground.
So how can we handle the action when the app returns to foreground?
The UNUserNotificationCenterDelegate protocol in the User Notifications framework is designed for this purpose. The protocol defines a method for responding to the actionable notifications:
optional func userNotificationCenter(_ center: UNUserNotificationCenter,
                          didReceive response: UNNotificationResponse,
               withCompletionHandler completionHandler: @escaping () -> Void)
To handle the action and execute custom code, you need to implement the protocol in a delegate object and assign it to the notification center object. When the app is returned to foreground, the method will be called accordingly.
We will implement this protocol in AppDelegate. But before we do that, you probably have another question in mind. We're going to make a call to the suggested restaurant. How can we pass the restaurant's phone number from RestaurantListView to AppDelegate?
The notification content has a property named userInfo for you to store custom information in the form of a dictionary. For example, you can store the phone number in the notification like this:
content.userInfo = ["phone": suggestedRestaurant.phone]
Put the line of code above in the prepareNotification method right below content.sound.
With the phone number associated with the notification, we now implement the UNUserNotificationCenterDelegate protocol. Open FoodPinApp.swift and edit AppDelegate to adopt the protocol like this:
final class AppDelegate: UIResponder, UIApplicationDelegate, UNUserNotificationCenterDelegate {
Then insert the following method in the class:
func userNotificationCenter(_ center: UNUserNotificationCenter, didReceive response: UNNotificationResponse, withCompletionHandler completionHandler: @escaping () -> Void) {

    if response.actionIdentifier == "foodpin.makeReservation" {
        print("Make reservation...")
        if let phone = response.notification.request.content.userInfo["phone"] {
            let telURL = "tel://\(phone)"
            if let url = URL(string: telURL) {
                if UIApplication.shared.canOpenURL(url) {
                    print("calling \(telURL)")
                    UIApplication.shared.open(url)
                }
            }
        }
    }

    completionHandler()
}
When an action of a notification is selected by a user, the userNotificationCenter(_:didReceive:withCompletionHandler:) is called. So we provide our own implementation for making a call to the suggested restaurant.
As we only need to handle the Reserve a table action, we first verify the identifier of the action. Then we retrieve the phone number of the restaurant from the userInfo property of the notification content.
In iOS, you can launch some of the system apps by using specific URLs. In this case, we want to open the Phone app to call up the number. You can use the tel scheme to initiate a call. Here is a sample URL:
tel://<phone-number>
In the code above, we construct the telURL and then call the open method of UIApplication to launch the Phone app.
At the end of the method, it is required to call the completionHandler block to let the system know that you are done processing the notification.
The last thing you have to do is set the delegate of the notification center. In the application(_:didFinishLaunchingWithOptions:) of AppDelegate, add the following line of code:
UNUserNotificationCenter.current().delegate = self
That's it. Run the project and deploy the app on a real device for testing. You have to use a real device because you can't make a call using the simulator. If you select the Reserve a table button, the app will launch the FoodPin app and show you an option to make the call.
Summary
The User Notifications framework is a nice framework for developers to manage and schedule user notifications. In this chapter, I have given you an overview of the framework and demonstrate how to schedule a local notification.
With interactive and rich content notifications, you can improve the user experience and engagement of your app. This is a good way to increase app retention rate. When you're going to build your next app, try to make use of user notifications and see how it can add value to your app.
Lastly, thanks for reading this book. This has been a long journey for both of us. I wish you the best of luck and hope you will release your app very soon. If you've submitted an app that's been approved, I'd love to hear about your success story. Feel free to email me at simonng@appcoda.com and remember to join our developer group on Facebook (https://www.facebook.com/groups/appcoda).
For reference, you can download the complete Xcode project from http://www.appcoda.com/resources/swift57/swiftui-foodpin-usernotifications.zip.