- Made by AppCoda
- Contact us / Support
- Tweet this book
- Preface
- 1. The Development Tools, the Learning Approach, and the App Idea
- 2. Your First Taste of Swift with Playgrounds
- 3. Build Your First App in Swift and SwiftUI
- 4. Designing UI Using Stack Views
- 5. Introduction to Prototyping
- 6. Understanding List and ForEach
- 7. Customizing List Views
- 8. Displaying Confirmations and Handling List View Selection
- 9. Understanding Struct, Project Organization and Code Documentation
- 10. List Deletion, Swipe Actions, Context Menus and Activity Controller
- 11. Working with Navigation View
- 12. Detail View Enhancement, Custom Fonts and Navigation Bar Customization
- 13. Understanding Colors, Swift Extensions and Dynamic Type
- 14. Working with Maps
- 15. View Animations and Blur Effect
- 16. Working with Observable Objects and Combine
- 17. Working with Forms and Camera
- 18. Working with Core Data
- 19. Adding a Search Bar Using Searchable
- 20. Building Walkthrough Screens Using TabView
- 21. Working with Tab View and Tab Bar Customizations
- 22. Displaying Web Content with WKWebView and SFSafariViewController
- 23. Working with CloudKit
- 24. Localizing Your App to Support Multiple Languages
- 25. Deploying and Testing Your App on a Real iOS Device
- 26. Beta Testing with TestFlight and CloudKit Production Deployment
- 27. Submit Your App to App Store
- 28. Adopting Haptic Touch
- 29. Working with User Notifications
- 30. Appendix - Swift Basics
- Published with GitBook
Chapter 7
Customizing List Views

I think that's the single best piece of advice: Constantly think about how you could be doing things better and questioning yourself.
- Elon Musk, Tesla Motors
In the previous chapter, we created a simple app using List to display a list of restaurants. In this chapter, we'll customize the list view and make it look more stylish (see figure 7-1). And, starting from this chapter and onwards, you begin to develop a real-world app called FoodPin. It's gonna be fun!

Creating the Xcode Project
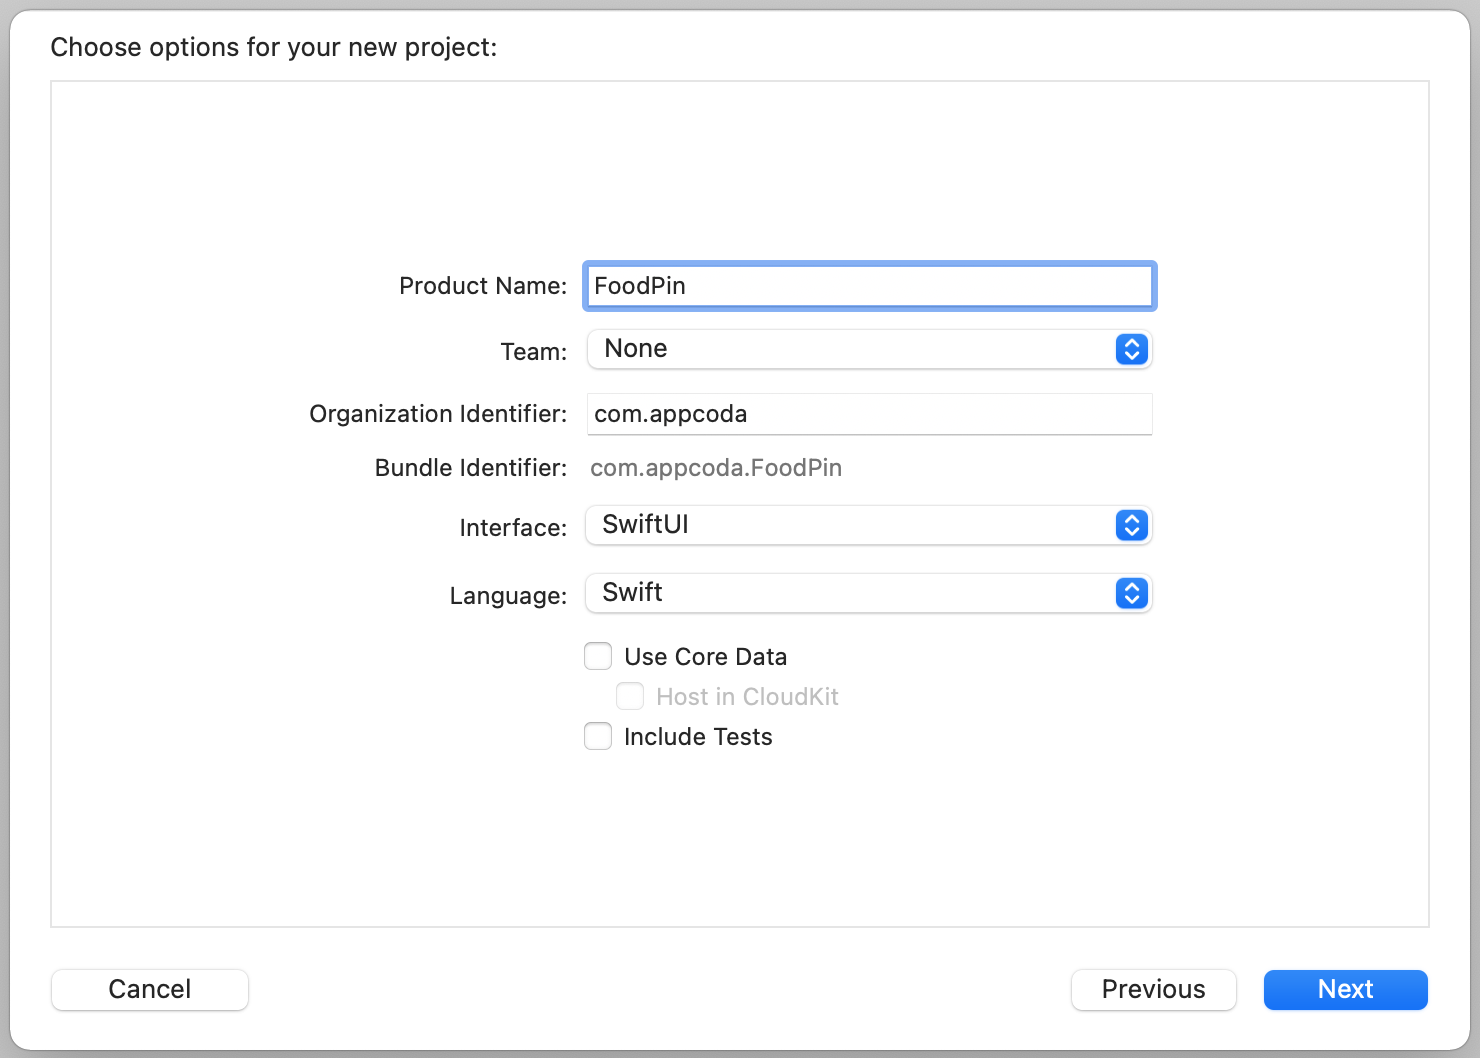
First, fire up your Xcode, and create a new project using the App template. Name the project FoodPin and fill in all the required options for the Xcode project, just like what you did in the previous chapter.
Quick note: We're building a real app, so let's give it a better name. Feel free to use other names if you want. Also, make sure you use your own organization identifier. Otherwise, you can't test your app on a real iPhone.
Once you create the Xcode project, you should see the ContentView.swift file, generated by Xcode. The name is not very appropriate for our FoodPin app. In ContentView.swift, right click ContentView and choose Refactor -> Rename....
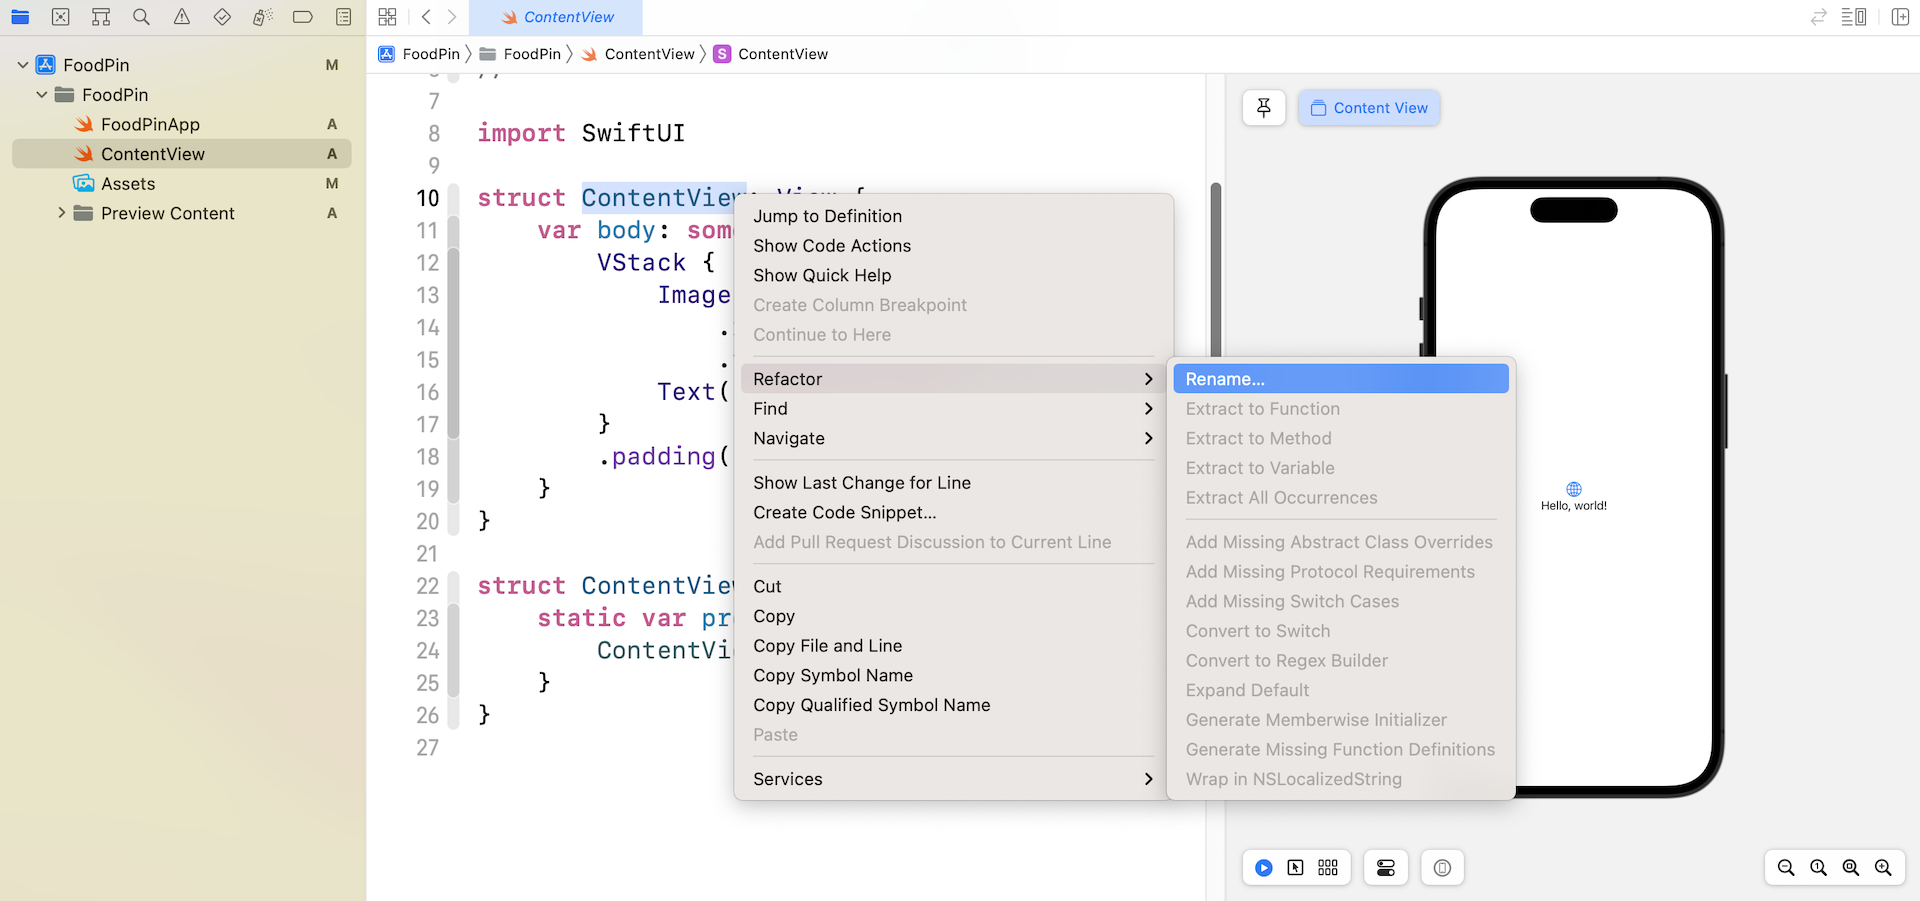
Set the new name to RestaurantListView. The refactoring feature will rename the file and all the related code.
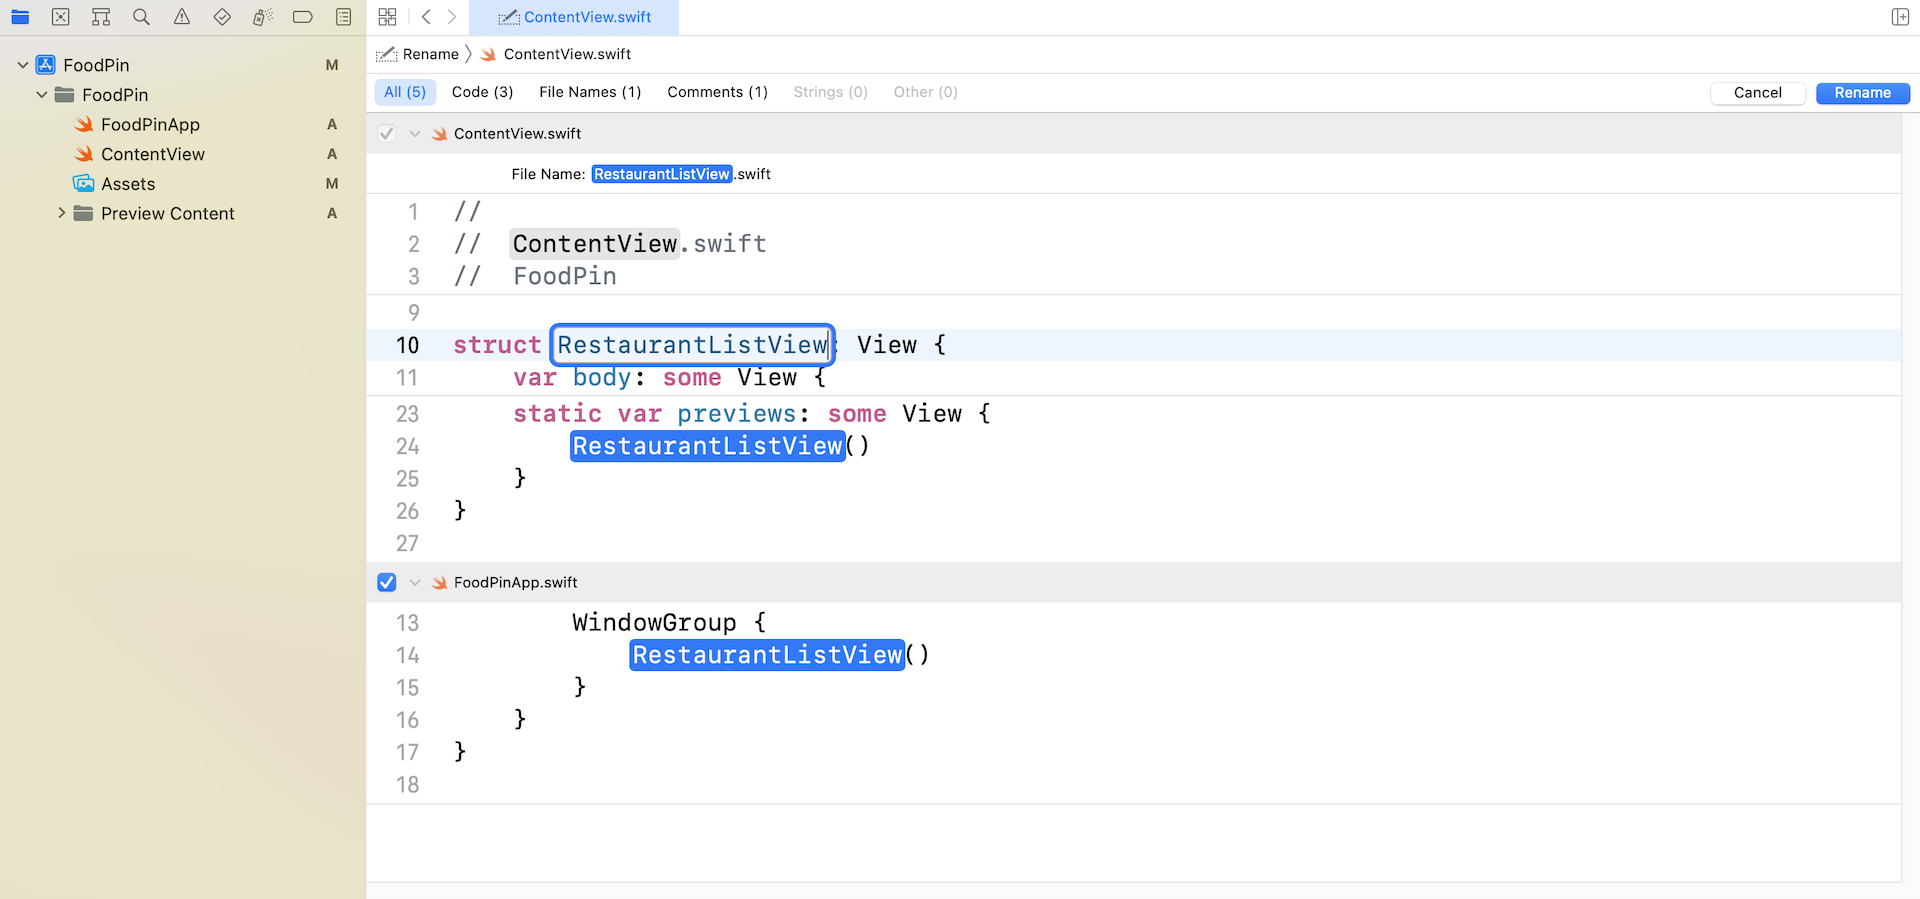
However, it doesn't rename the preview struct of RestaurantListView. I suggest you to change it manually to RestaurantListView_Previews like this:
struct RestaurantListView_Previews: PreviewProvider {
    static var previews: some View {
        RestaurantListView()
    }
}
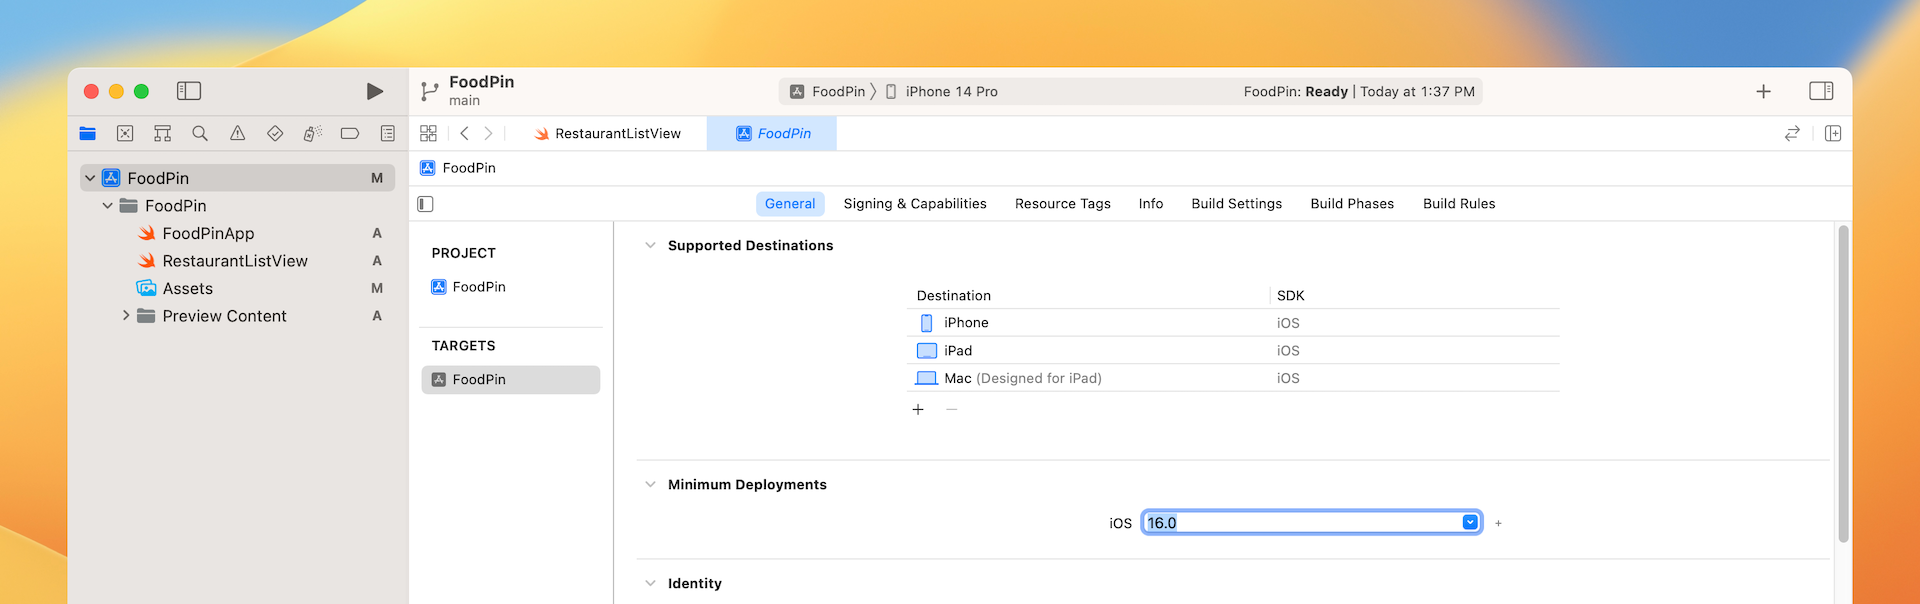
Note: In the project navigator, select the FoodPin project and then click FoodPin under Targets. You should see that the minimum deployment target sets to iOS 16.0. This is the default setting. In future, if your app needs to support older version of the iOS devices, you can change it here. That said, we will keep it intact for this book.
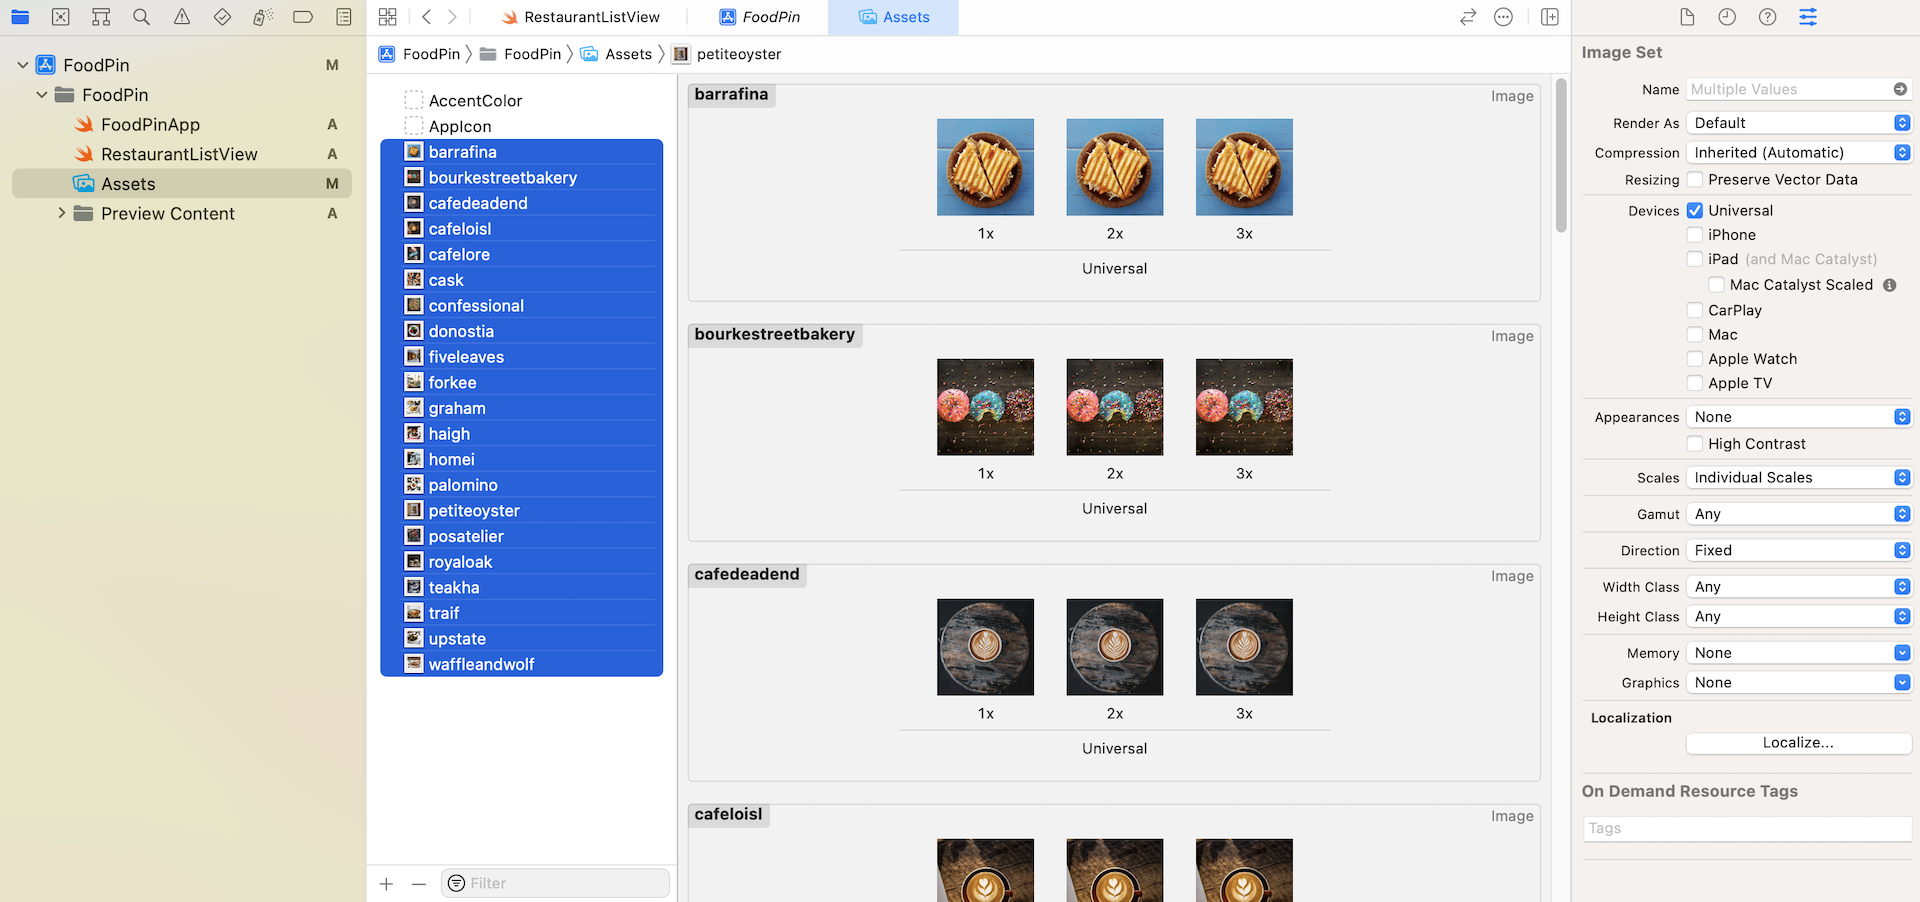
Preparing the Restaurant Images
Since we will present a list of restaurants with both restaurant name and image, please download the image pack at http://www.appcoda.com/resources/swift53/simpletable-images2.zip and import all the images into the asset catalog.
Creating the Basic List View
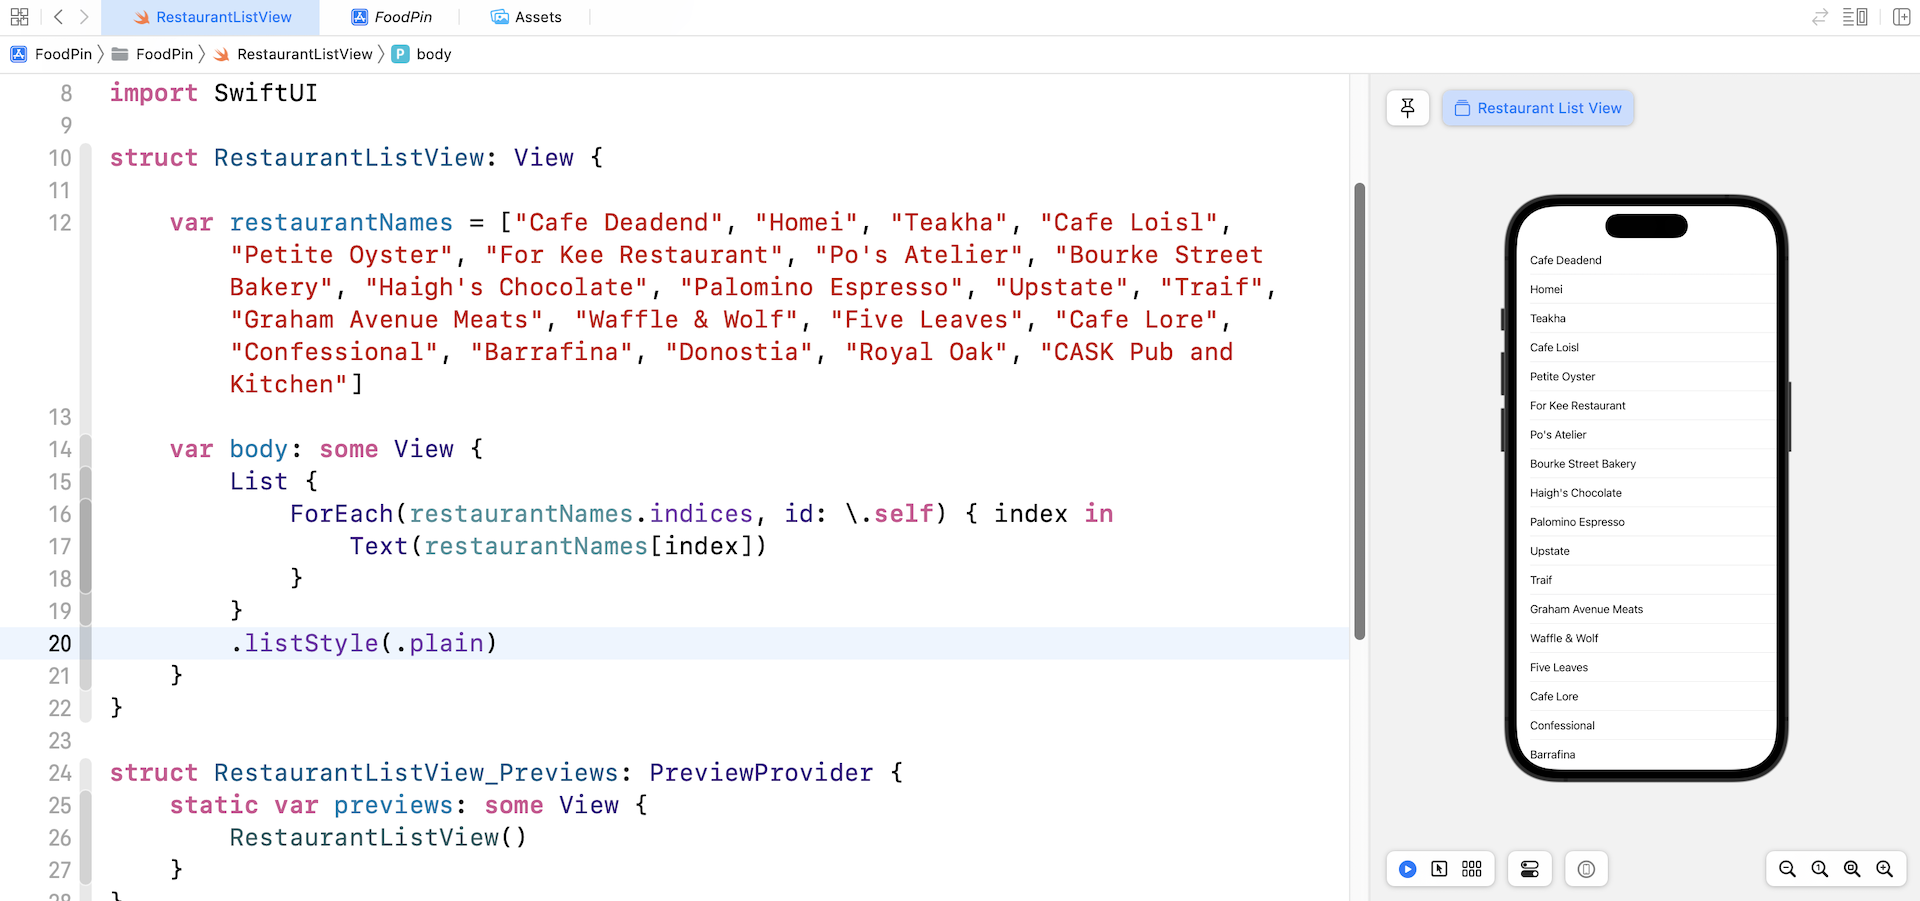
Now we are ready to create the data array and present the items in the restaurant list view. Like before, declare the restaurantNames array in the RestaurantListView struct:
var restaurantNames = ["Cafe Deadend", "Homei", "Teakha", "Cafe Loisl", "Petite Oyster", "For Kee Restaurant", "Po's Atelier", "Bourke Street Bakery", "Haigh's Chocolate", "Palomino Espresso", "Upstate", "Traif", "Graham Avenue Meats", "Waffle & Wolf", "Five Leaves", "Cafe Lore", "Confessional", "Barrafina", "Donostia", "Royal Oak", "CASK Pub and Kitchen"]
This array holds a collection of the restaurant names. To present the list, we can update the body variable like this:
var body: some View {
    List {
        ForEach(restaurantNames.indices, id: \.self) { index in
            Text(restaurantNames[index])
        }
    }
    .listStyle(.plain)
}
We loop through the items in restaurantNames and display the restaurant names in the list. The list style is set to plain.
Displaying Different Restaurant Images
Did you go through the exercise in the previous chapter? I hope you've put your effort in it. In this section, we will modify the existing app to display different restaurant images.
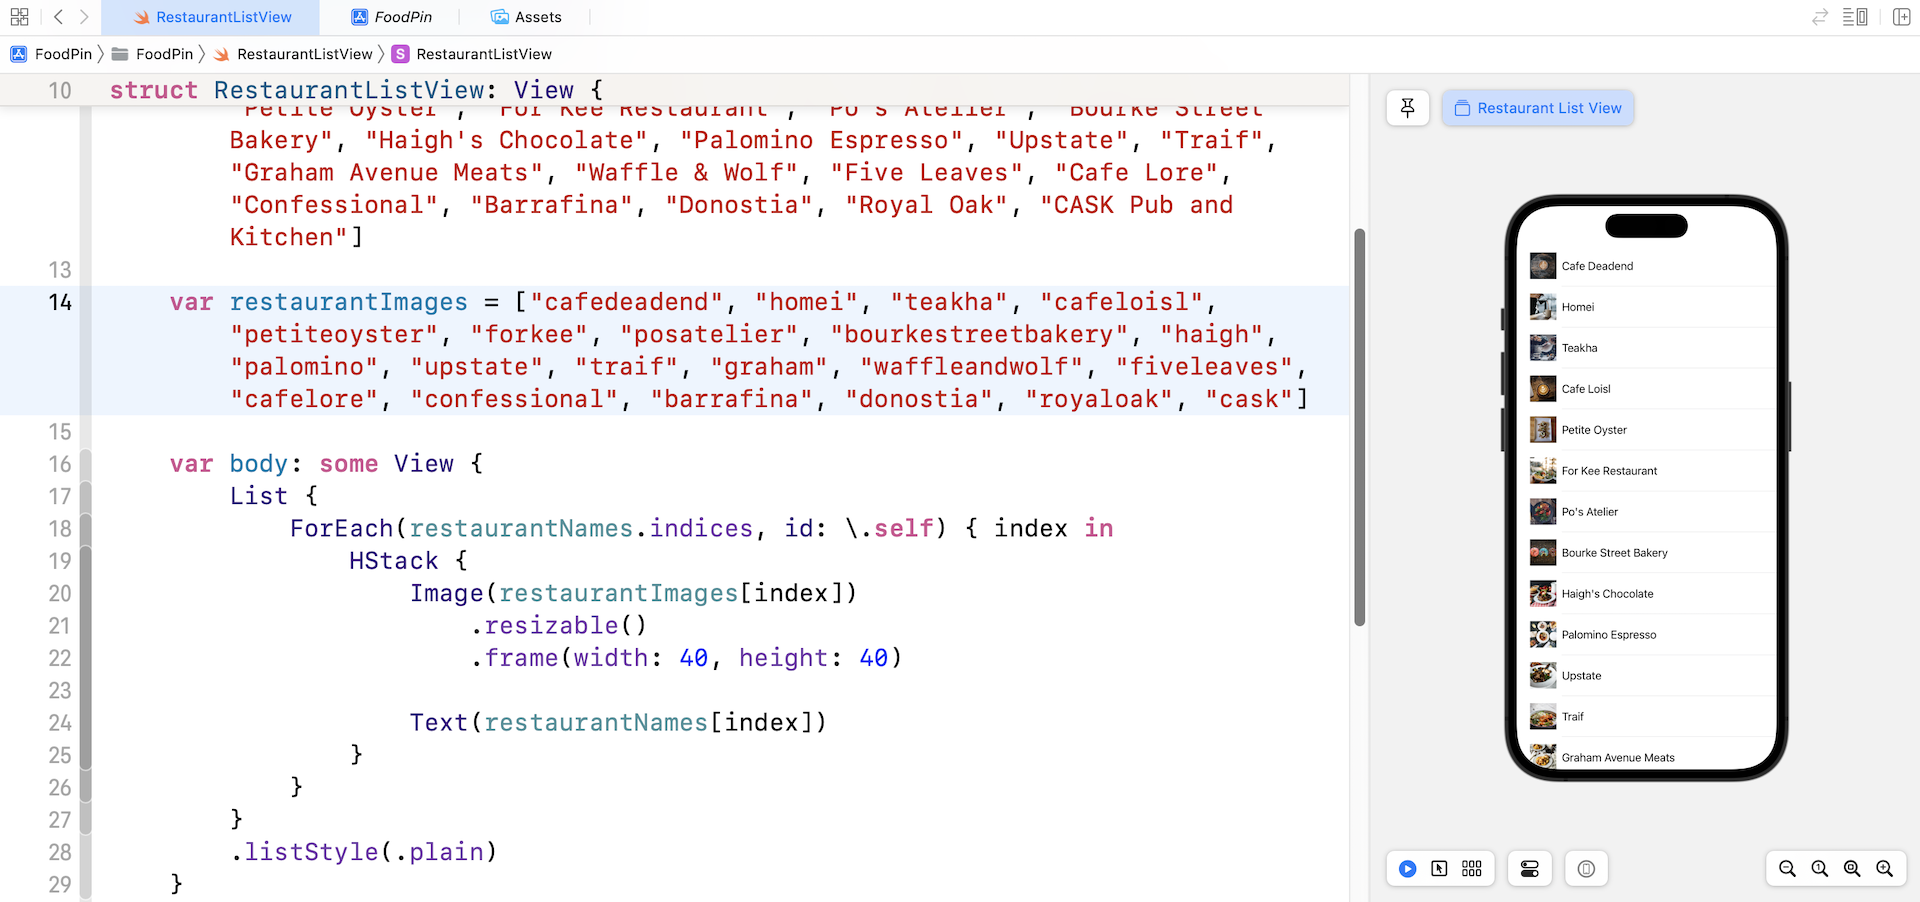
First, let's declare a new array named restaurantImages for holding the file name of the restaurant images. Insert the following line of code in the RestaurantListView struct:
var restaurantImages = ["cafedeadend", "homei", "teakha", "cafeloisl", "petiteoyster", "forkee", "posatelier", "bourkestreetbakery", "haigh", "palomino", "upstate", "traif", "graham", "waffleandwolf", "fiveleaves", "cafelore", "confessional", "barrafina", "donostia", "royaloak", "cask"]
Note that the order of images are aligned with that of the restaurantNames. To display an image next to the restaurant name, update the code of the List view like below:
List {
    ForEach(restaurantNames.indices, id: \.self) { index in
        HStack {
            Image(restaurantImages[index])
                .resizable()
                .frame(width: 40, height: 40)

            Text(restaurantNames[index])
        }
    }
}
.listStyle(.plain)
We have discussed the code in the previous chapter. But instead of assigning a fixed image name to Image, we set the image name to restaurantImages[index]. This is how we display the corresponding image of the restaurant.
Redesigning the Row Layout
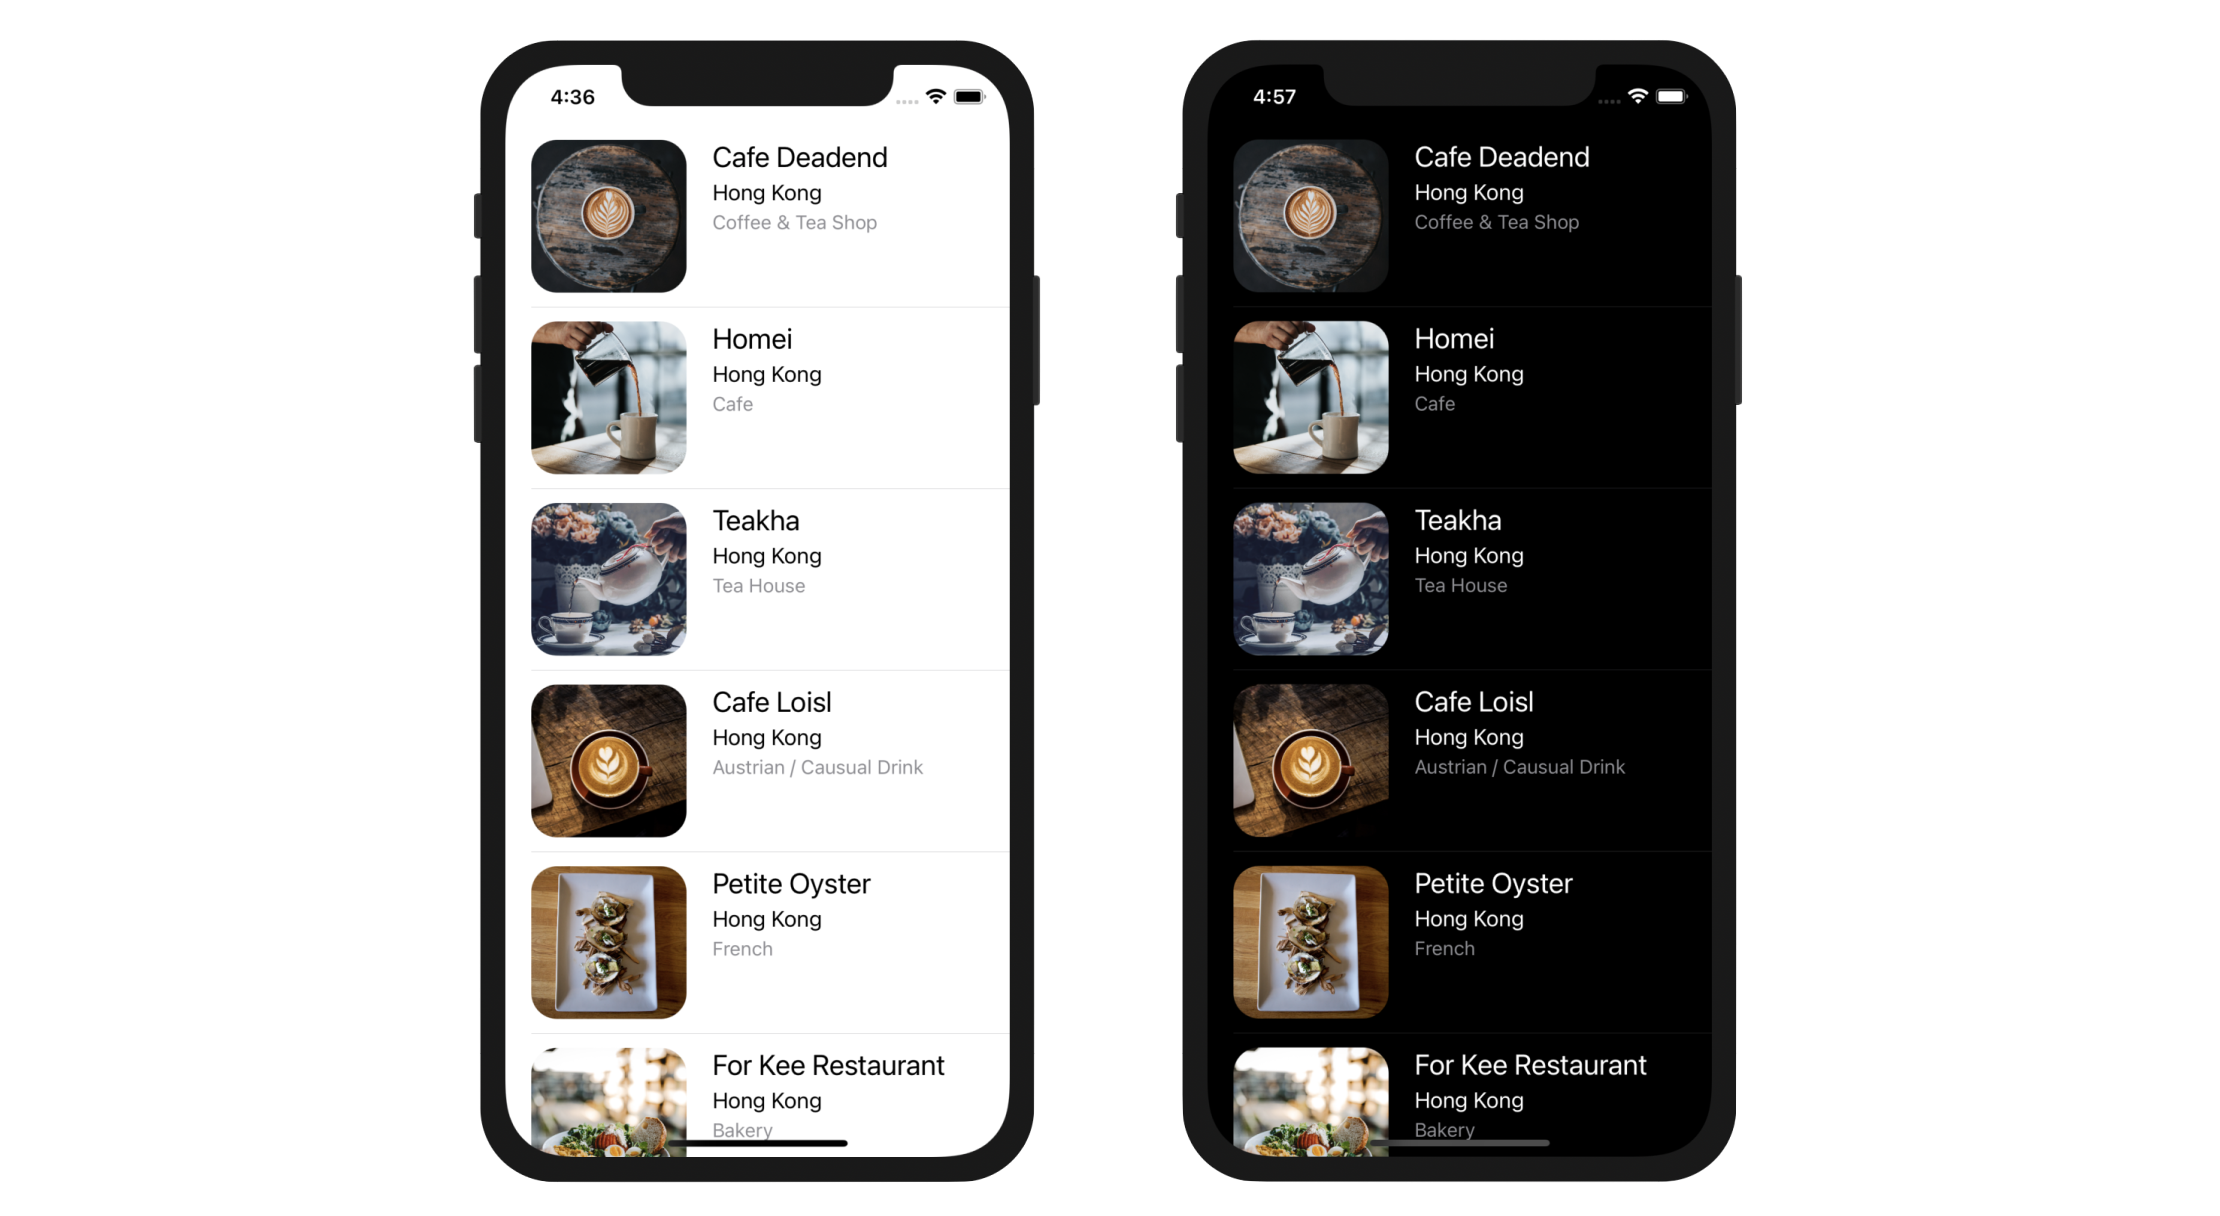
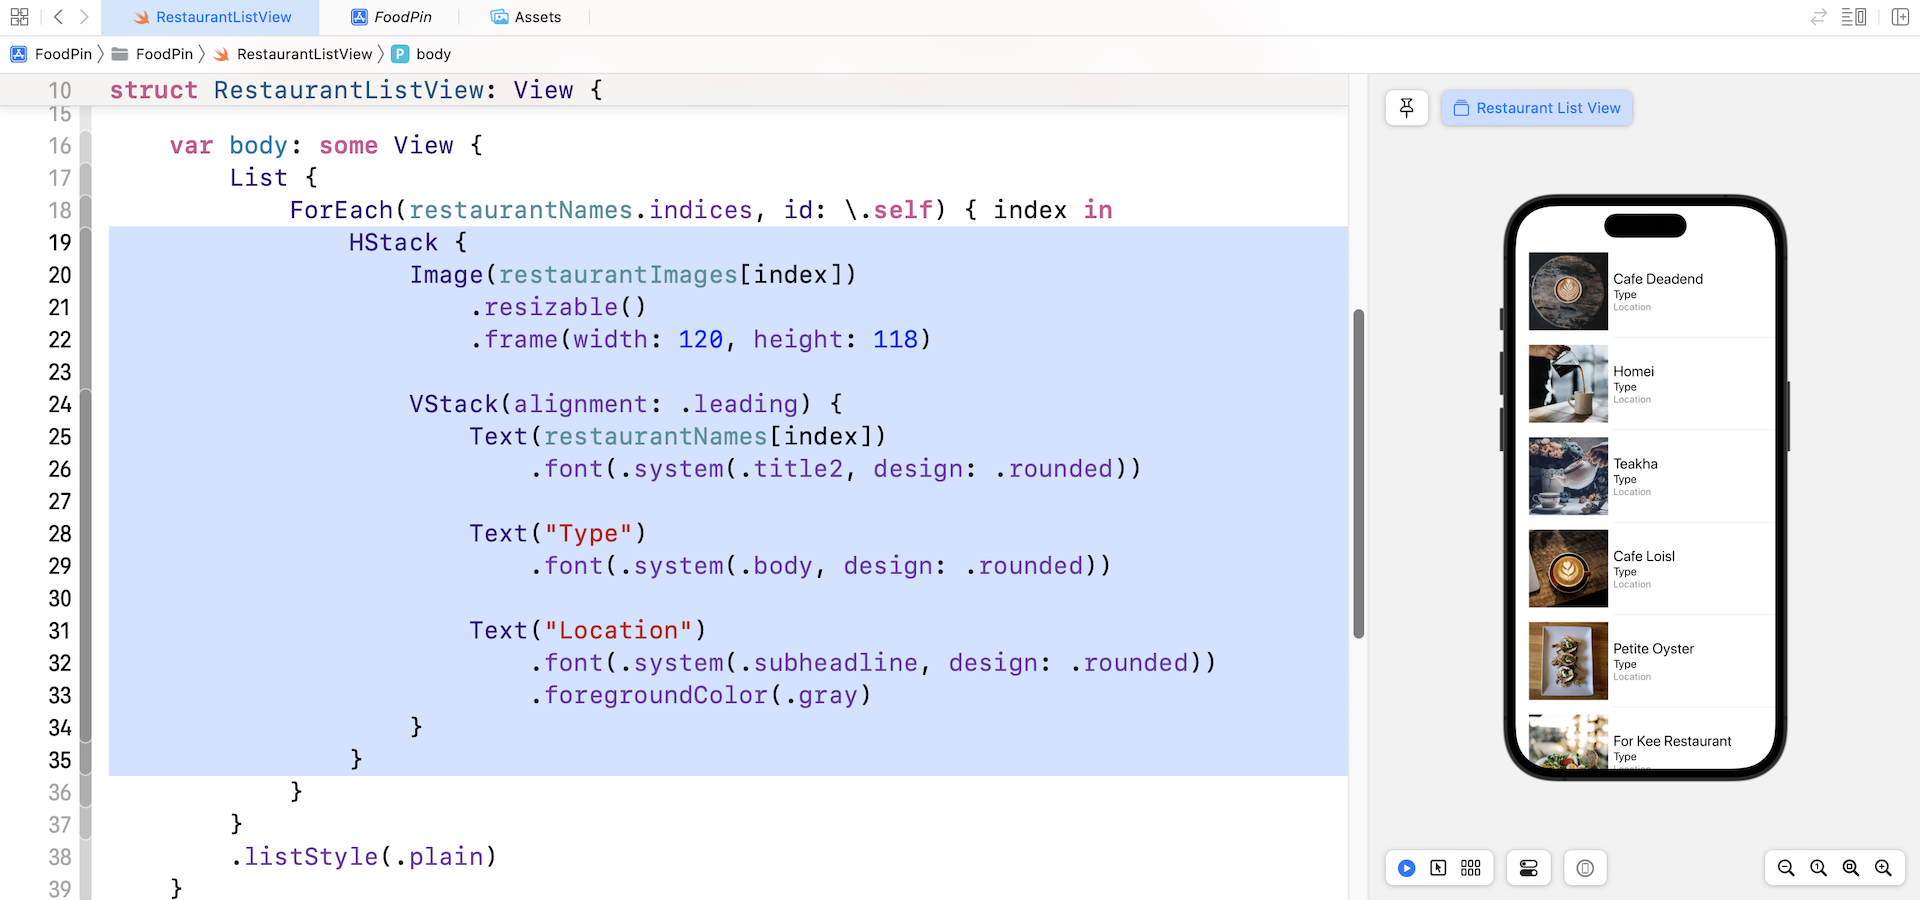
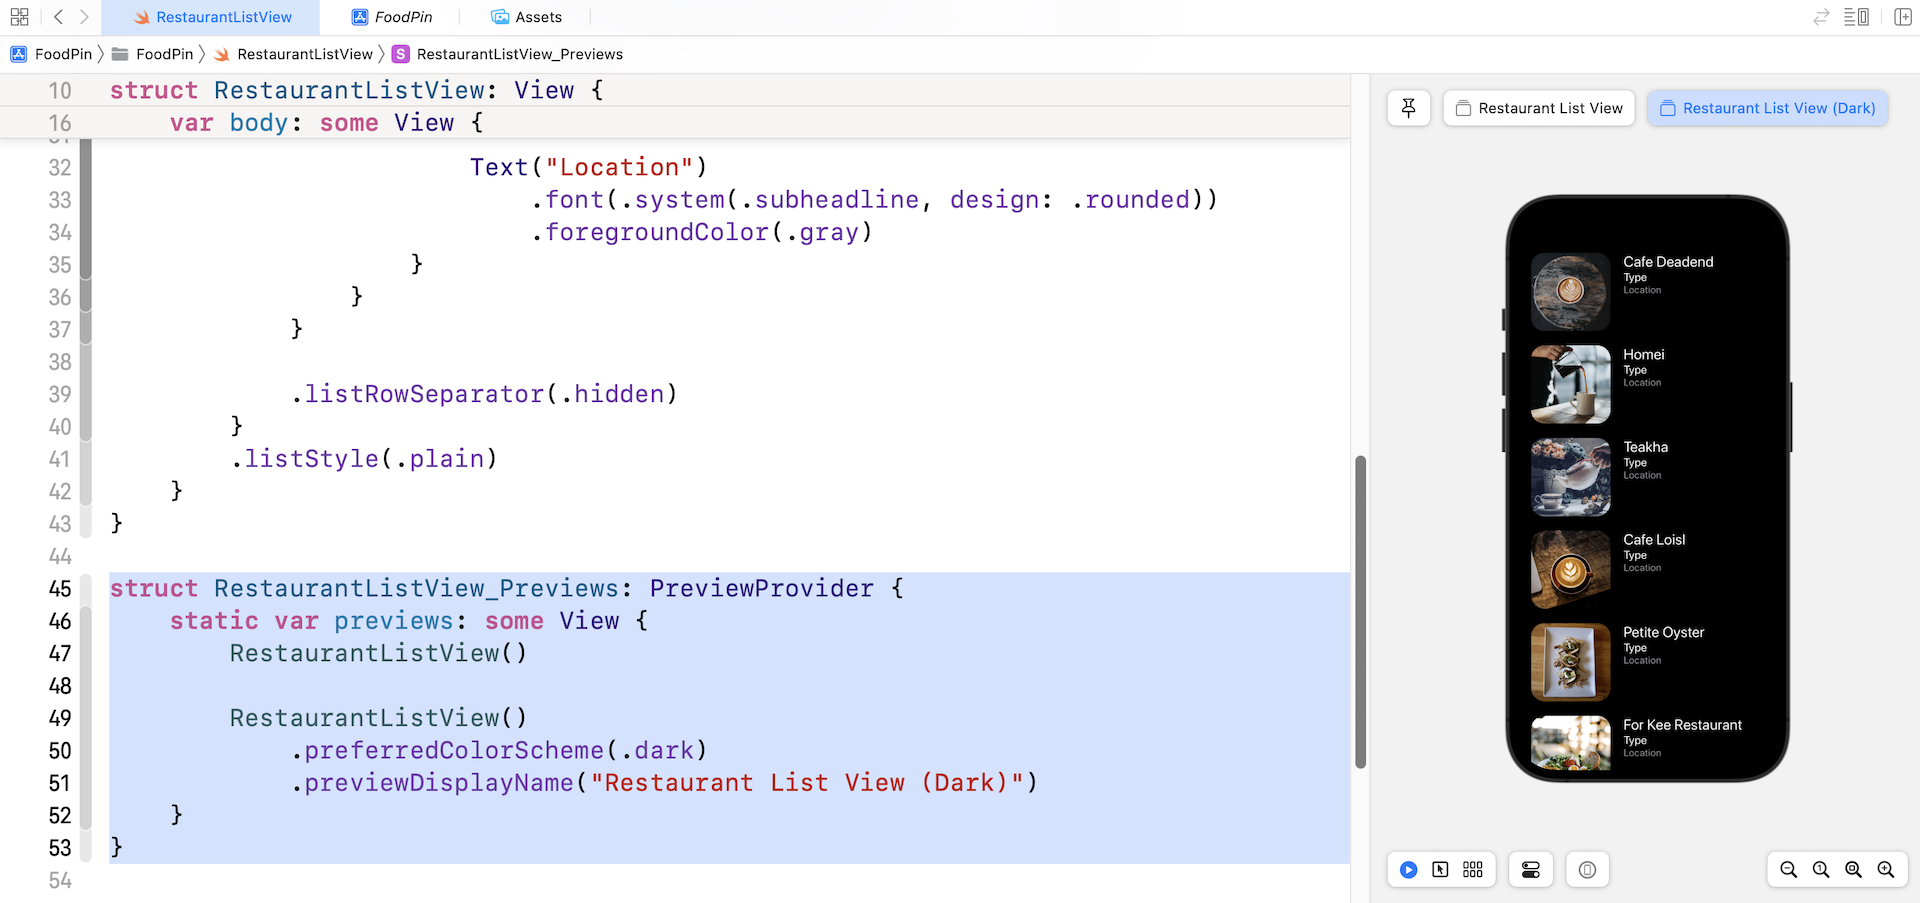
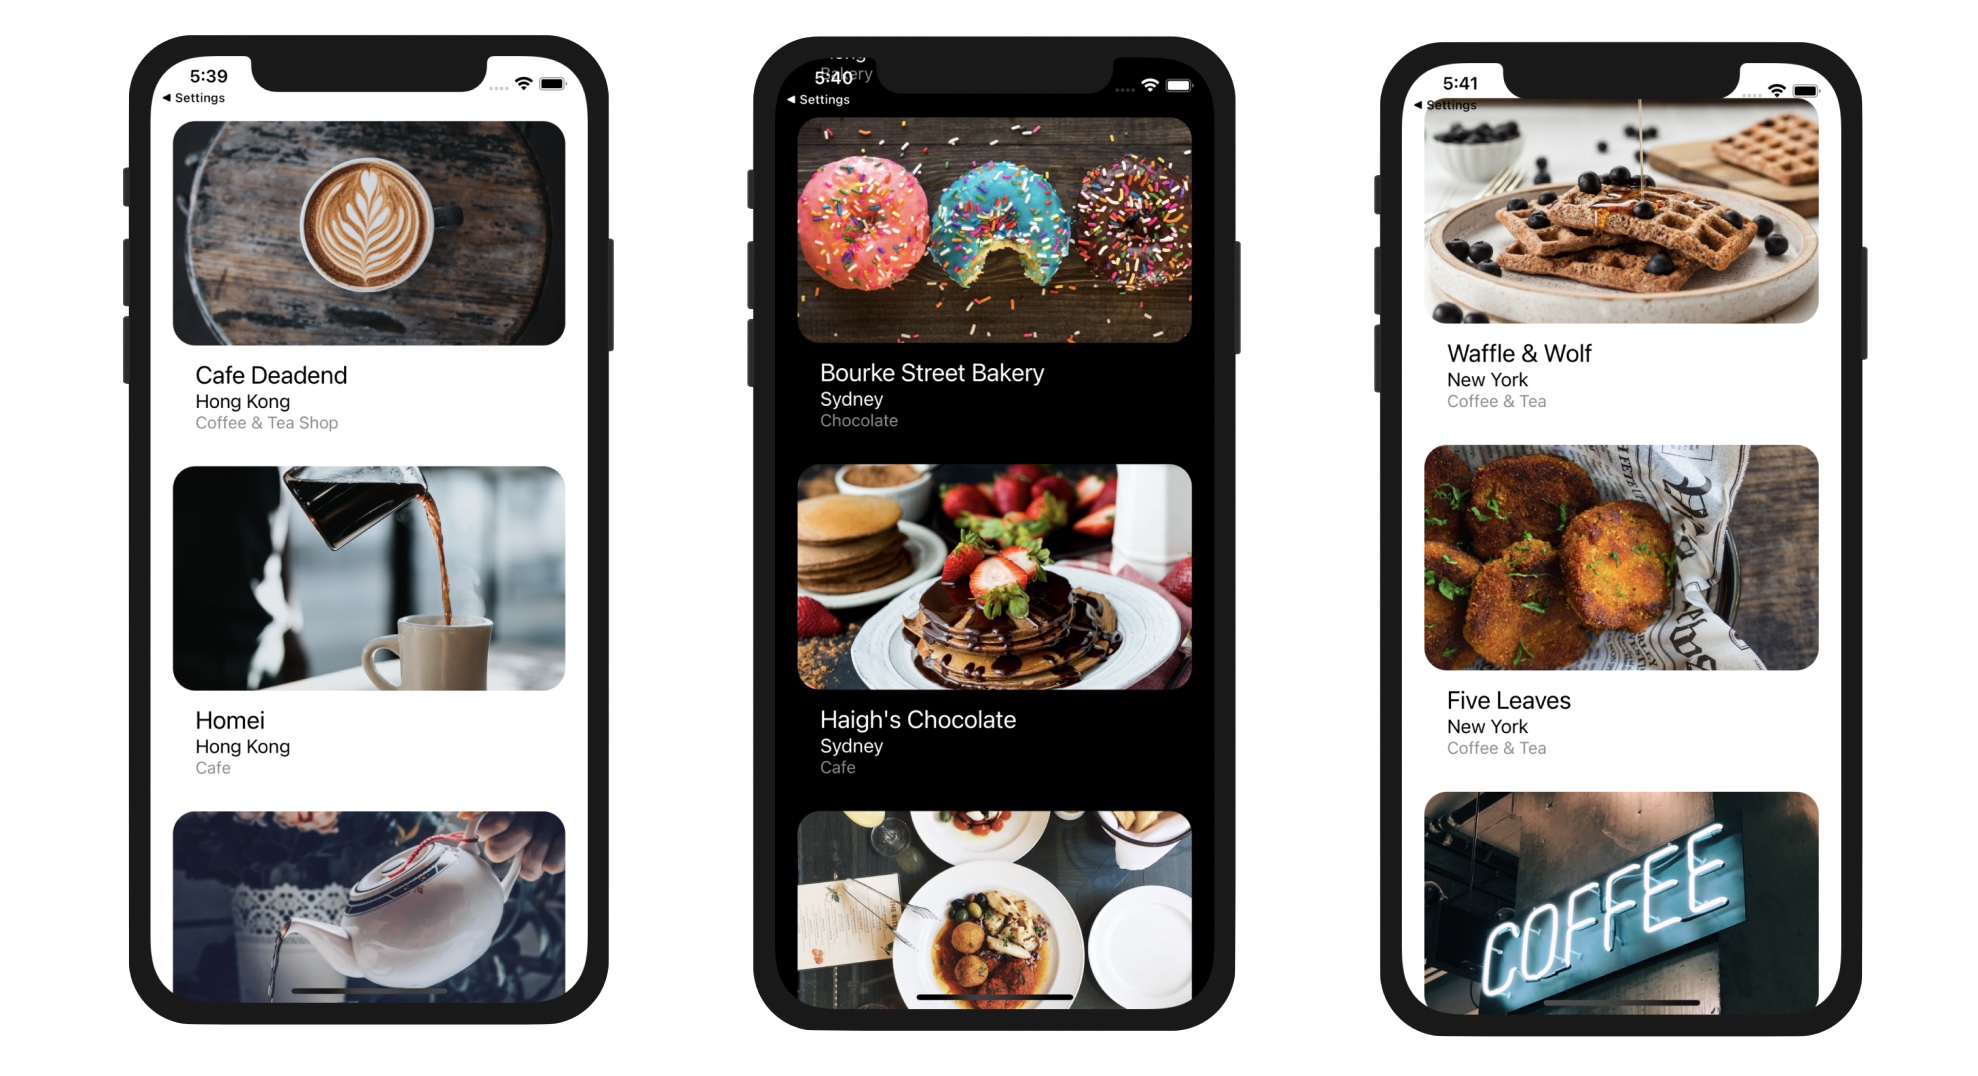
The row layout is very simple. We're going to make it even better by redesigning the layout. Here is what we are going to do. We will make the restaurant image a little bit bigger. Also, we will show more information about the restaurant such as location and type. On top of that, we will round the corners of the images. To give you a better idea about how the row layout is redesigned, take a look at figure 7-9. It looks awesome, right? And, I forgot to mention that the new layout will also look great in dark mode.
To build the row layout, we will make use of both HStack and VStack. Now update the code inside ForEach like this:
HStack {
    Image(restaurantImages[index])
        .resizable()
        .frame(width: 120, height: 118)

    VStack(alignment: .leading) {
        Text(restaurantNames[index])
            .font(.system(.title2, design: .rounded))

        Text("Type")
            .font(.system(.body, design: .rounded))

        Text("Location")
            .font(.system(.subheadline, design: .rounded))
            .foregroundColor(.gray)
    }
}
The VStack view is used to arrange the restaurant name, type, and location. Both the Image view and VStack view are embedded in a horizontal stack view to create the desired layout.
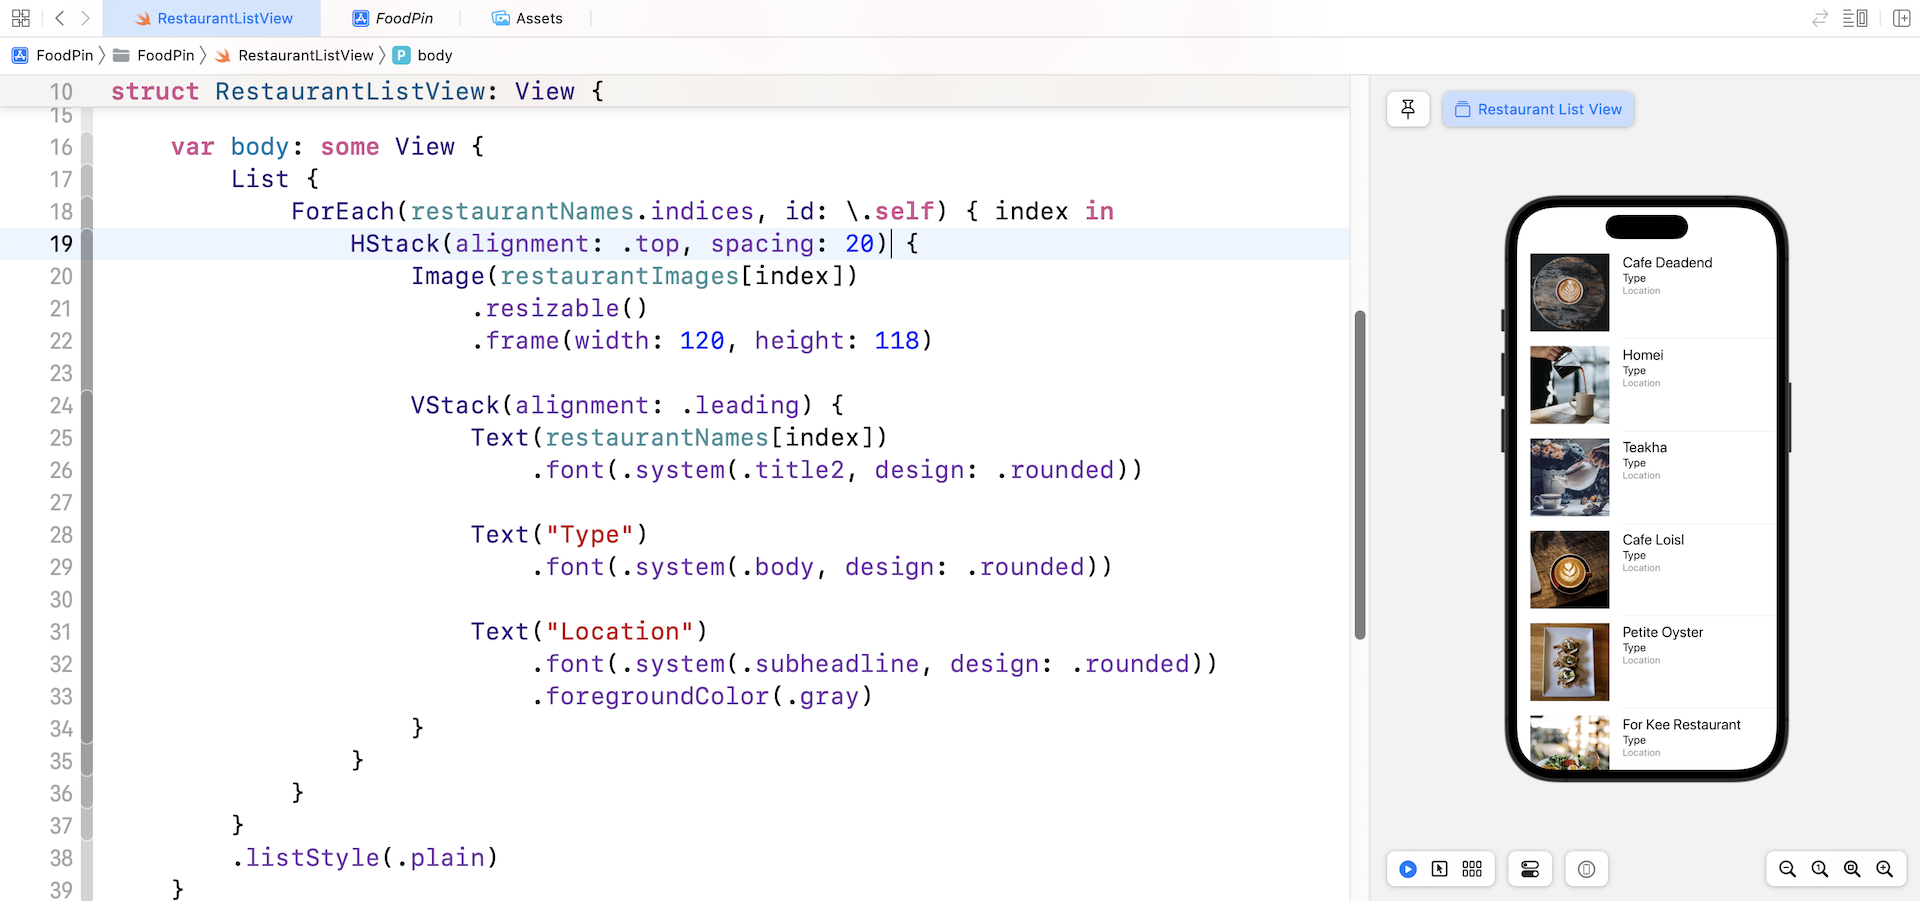
Wait! The row layout is not exactly the same as the one shown in figure 7-8. To fix the issues, we need to align the VStack to the top of the HStack and add some spacing. You can simply update the HStack and tweak a couple of parameters like this:
HStack(alignment: .top, spacing: 20) {
  .
  .
  .
}
Once you made the change, you should fix the alignement issue.
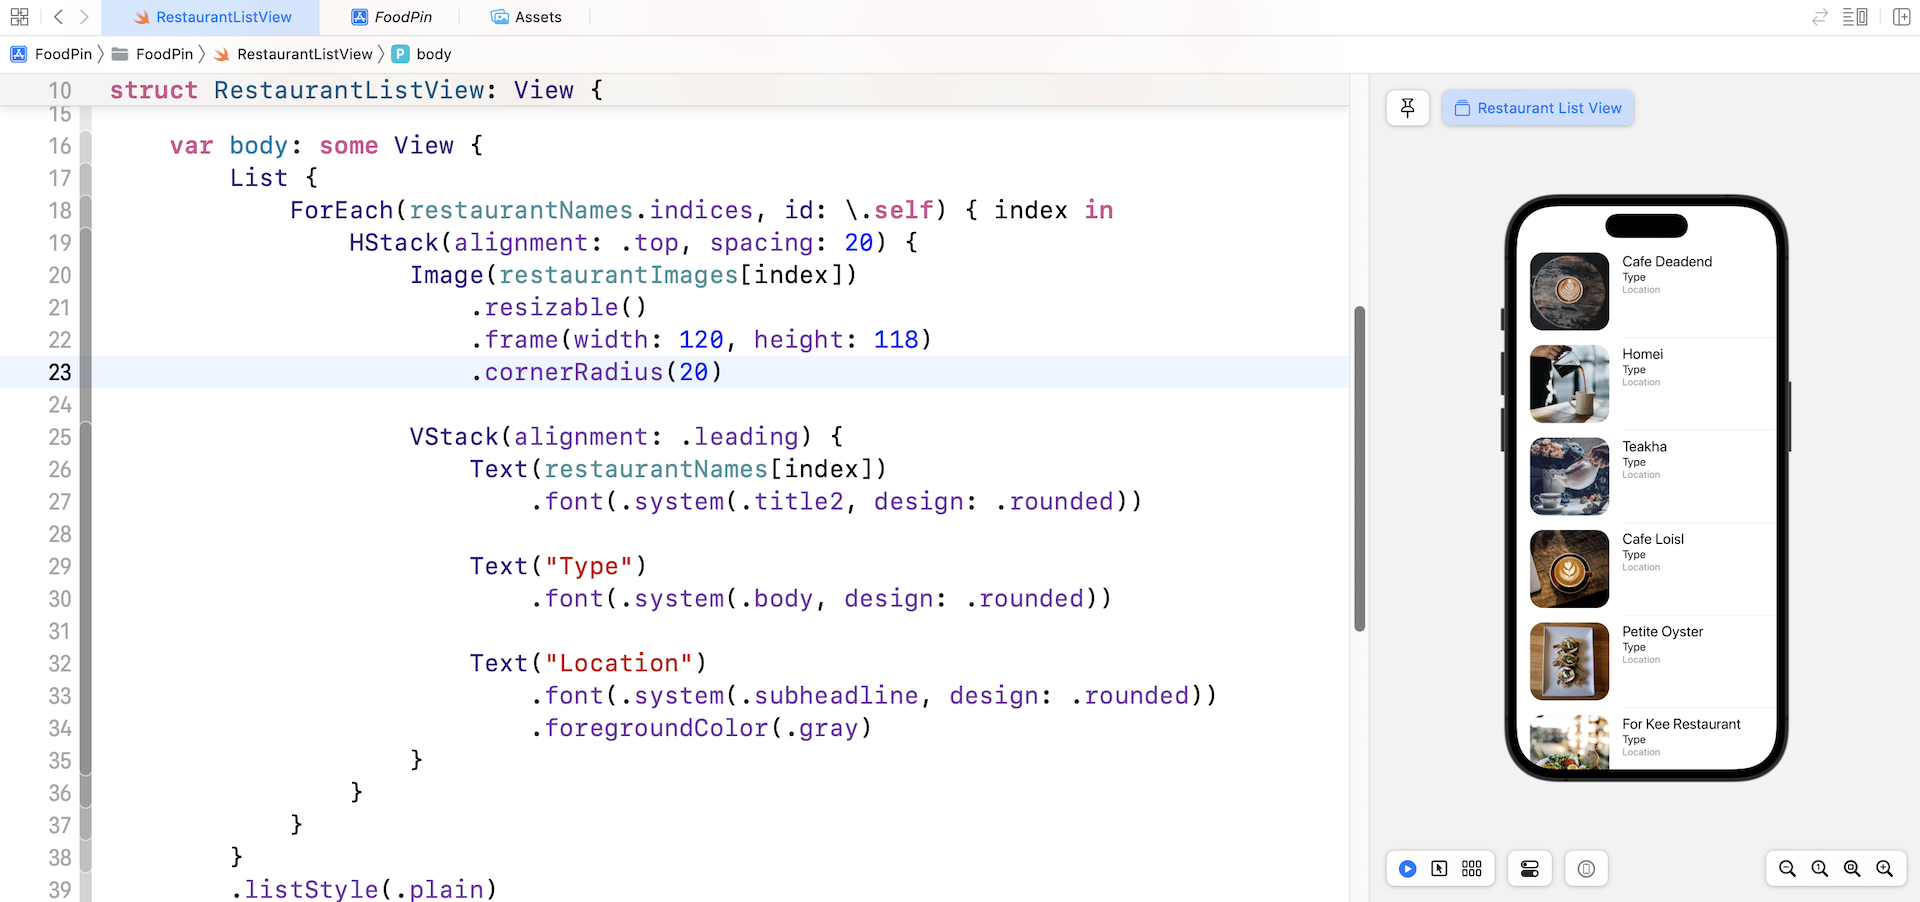
Rounding Image Corners
There is still one issue left. We need to round the image corners. With SwiftUI, you can easily create rounded corners by attaching the cornerRadius modifier to the Image view:
Image(restaurantImages[index])
    .resizable()
    .frame(width: 120, height: 118)
    .cornerRadius(20)
We set the value to 20 points. If you want a sharper corner, you can change it to a lower value.
An alternative way to round the image corners is to use the clipShape modifier. You can replace the cornerRadius modifier with the following line of code to achieve the same result:
.clipShape(RoundedRectangle(cornerRadius: 20))
This modifier lets you clip the view into a specific shape. In the code above, we tell the modifier to mask the image to a rounded rectangle, thus resulting an image with rounded corners.
RoundedRectangle is just one of the built-in shape. You can apply other shapes like Circle() and Capsule().
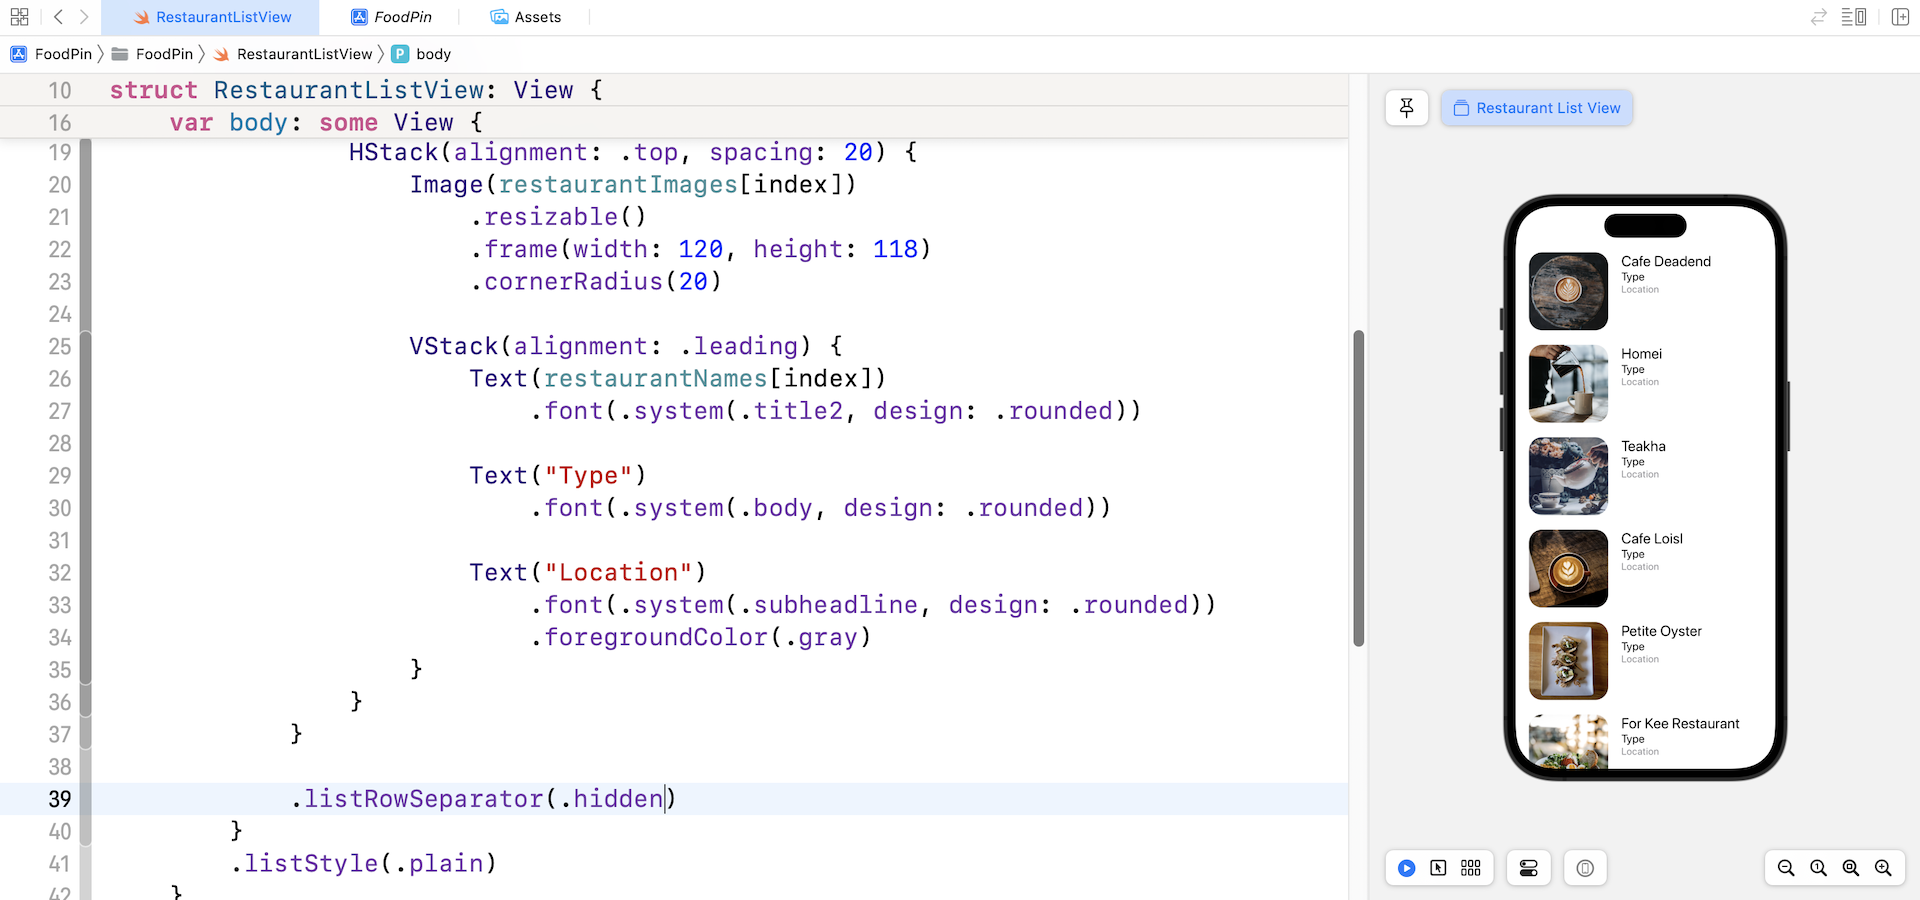
Hiding the List Separators
By default, the List view separates each row by using a line separator. If you want to hide the separators, iOS 15 introduces a new modifier called listRowSeparator for you control the visibility of the line separators.
Inside the List view, you can add the listRowSeparator and set the value to .hidden to hide the separators.
Testing the App Using Dark Mode
Since the release of iOS 13, Apple allows users to choose between light and dark system-wide appearance. When the user chooses to adopt Dark Mode, both the system and apps use a darker color palette for all screens and views. As an app developer, you should make sure your apps also comply with Dark Mode. There are multiple ways to test your app in Dark Mode.
First, you can update the RestaurantListView_Previews struct like this:
struct RestaurantListView_Previews: PreviewProvider {
    static var previews: some View {
        RestaurantListView()

        RestaurantListView()
            .preferredColorScheme(.dark)
            .previewDisplayName("Restaurant List View (Dark)")
    }
}
The preferredColorScheme modifier allows you to switch to Dark Mode by passing the value of .dark. Now you can preview the app UI in both light and dark mode in the preview pane. Take a look at the figure, the app UI already looks great in dark mode even without any modification.
Alternatively, while you are running the app on a simulator, you can click the Environment Overrides button to switch the appearance from light to dark. Once you enable the switch, the simulator is set to adopt Dark Mode.
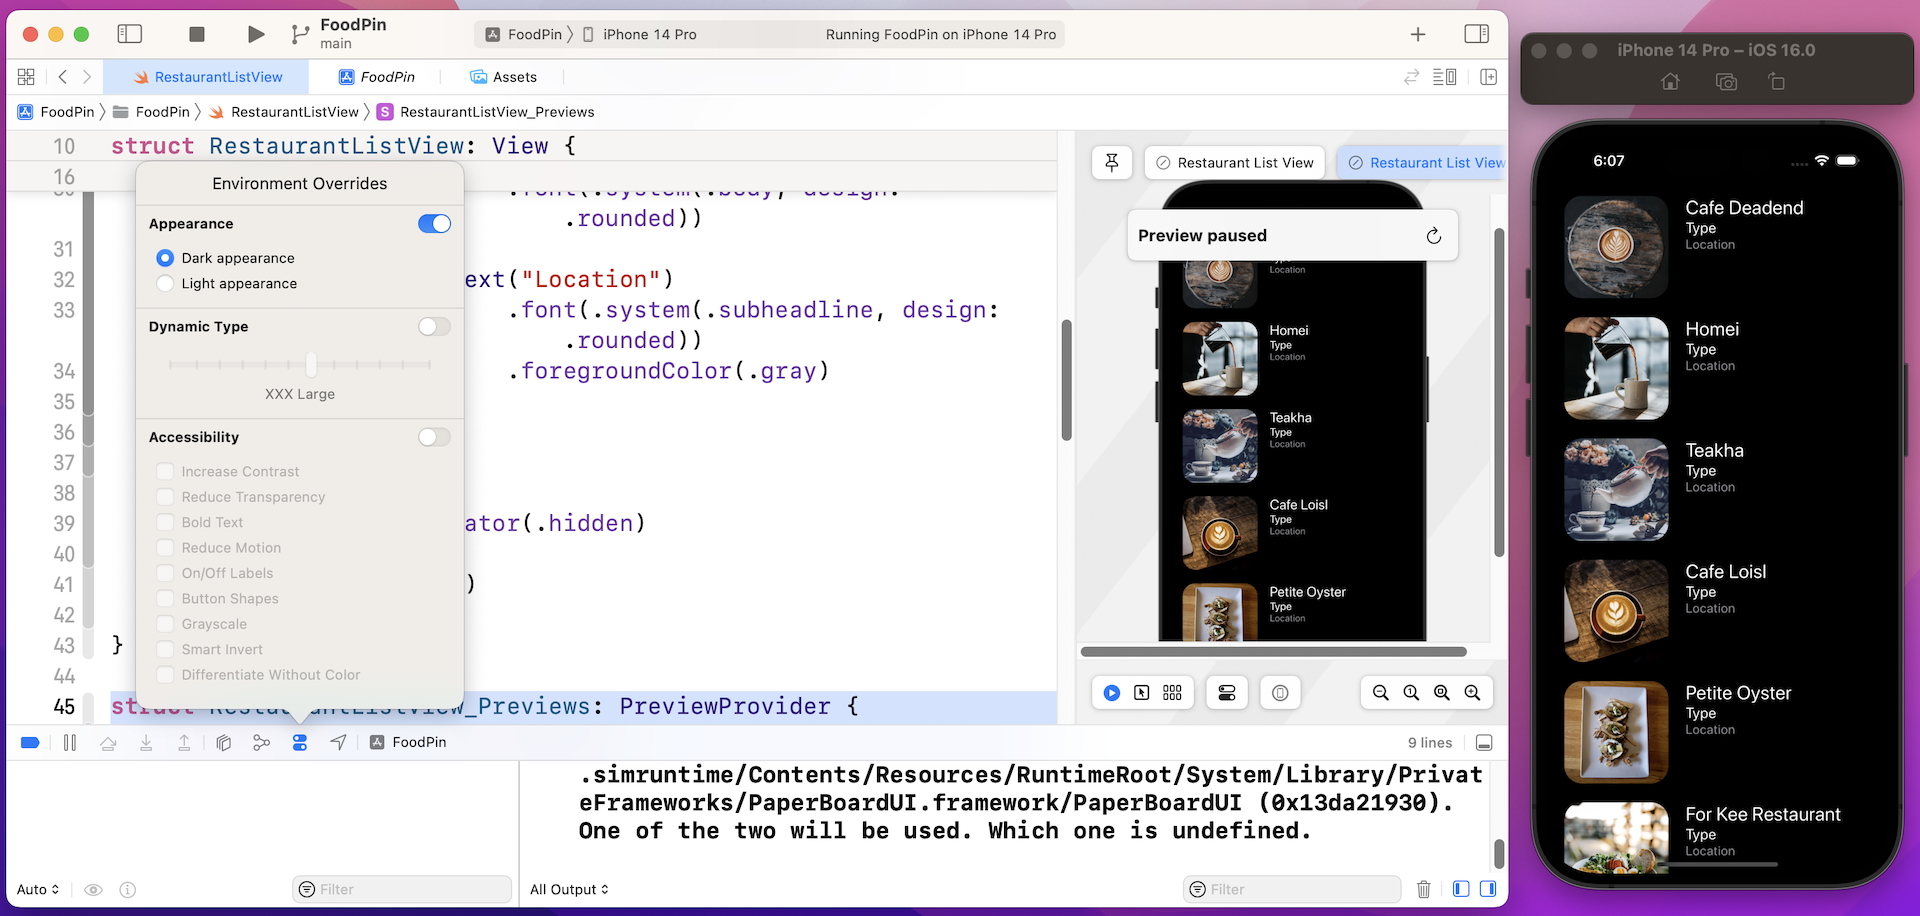
The third way to test dark mode is to change the setting of your simulator. On any of the simulators, go to Settings > Developer. Turn the switch of the Dark Appearance option to ON to enable Dark Mode.
Exercise #1
As of now, the app simply displays "Location" and "Type" for all rows. As an exercise, I'll leave it to you to fix the issue. Try to edit the source code to update the location and type labels. Below are the two arrays you need:
var restaurantLocations = ["Hong Kong", "Hong Kong", "Hong Kong", "Hong Kong", "Hong Kong", "Hong Kong", "Hong Kong", "Sydney", "Sydney", "Sydney", "New York", "New York", "New York", "New York", "New York", "New York", "New York", "London", "London", "London", "London"]

var restaurantTypes = ["Coffee & Tea Shop", "Cafe", "Tea House", "Austrian / Causual Drink", "French", "Bakery", "Bakery", "Chocolate", "Cafe", "American / Seafood", "American", "American", "Breakfast & Brunch", "Coffee & Tea", "Coffee & Tea", "Latin American", "Spanish", "Spanish", "Spanish", "British", "Thai"]
Exercise #2
The previous exercise may be too easy for you. Here is another challenge. Try to redesign the row layout and see if you can create an app like this.
Summary
Congratulations! You've made a huge progress. If you understand the ins and outs of the List view, you're ready to make some awesome UIs. List view is the backbone for most iOS apps. Unless you're building a game, you'll probably implement a list view in one way or another when building your own apps. So take some time to work on the exercises and play around with the code. Remember "learn by doing" is the best way to learn coding.
For reference, you can download the complete Xcode project from http://www.appcoda.com/resources/swift57/swiftui-foodpin-custom-list.zip. If you can't figure out how to complete the exercise, you can download the solution from http://www.appcoda.com/resources/swift57/swiftui-foodpin-custom-list-exercise.zip.