- Made by AppCoda
- Contact us / Support
- Tweet this book
- Preface
- 1. The Development Tools, the Learning Approach, and the App Idea
- 2. Your First Taste of Swift with Playgrounds
- 3. Build Your First App in Swift and SwiftUI
- 4. Designing UI Using Stack Views
- 5. Introduction to Prototyping
- 6. Understanding List and ForEach
- 7. Customizing List Views
- 8. Displaying Confirmations and Handling List View Selection
- 9. Understanding Struct, Project Organization and Code Documentation
- 10. List Deletion, Swipe Actions, Context Menus and Activity Controller
- 11. Working with Navigation View
- 12. Detail View Enhancement, Custom Fonts and Navigation Bar Customization
- 13. Understanding Colors, Swift Extensions and Dynamic Type
- 14. Working with Maps
- 15. View Animations and Blur Effect
- 16. Working with Observable Objects and Combine
- 17. Working with Forms and Camera
- 18. Working with Core Data
- 19. Adding a Search Bar Using Searchable
- 20. Building Walkthrough Screens Using TabView
- 21. Working with Tab View and Tab Bar Customizations
- 22. Displaying Web Content with WKWebView and SFSafariViewController
- 23. Working with CloudKit
- 24. Localizing Your App to Support Multiple Languages
- 25. Deploying and Testing Your App on a Real iOS Device
- 26. Beta Testing with TestFlight and CloudKit Production Deployment
- 27. Submit Your App to App Store
- 28. Adopting Haptic Touch
- 29. Working with User Notifications
- 30. Appendix - Swift Basics
- Published with GitBook
Chapter 25
Deploying and Testing Your App on a Real iOS Device
If we want users to like our software, we should design it to behave like a likable person: respectful, generous and helpful.
- Alan Cooper
Up till now, you have been running and testing your app on the built-in simulator. The simulator is a great companion for app development especially if you do not own an iPhone. While the simulator is good, you can never rely completely on the simulator. It's not recommended to submit your app to App Store without testing it on a real device. Chances are there are some bugs that only show up when your app runs on a physical iPhone or over the cellular network. If you're serious about building a great app, this is a must to test your app on a real device before releasing it to your users.
One great news, especially for aspiring iOS developers, is that Apple no longer requires you to enroll in the Apple Developer Program before you can test your app on an iOS device. You can simply sign in Xcode with your Apple ID, and your app is ready to run on your iPhone or iPad. However, please note that if your app makes use of the services like CloudKit and Push Notifications, you still need to enroll in the Apple Developer Program, which costs $99 per year. I know, for some, this is a significant amount of money for some of you. But if you read the book from the very beginning and are still with me, I believe you have demonstrated a strong determination to build an app and deploy it to your audience. It's not easy to make it this far! So why stop here? If you're not on a tight budget, I highly recommend you enroll in the program so that you can continue to learn the rest of the materials and most importantly, submit your app to App Store.
To test an app on a physical device, you will need to perform a few configurations:
- Request your development certificate
- Create an App ID for your app
- Configure your device for development
- Create a provisioning profile for your app
In the old days of iOS development, you had to manage the above configurations all on your own through the iOS Provisioning Portal (or Member Center). The modern version of Xcode automates the whole signing and configuration processes by using a feature called Automatic Signing. This makes your life a lot easier. You will see what I mean shortly.
Understanding Code Signing and Provisioning Profiles
You may wonder why you need to request a certificate and go through all these complicated procedures just to put an app on a device. Not to say, it's your own app and device. The main reason is because of security. Every app deployed on an iOS device is code signed. Xcode uses both your private key and digital certificate to sign the code. By signing your code, Apple knows you're the rightful owner of the app. As you know, Apple only issues digital certificates to legitimate developers who have joined the developer program. This also prevents non-authorized developer to deploy apps on the app store.
Apple issues two types of digital certificates: Development and Distribution. To run an app on a real device, you just need the development certificate. Later, when you submit an app to App Store, you have to sign your app using a distribution certificate. Again, this is automatically taken care by Xcode. We will discuss app submission in chapter 28. For now, let's focus on deploying your app to a device.
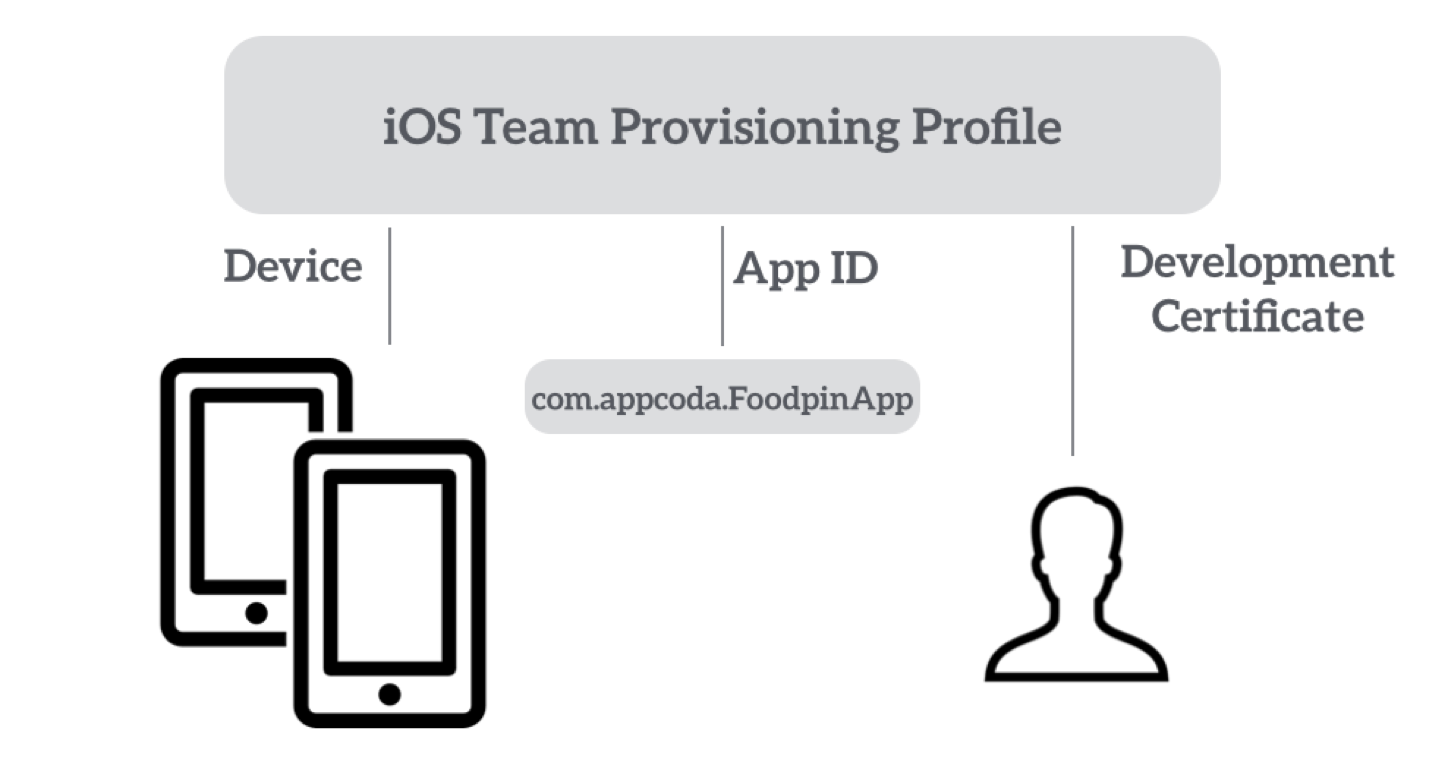
Provisioning Profile is another term you come across in app deployment. Provisioning refers to the process of preparing and configuring an app to launch on devices. A team provisioning profile allows your app to be signed and run by all team members (if you're an indie developer, you're the only member of the team) on their devices. Figure 25-1 shows an illustration of a sample provisioning profile.

Reviewing Your Bundle ID
Before moving on, I would like you to review your bundle ID. As discussed before, a bundle ID identifies a single app, so it must be unique. Assuming you have followed the CloudKit chapter, I believe you already created your own bundle ID. But let me remind you once again. You must not use com.appcoda.FoodPin (or com.appcoda.FoodPinV6) because it has been used by the demo app. Otherwise, you will not be able to deploy the app onto your physical device.
Therefore, make sure you change the bundle ID. It can be anything. However, if you already own a domain, use it and write the ID in reverse-DNS format (e.g. edu.self.foodpinapp).
Note: After your app is published on the app store, you will not be able to change the bundle ID.
Automatic Signing in Xcode
Automatic signing was a feature since the release of Xcode 8. As mentioned before, you will need to manage the following tasks before you can deploy and run your app on a real device:
- Request your development certificate
- Create an App ID for your app
- Create a provisioning profile for your app
With Automatic Signing, you no longer need to create your development certificate or provisioning profile manually. Xcode takes care of all these tasks for you.
When creating an Xcode project, automatic signing is enabled by default. If you select the FoodPin project in the project navigator and go to the FoodPin target, you should find the Automatically manage signing option is on.
Before we perform automatic signing, connect your iPhone (or iPad) to your Mac. In Xcode, click the simulator button, you should see your device in the simulator/device list. Please make sure you select the device because Xcode will register your iPhone as the valid test device during the signing process.
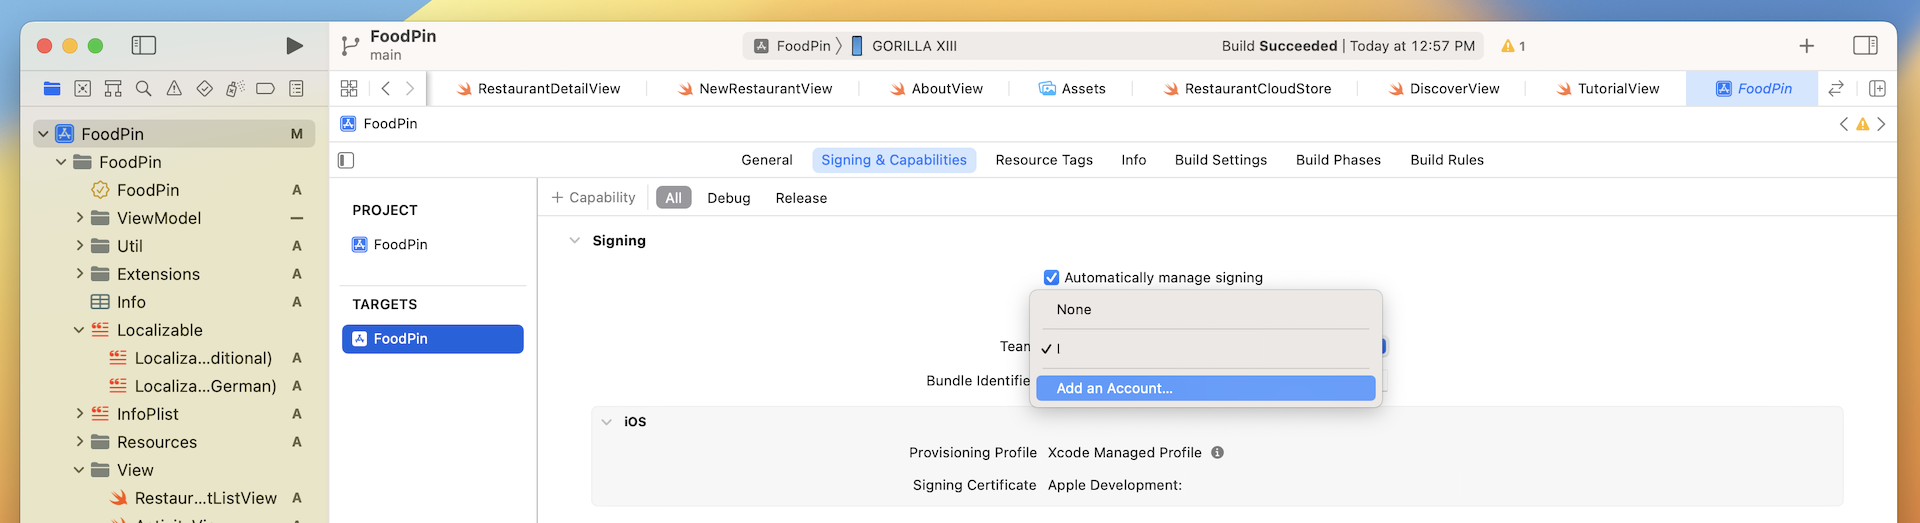
Now, go to the project option and choose the Signing & Capabilities section, the Team option is set to None. To use automatic signing, you have to add an account to your project. Click the Team option and choose Add an account. Fill in your Apple ID/password, and click Add to proceed. If you have already added your account before, you can skip this step.
Even if you haven't enrolled in the Apple Developer Program, you can sign in with your Apple ID.
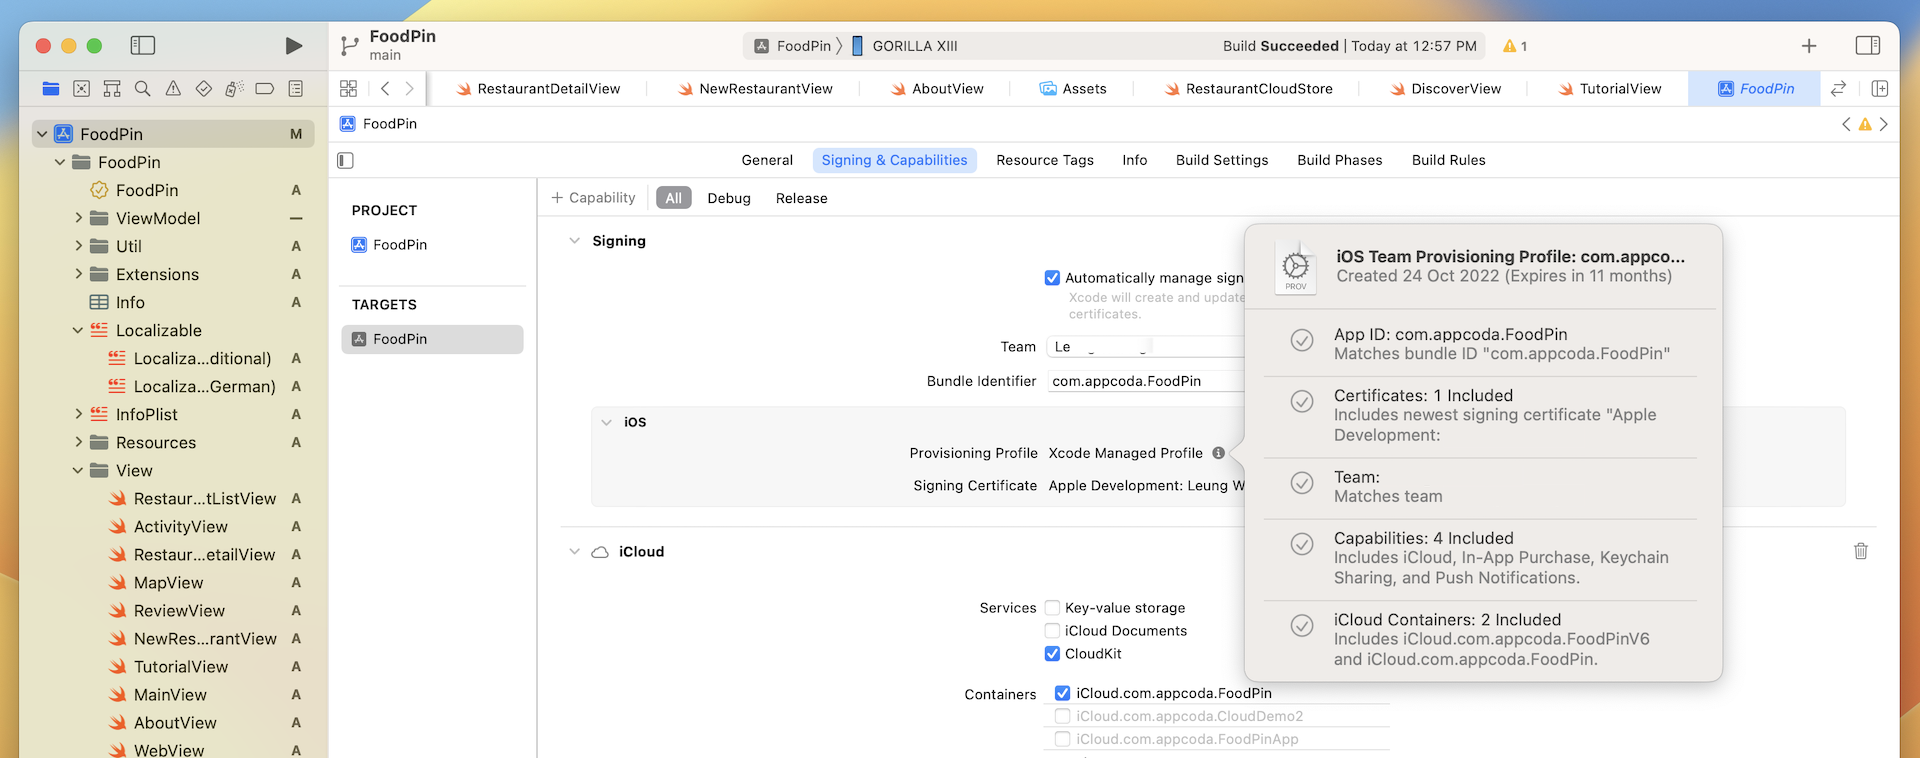
Once you added your account, Xcode will generate the development certificate and create the provisioning profile automatically. In the signing section, you will find your signing certificate and provisioning profile. You can further click the info icon (next to the provisioning profile) to reveal the details.
You can always review your App ID and provisioning profile in the Member Center. Open Safari and access https://developer.apple.com/membercenter/. Sign in with your developer account and you'll see the below screen.
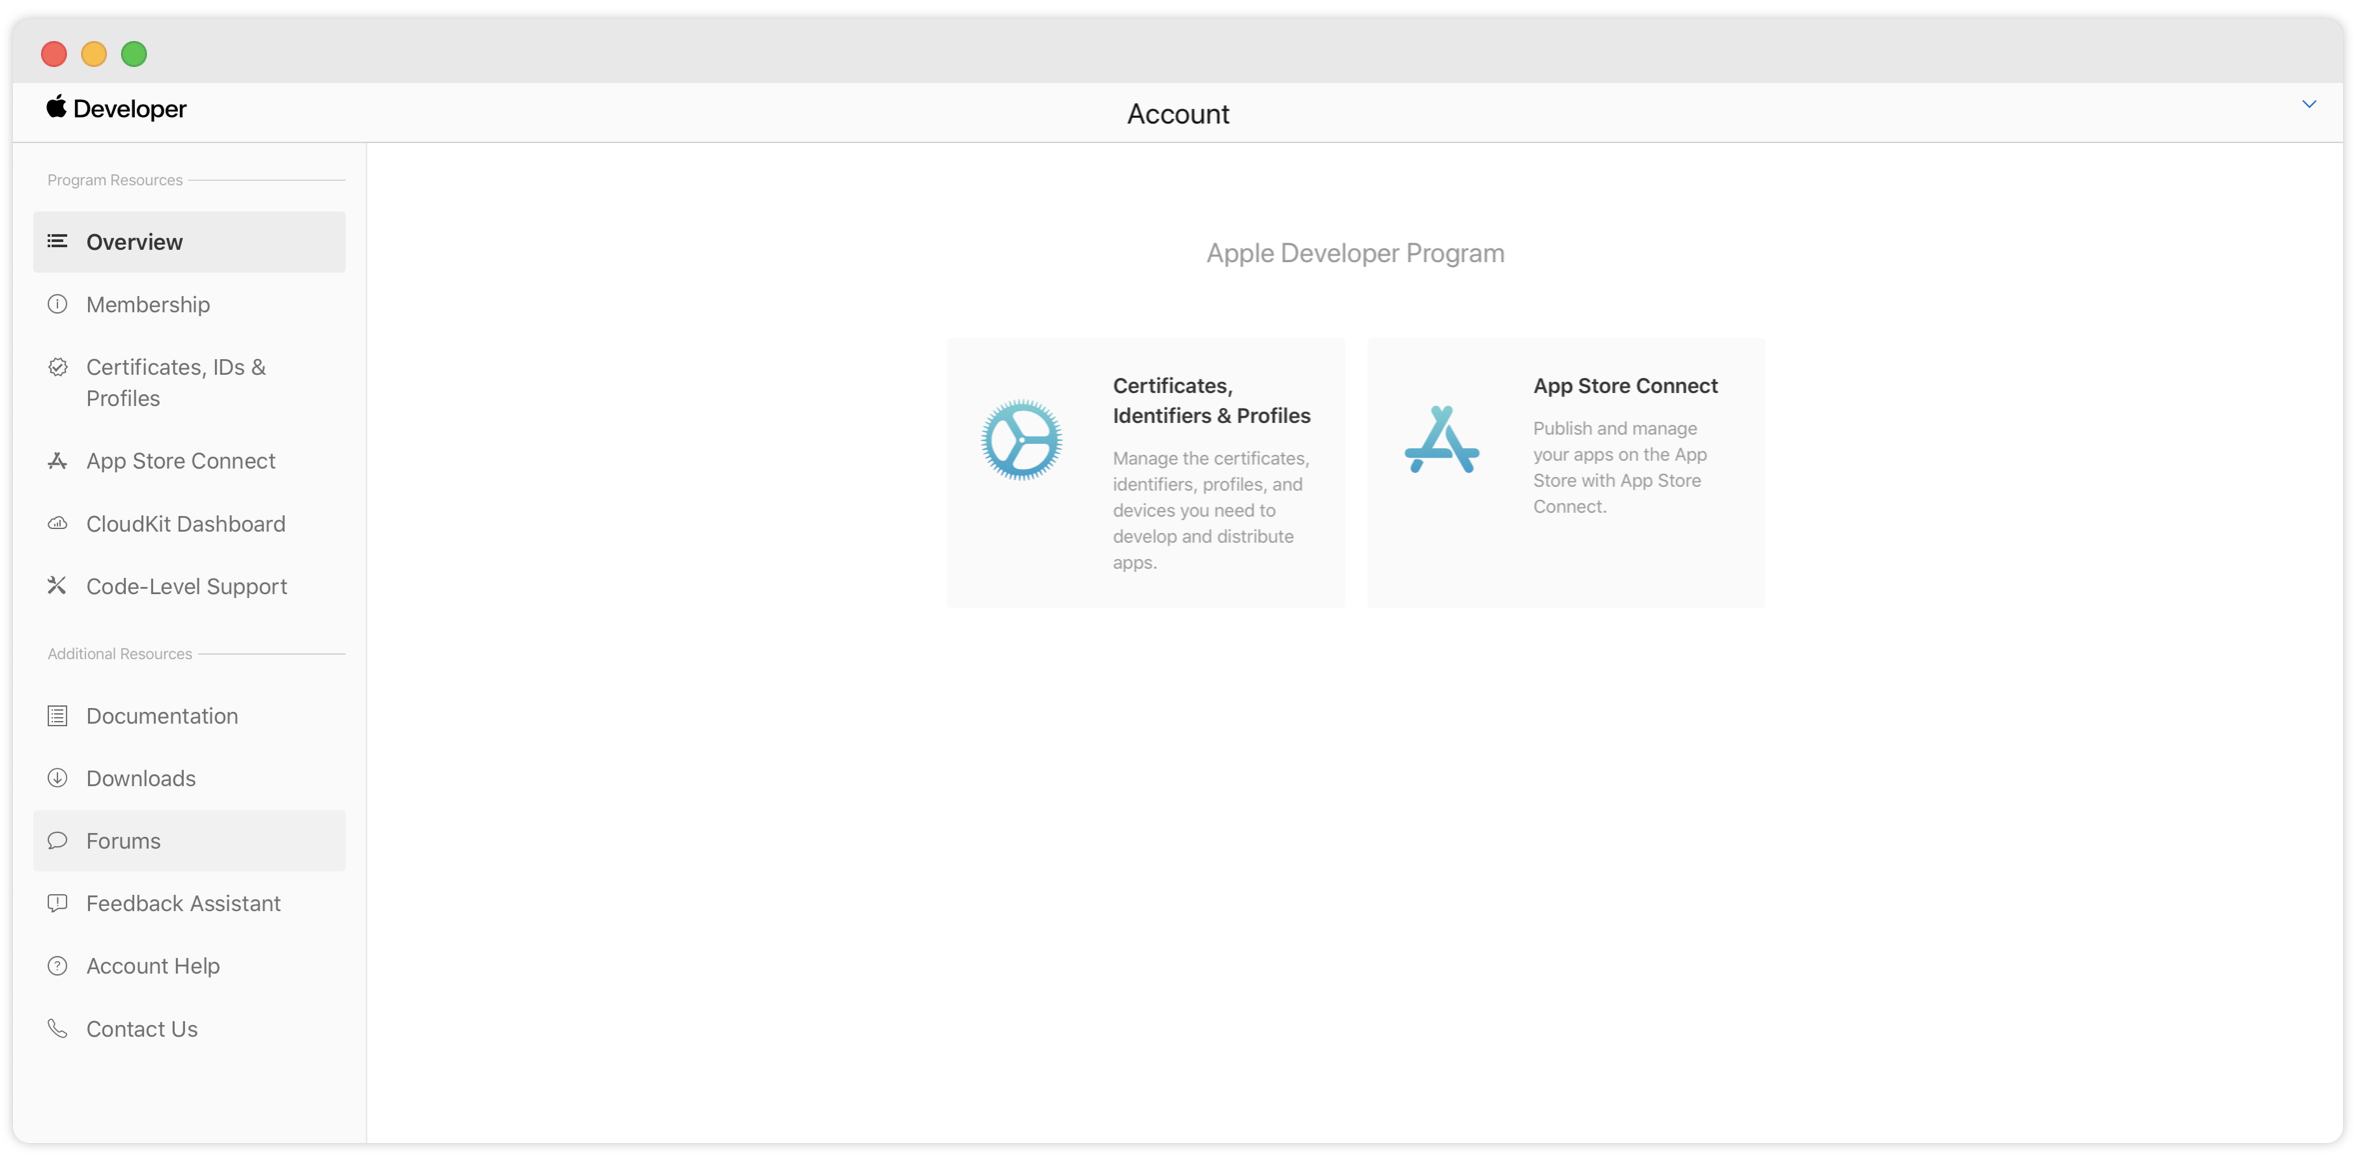
Note: The "Certificates, identifiers & Profiles" will only appear if you have enrolled in the Apple Developer Program.
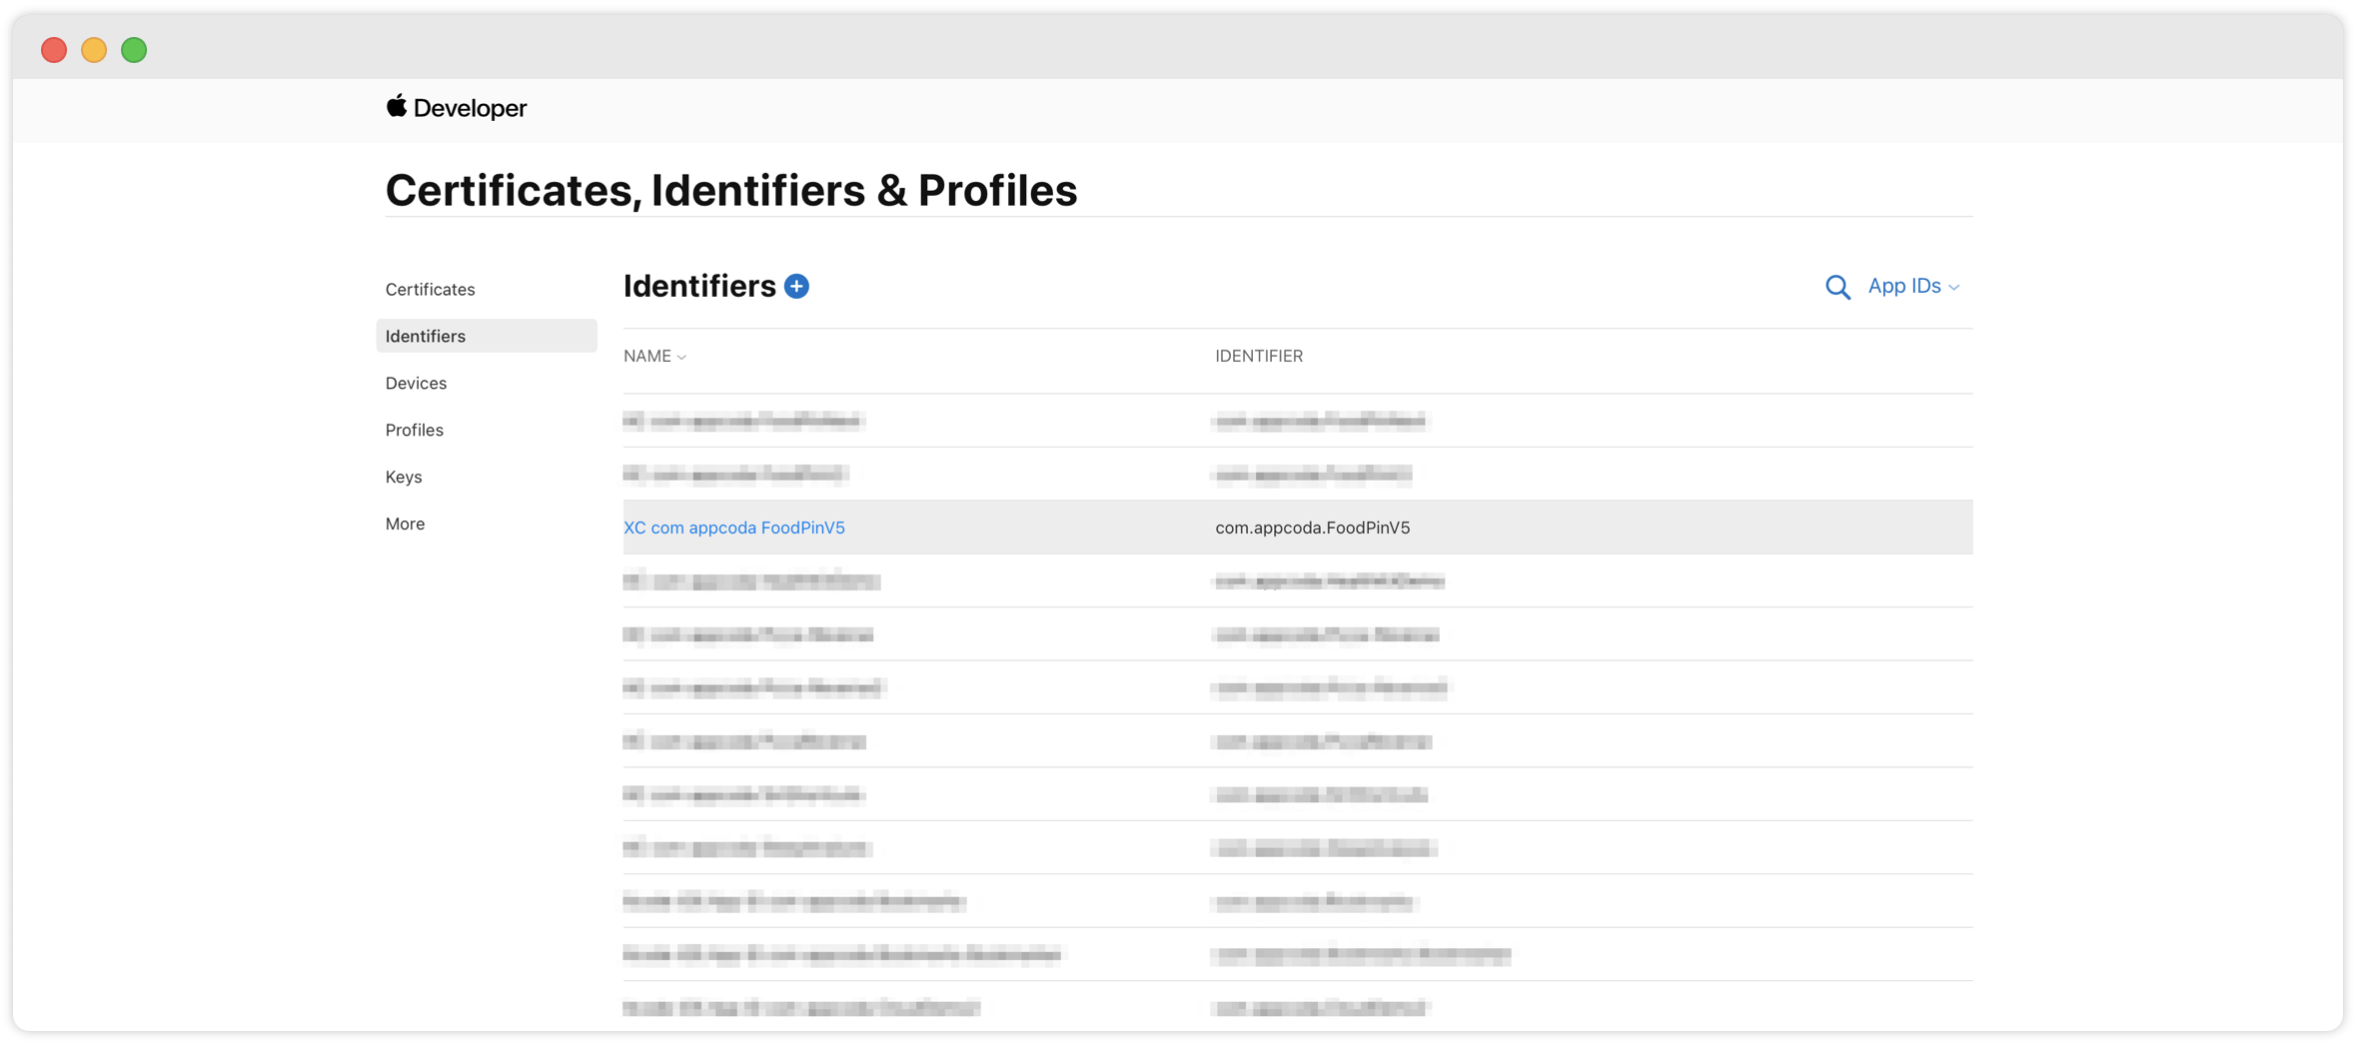
Select "Certificates, IDs & Profiles" and you'll navigate to another screen for managing certificates, identifiers, devices and provisioning profiles. Choose identifiers under iOS Apps and you will find the App ID (which is the same as your bundle ID) of your app. Figure 25-5 shows a sample App ID.
Deploying the App on Your Device via USB
Assuming you've connected your iOS device to your Mac, you are ready to deploy your app and test it on your iPhone (or iPad). Click the simulator/device pop-up menu and scroll to the top of the list, choose your device.

Quick note: If your iOS device is ineligible, fix the issue before continuing. For example, if the device doesn't match the deployment target (e.g. iOS 16), upgrade the version of iOS on the device.
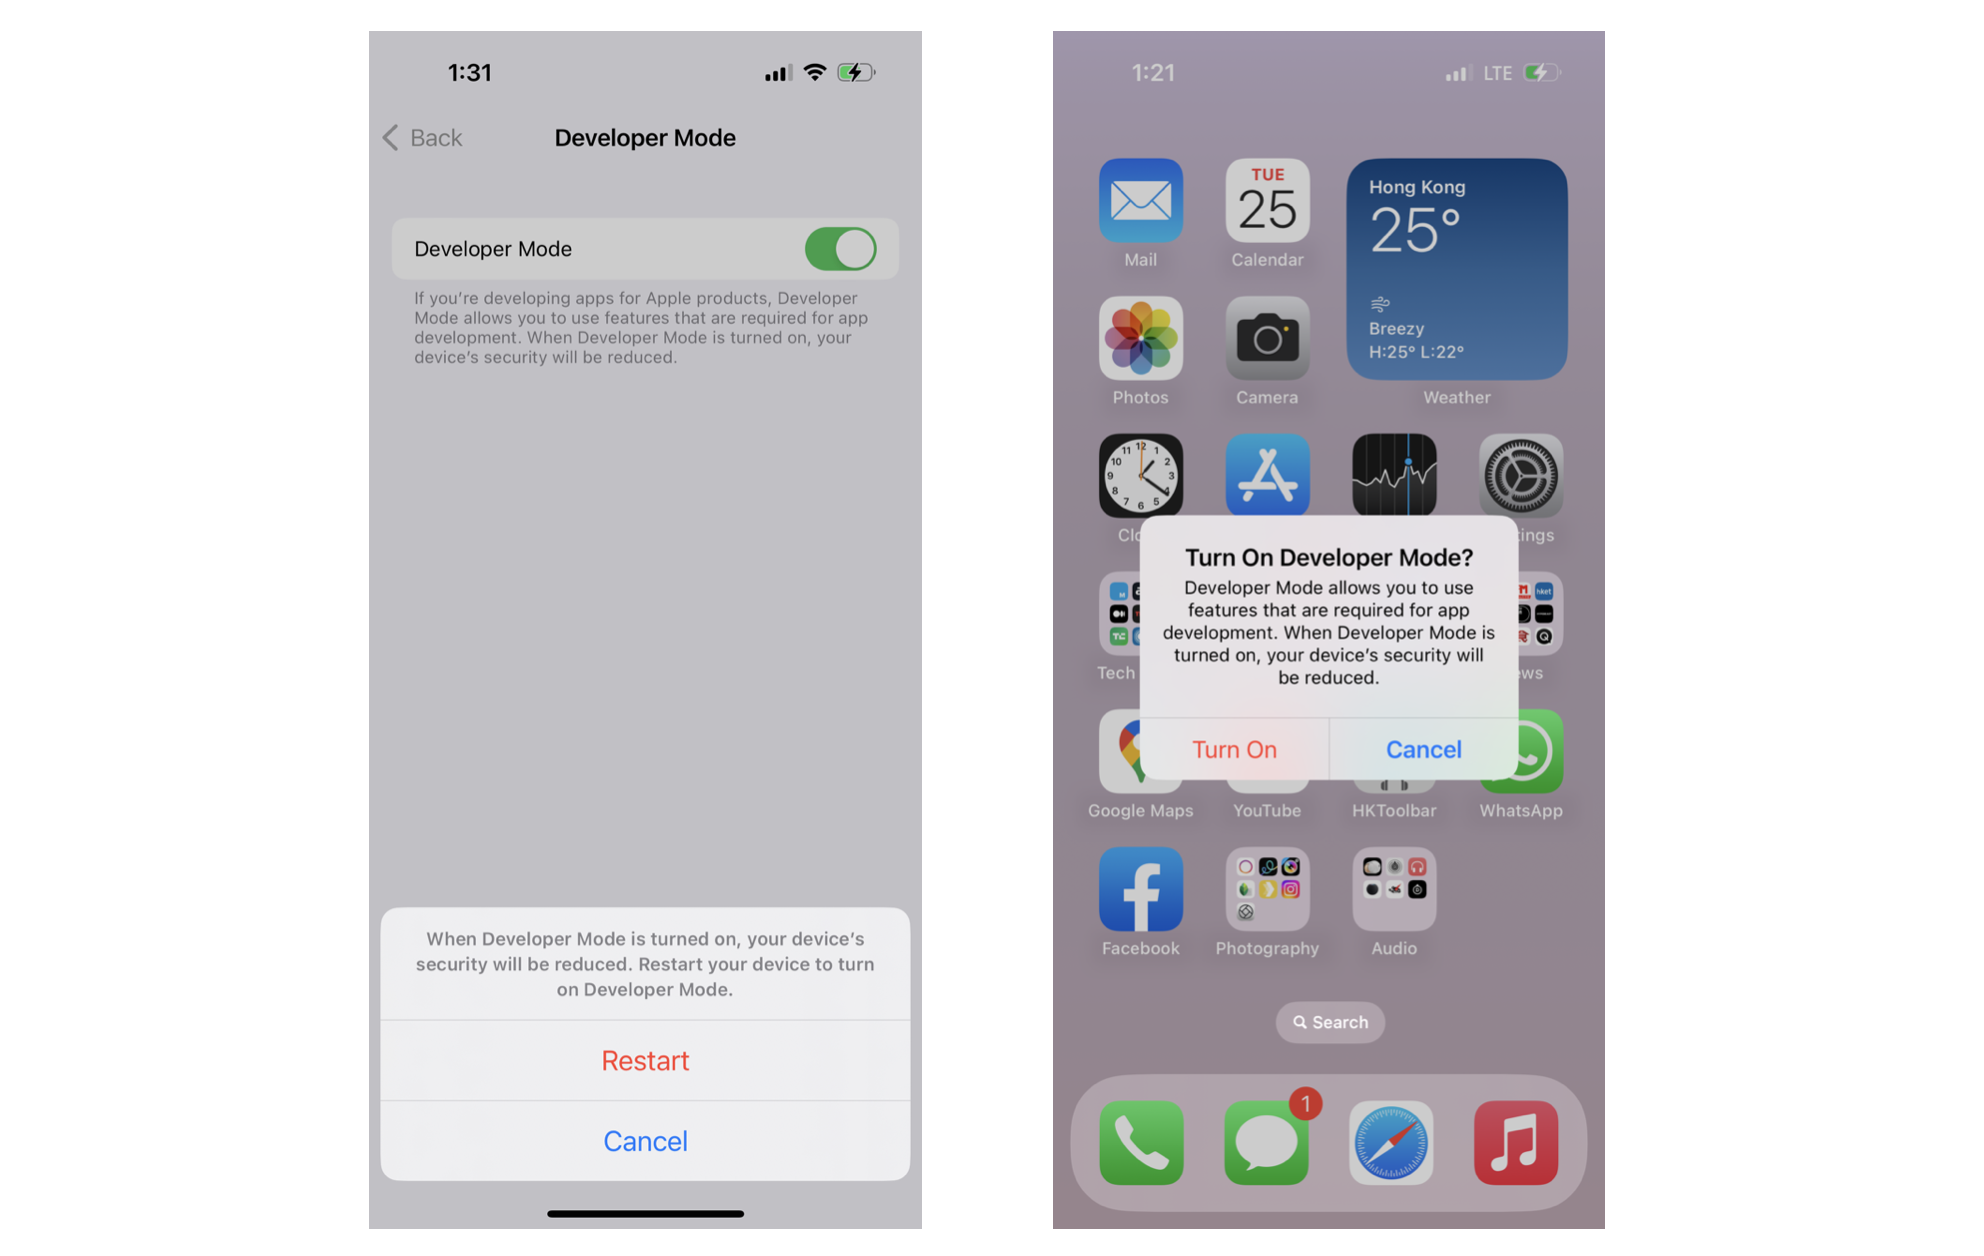
If there is a message ("Developer Mode disabled") displayed right next to your device, you will need to enable it on your iPhone/iPad. Go to Settings > Privacy & Security > Developer Mode. Flip the switch of Developer Mode to ON. iOS will prompt you for confirmation and request to restart the device to turn on Developer Mode.
Developer Mode, introduced in iOS 16 and watchOS 9, protects people from inadvertently installing potentially harmful software on their devices, and reduces attack vectors exposed by developer-only functionality.
- Apple's documentation (https://developer.apple.com/documentation/xcode/enabling-developer-mode-on-a-device)
You're now ready to deploy and run the app on your device. Hit the Run button and start the deployment process! Remember to unlock your iPhone before deploying the app. Otherwise, you won't be able to launch it.
Deploying the App over Wi-Fi
From Xcode 9 and onwards, the development tool comes with one of the most anticipated features for app deployment. Xcode allows you to cut the USB cable and deploy your app to any iOS devices over Wi-Fi.
But, there is a catch. Before you can use this new feature, you have to first connect your iOS device using a USB cable and go through a simple configuration.
Assuming you have your device connected, go up to the Xcode menu and choose Window > Devices and Simulators.
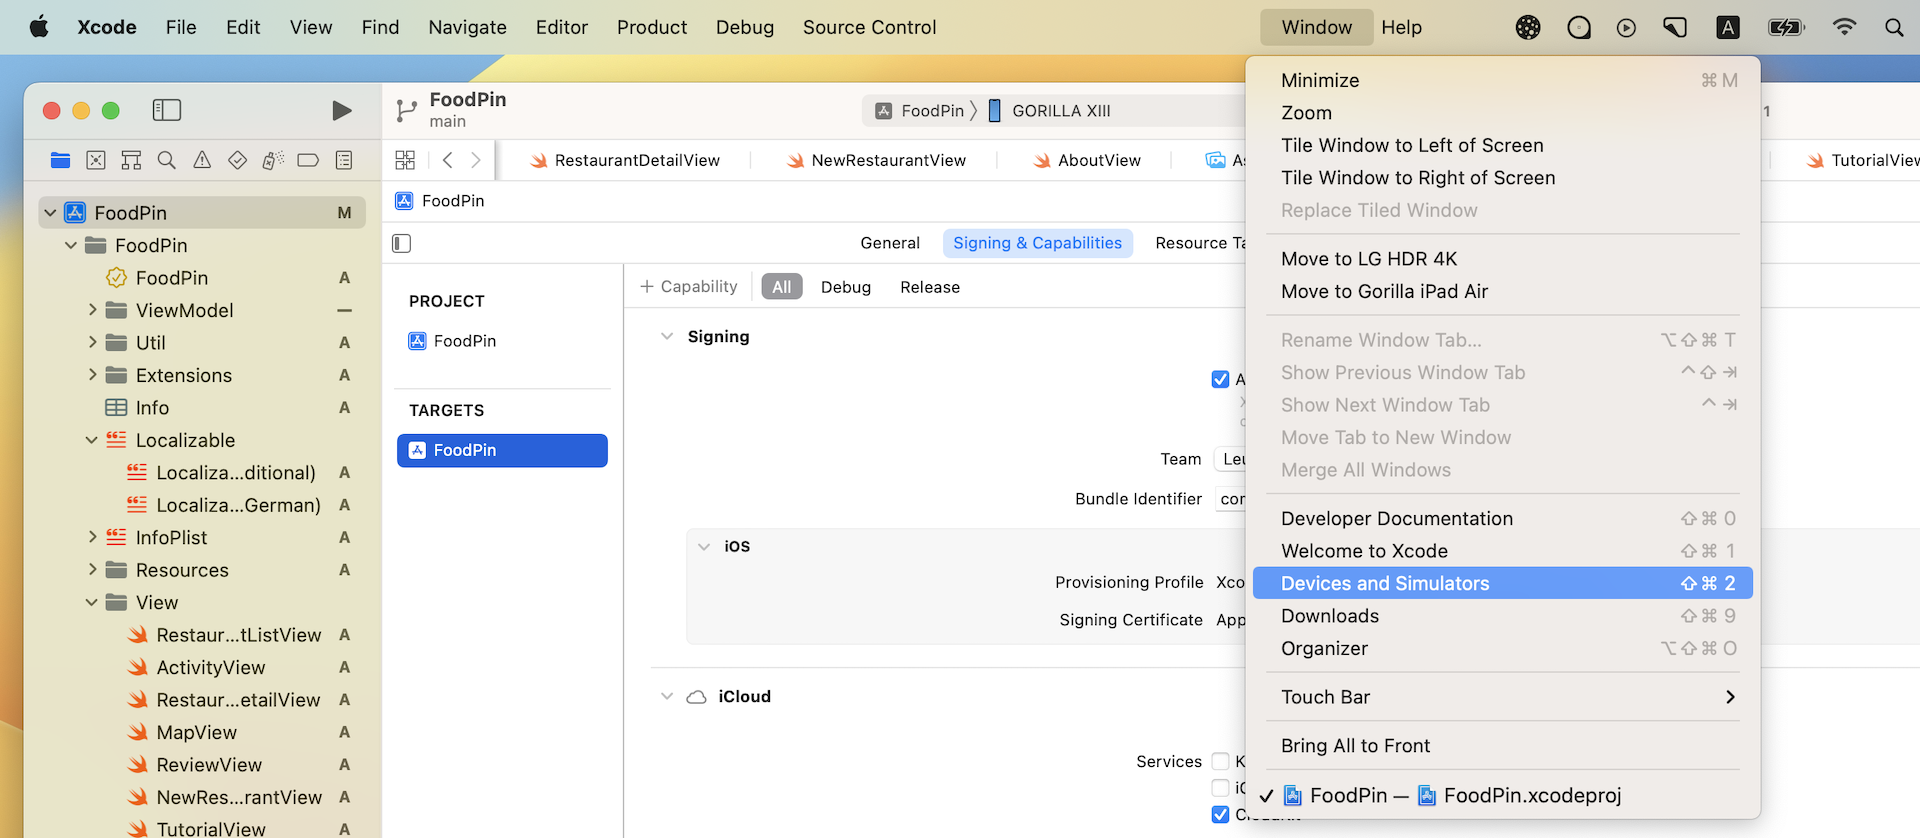
Choose your device under the Connected section. Then you should find a checkbox Connect via network. Tick it to enable Wi-Fi deployment.
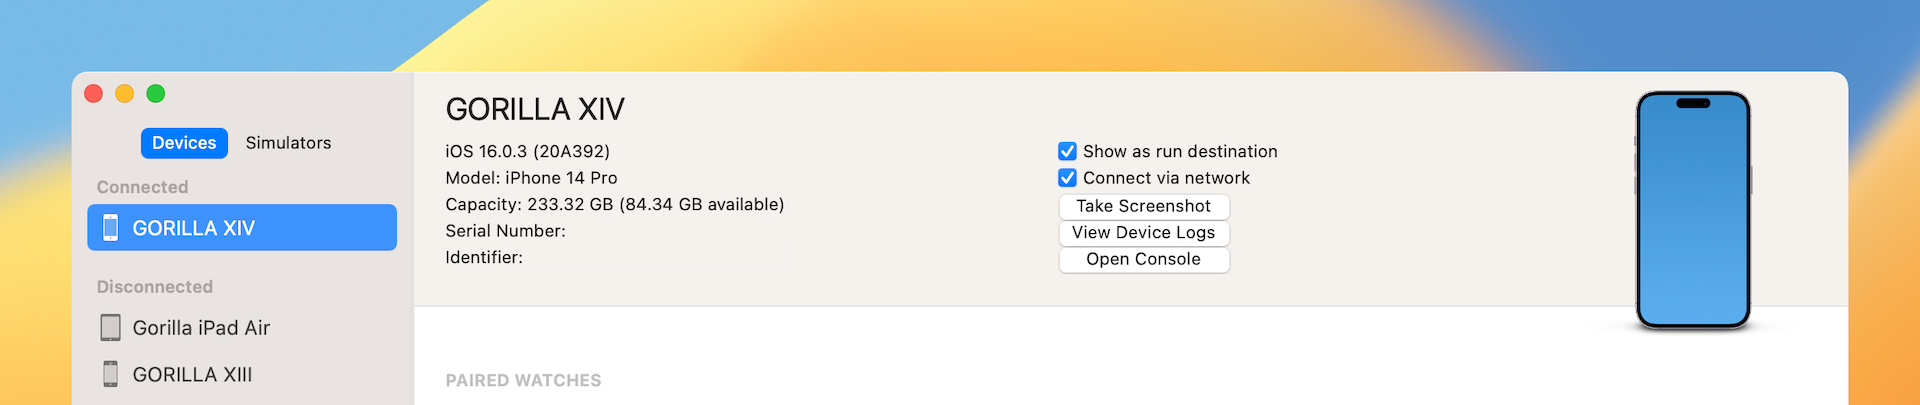
Now you can disconnect your iPhone (or iPad) from your Mac. Make sure your device and your Mac are connected to the same Wi-Fi network. You can then deploy your app over Wi-Fi.

Summary
Isn't it cool to run your app on a real device? You can now show off your app to your friends and family member. The latest version of Xcode makes your developer's life easier by simplifying the way to create a provisioning profile, app ID creation, and developer certificate generation. With a few clicks, you will be able to test your app on your devices. Needless to say, Wi-Fi deployment is a great add-on.
If you run into any issues of the app deployment, just post your question to our private Facebook group (https://facebook.com/groups/appcoda).