- Made by AppCoda
- Contact us / Support
- Tweet this book
- Preface
- 1. The Development Tools, the Learning Approach, and the App Idea
- 2. Your First Taste of Swift with Playgrounds
- 3. Build Your First App in Swift and SwiftUI
- 4. Designing UI Using Stack Views
- 5. Introduction to Prototyping
- 6. Understanding List and ForEach
- 7. Customizing List Views
- 8. Displaying Confirmations and Handling List View Selection
- 9. Understanding Struct, Project Organization and Code Documentation
- 10. List Deletion, Swipe Actions, Context Menus and Activity Controller
- 11. Working with Navigation View
- 12. Detail View Enhancement, Custom Fonts and Navigation Bar Customization
- 13. Understanding Colors, Swift Extensions and Dynamic Type
- 14. Working with Maps
- 15. View Animations and Blur Effect
- 16. Working with Observable Objects and Combine
- 17. Working with Forms and Camera
- 18. Working with Core Data
- 19. Adding a Search Bar Using Searchable
- 20. Building Walkthrough Screens Using TabView
- 21. Working with Tab View and Tab Bar Customizations
- 22. Displaying Web Content with WKWebView and SFSafariViewController
- 23. Working with CloudKit
- 24. Localizing Your App to Support Multiple Languages
- 25. Deploying and Testing Your App on a Real iOS Device
- 26. Beta Testing with TestFlight and CloudKit Production Deployment
- 27. Submit Your App to App Store
- 28. Adopting Haptic Touch
- 29. Working with User Notifications
- 30. Appendix - Swift Basics
- Published with GitBook
Chapter 6
Understanding List and ForEach

That's been one of my mantras - Focus and Simplicity. Simple can be harder than complex: You have to work hard to get your thinking clean to make it simple. But it's worth it in the end because once you get there, you can move mountains.
- Steve Jobs
Now that you have a basic understanding of prototyping and our demo app, we'll work on something more interesting and build a simple app using the List view in this chapter. Once you master the technique and list views, we'll start to build the Food Pin app.
First of all, what exactly is a list view in an iPhone app? If you have worked with UIKit before, a list view in SwiftUI is exactly the same as a table view in UIKit. A list view is one of the most common UI elements in iOS apps. Most apps (except games), in some ways, make use of table view to display content. The best example is the built-in Phone app. Your contacts are displayed in a table view. Another example is the Mail app. It uses a table view to display your mail boxes and emails. Not only designed for listing textual data, table view allows you to present the data in the form of images. The TED, Google+ and Airbnb are also good examples. Figure 6-1 displays a few more sample list-based apps. Though they look different, all the app UIs can be built using list views.

What we are going to do in this chapter is create a very simple list view and learn how to populate data (images and text) into it. If you've built a table view with UIKit before, you know it'll take you a bit of work to implement a simple table view. SwiftUI simplifies this whole process. With just a few lines of code, you will be able to list data in table form. Even if you need to customize the layout of the rows, it only requires minimal effort.
Feeling confused? No worries. You'll understand what I mean in a while.
Creating a SimpleTable Project
Don’t just read the book. If you’re serious about learning iOS programming, stop reading. Open your Xcode and code! This is the best way to learn programming.
Let's get started and create a simple app. The app is really simple. We'll just display a list of restaurants in a plain table view. We'll polish it in the next chapter. If you haven't fired up Xcode, launch it, and create a new project using the App template under iOS.
Click "Next" to continue. Again, fill in all the required options for the Xcode project:
- Product Name: SimpleTable – This is the name of your app.
- Team: Just leave it as it is.
- Organization Identifier: com.appcoda – It's actually the domain name written the other way round. If you have a domain, you can use your own domain name. Otherwise, you may use "com.
". - Bundle Identifier: com.appcoda.SimpleTable - This field should be automatically generated by Xcode.
- Interface: SwiftUI - Xcode now supports two ways to build UI. For this project, we use SwiftUI.
- Language: Swift – Xcode supports both Objective-C and Swift for app development. As this book is about Swift, we'll use Swift to develop the project.
- Use Core Data: [unchecked] – Do not select this option. You do not need Core Data for this simple project. We'll explain Core Data in later chapters.
- Include Tests: [unchecked] – Do not select this option. You do not need unit tests for this simple project.
Click "Next" to continue. Xcode then asks you where to save the SimpleTable project. Pick a folder on your Mac. Click "Create" to continue.
Creating a Simple List
Once the project is created, Xcode should show you the content of ContentView.swift. Select iPhone 14 Pro from the simulator list. I prefer to use this device to preview the UI.
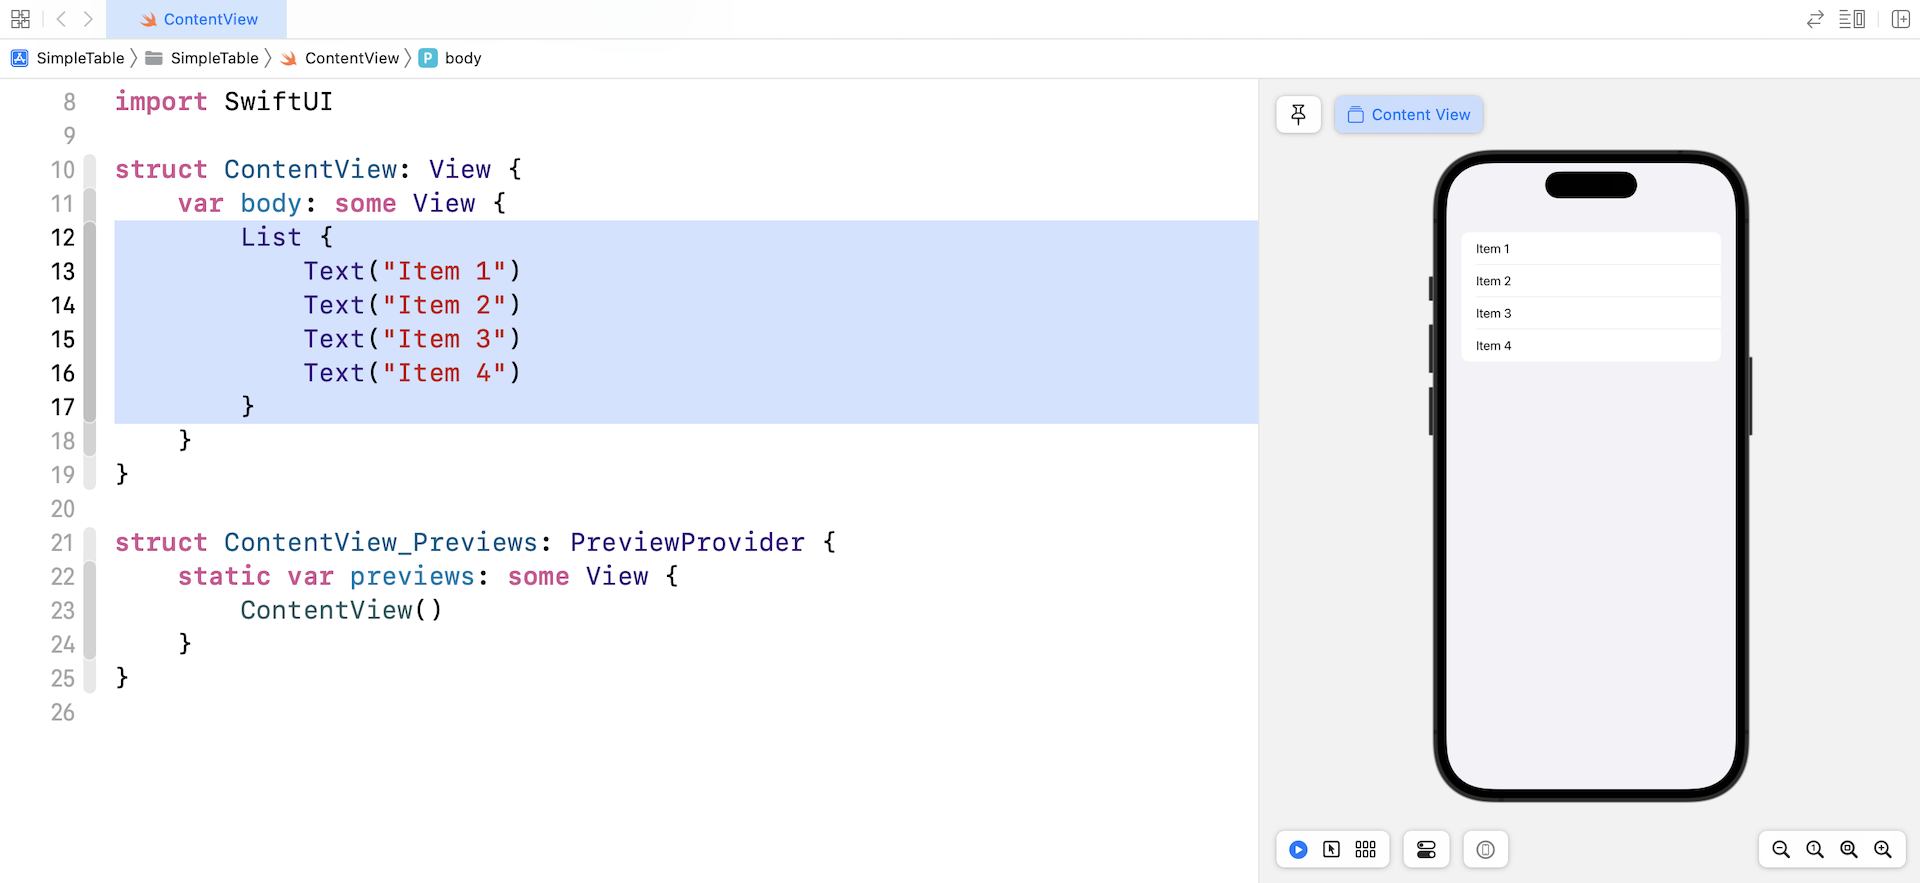
Let's begin with a simple list to understand the usage of the List view. Replace the code of the ContentView struct like this:
struct ContentView: View {
    var body: some View {
        List {
            Text("Item 1")
            Text("Item 2")
            Text("Item 3")
            Text("Item 4")
        }
    }
}
That's all the code you need to build a simple list or table. When you embed the text views in a List, the list view will present the data in rows. Here, each row shows a text view with different description.
The same code snippet can be written like this using ForEach:
struct ContentView: View {
    var body: some View {
        List {
            ForEach(1...4, id: \.self) { index in
                Text("Item \(index)")
            }
        }
    }
}
Since the text views are very similar, you can use ForEach in SwiftUI to create views in a loop.
A structure that computes views on demand from an underlying collection of of identified data.
- Apple's official documentation (https://developer.apple.com/documentation/swiftui/foreach)
You can provide ForEach with a collection of data or a range. But one thing you have to take note of is that you need to tell ForEach how to identify each of the items in the collection. The parameter id is for this purpose. Why does ForEach need to identify the items uniquely? SwiftUI is powerful enough to update the UI automatically when some/all items in the collection are changed. To make this possible, it needs an identifier to uniquely identify the item when it's updated or removed.
In the code above, we pass ForEach a range of values to loop through. The identifier is set to the value itself (i.e. 1, 2, 3, or 4). The index parameter stores the current value of the loop. Say, for example, it starts with the value of 1. The index parameter will have a value of 1.
Within the closure, which is the block of code inside ForEach, it is the code you need to render the views. Here, we create the text view. Its description will change depending on the value of index in the loop. That's how you create 4 items in the list with different titles.
Let me show you one more technique. The same code snippet can be further rewritten like this:
struct ContentView: View {
    var body: some View {
        List {
            ForEach(1...4, id: \.self) {
                Text("Item \($0)")
            }
        }
    }
}
You can omit the index parameter and use the shorthand $0, which refers the first parameter of the closure.
Let's further rewrite the code to make it even more simple. You can pass the collection of data to the List view directly. Here is the code:
struct ContentView: View {
    var body: some View {
        List(1...4, id: \.self) {
            Text("Item \($0)")
        }
    }
}
As you can see, you only need a couple lines of code to build a simple list (or table).
Presenting a List with Array of Items
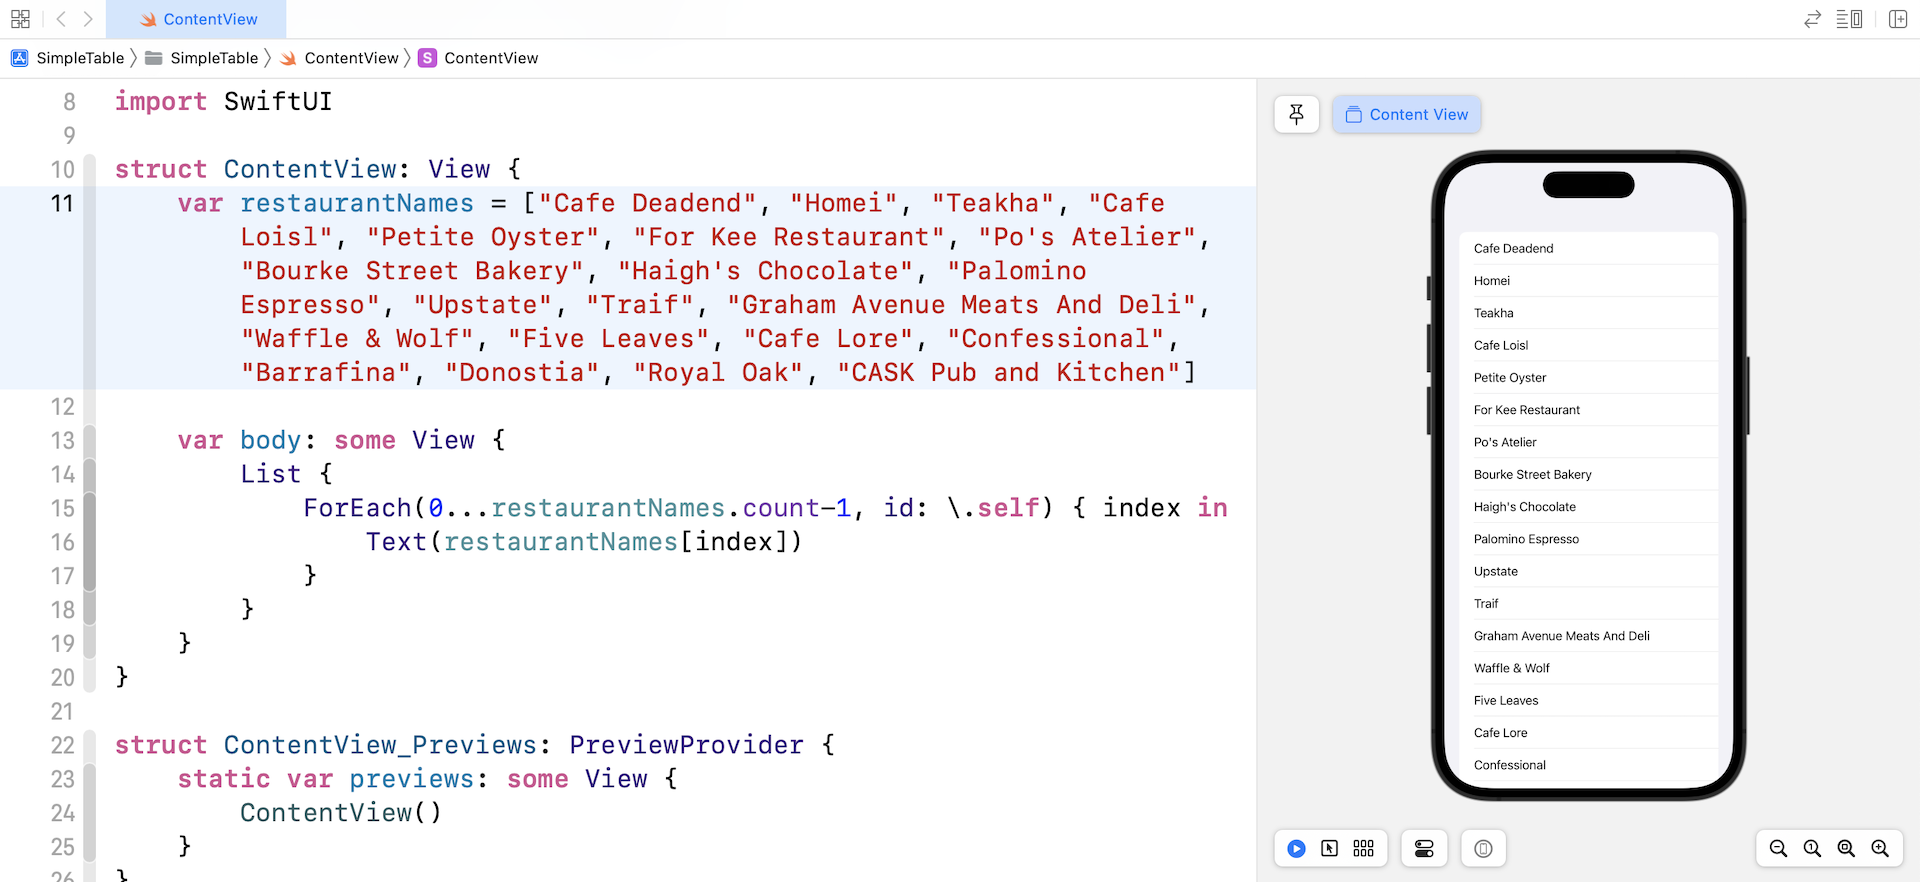
Now that you know how to create a simple list, let's see how to work with a more complex layout (see figure 6-4). In most cases, the items of a list view contain both text and images. How do you implement that? If you know how Image, Text, VStack, and HStack work, you should have some ideas about how to create a complex list.
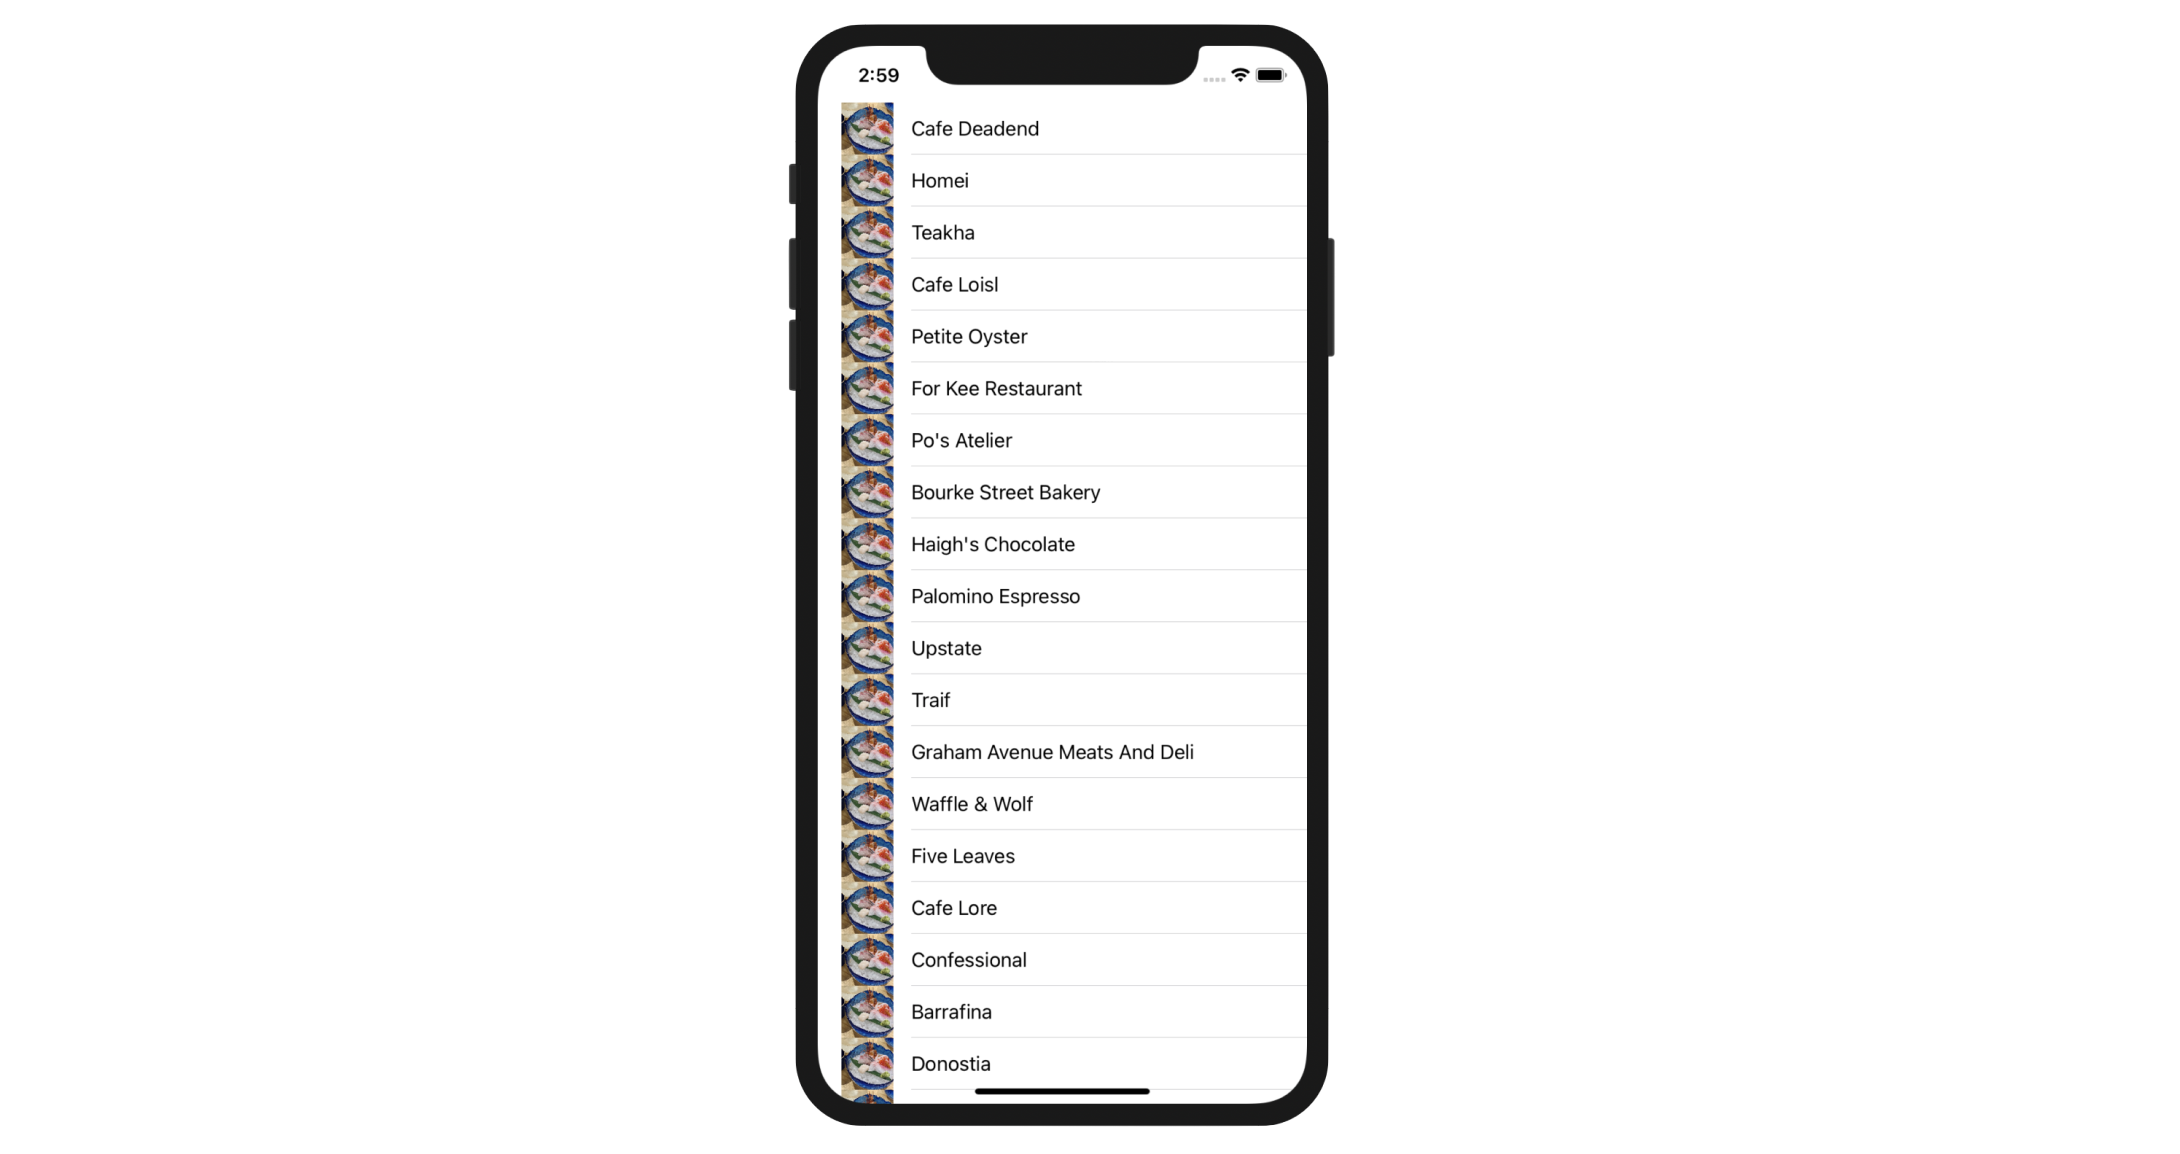
Now open ContentView.swift to code the UI. First, let's declare the variable restaurantNames and insert the following line of code in the struct:
var restaurantNames = ["Cafe Deadend", "Homei", "Teakha", "Cafe Loisl", "Petite Oyster", "For Kee Restaurant", "Po's Atelier", "Bourke Street Bakery", "Haigh's Chocolate", "Palomino Espresso", "Upstate", "Traif", "Graham Avenue Meats And Deli", "Waffle & Wolf", "Five Leaves", "Cafe Lore", "Confessional", "Barrafina", "Donostia", "Royal Oak", "CASK Pub and Kitchen"]
In this example, we use an array to store the table data. If you forgot the syntax of an array, refer to chapter 2. The values are separated by commas and surrounded by a pair of square brackets.
When I said "insert the code in the struct", it means you have to declare the variable within the curly bracket of the struct like this:
struct ContentView: View {

    var restaurantNames = ["Cafe Deadend", "Homei", "Teakha", "Cafe Loisl", "Petite Oyster", "For Kee Restaurant", "Po's Atelier", "Bourke Street Bakery", "Haigh's Chocolate", "Palomino Espresso", "Upstate", "Traif", "Graham Avenue Meats And Deli", "Waffle & Wolf", "Five Leaves", "Cafe Lore", "Confessional", "Barrafina", "Donostia", "Royal Oak", "CASK Pub and Kitchen"]

    .
    .
    .

}
An array is a fundamental data structure in computer programming. You can think of an array as a collection of data elements. Consider the restaurantNames array in the above code, it represents a collection of String elements. You may visualize the array like this:

Each of the array elements is identified or accessed by an index. An array with 10 elements will have indices from 0 to 9. That means restaurantNames[0] returns the first item of the array.
Let's continue to code and update the body variable like this:
var body: some View {
    List {
        ForEach(0...restaurantNames.count-1, id: \.self) { index in
            Text(restaurantNames[index])
        }
    }
}
We loop through each item of the array by using ForEach. As mentioned earlier, the first index of an array is 0. So, we set the range from 0 to restaurantNames.count-1. The count property returns us the total number of items in the array. The value of restaurantNames.count-1 is the last index of the array.
To present the restaurant names, we create a Text view in the code block of ForEach and pass the text view the name of the corresponding restaurant.
Once you updated the code, the preview should show you a list of restaurant names. To scroll through the list, you can drag it up and down using your mouse cursor.
Adding Thumbnails to the List View
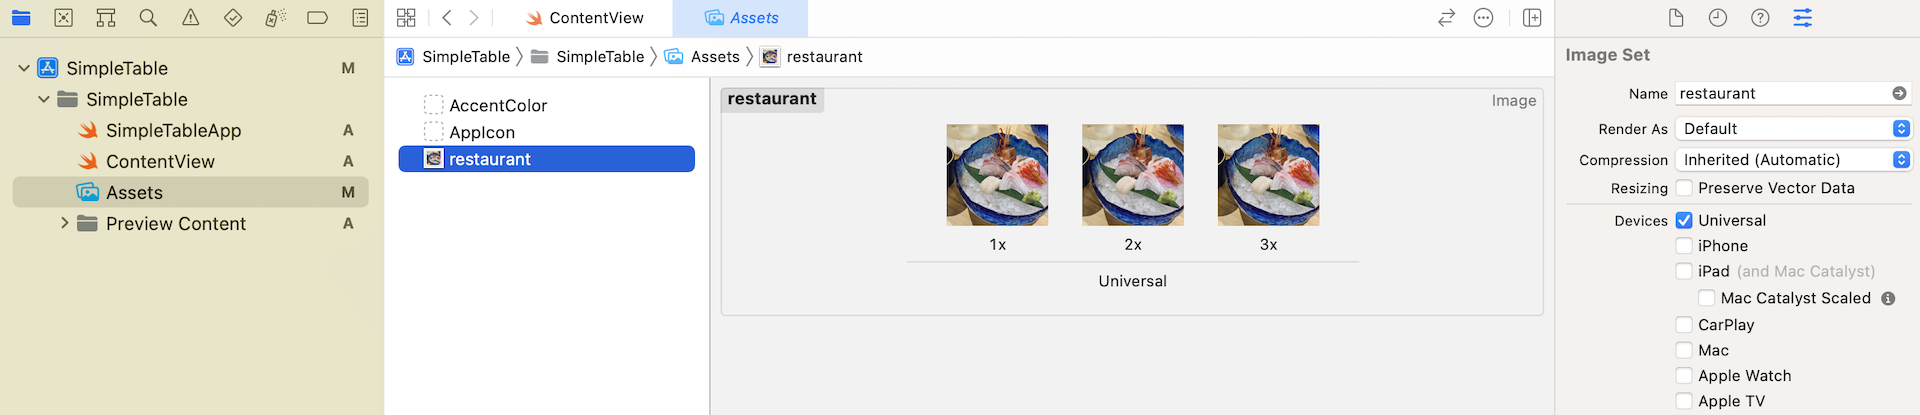
We still haven't added the image to each of the rows. First, download the sample images from http://www.appcoda.com/resources/swift53/simpletable-images1.zip. The zipped archive contains three image files. Unzip the file and drag the images from Finder to the asset catalog (Assets.xcassets).
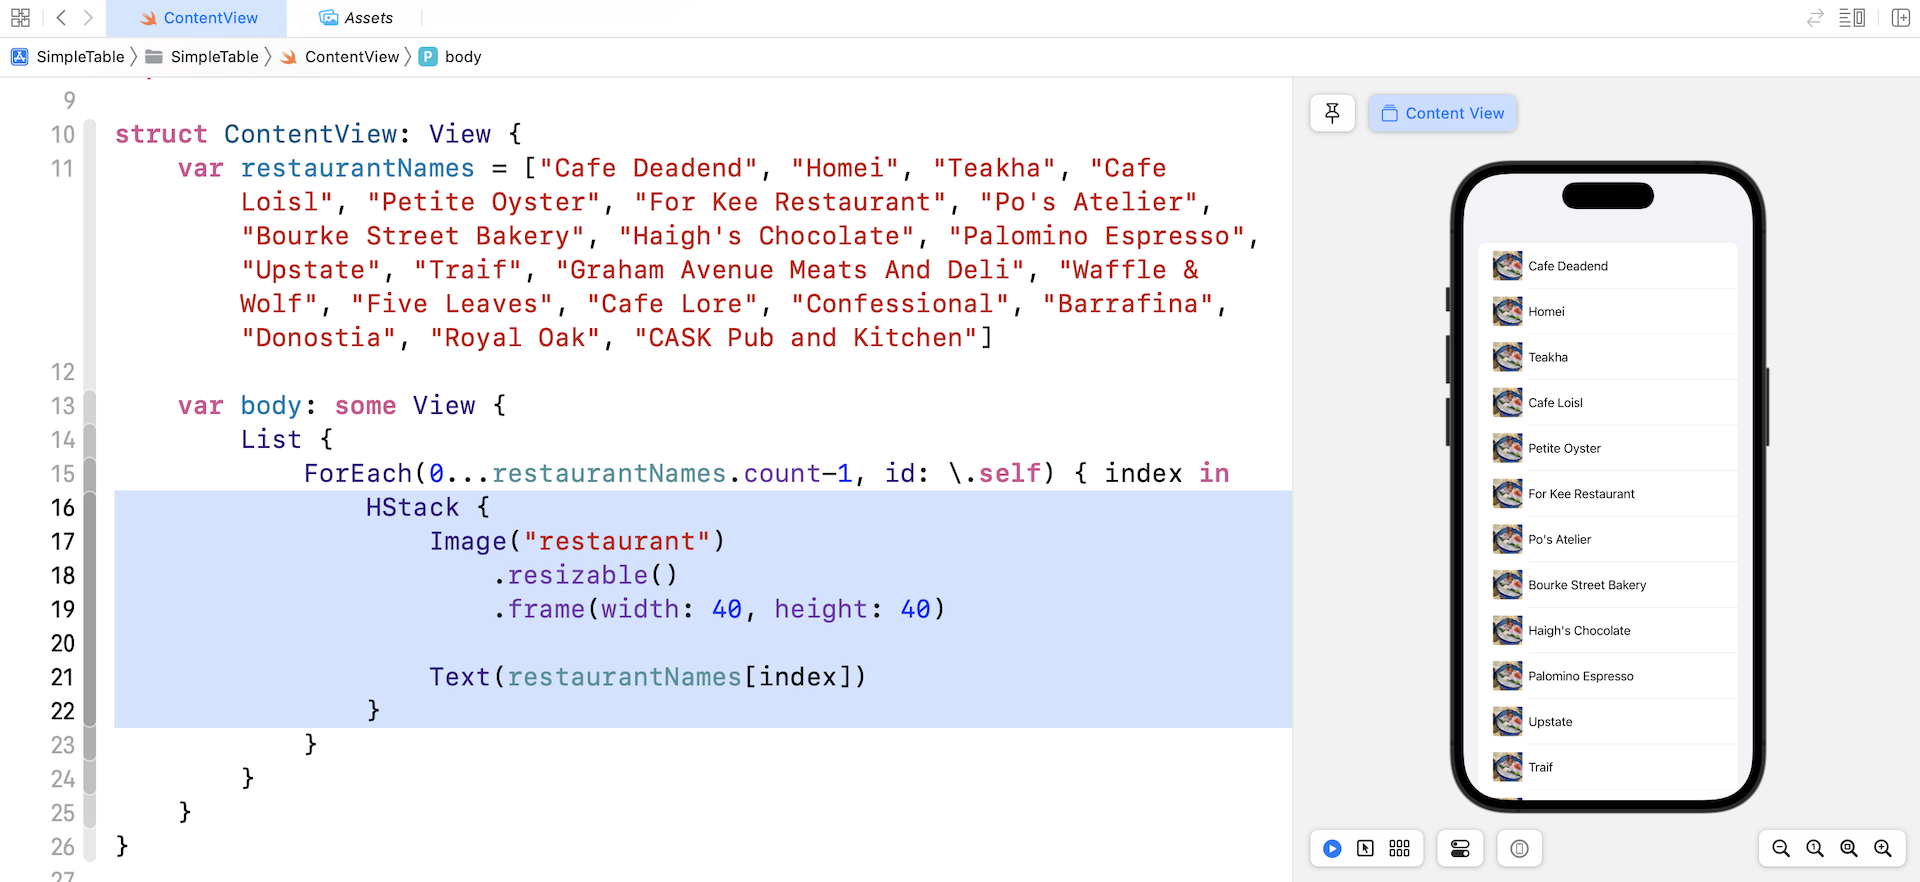
Now edit ContentView and replace the Text view with the following HStack view:
HStack {
    Image("restaurant")
        .resizable()
        .frame(width: 40, height: 40)

    Text(restaurantNames[index])
}
We use the Image view to load the restaurant image. To resize the image, we attach the resizable modifier and the frame modifier to scale down the image to 40x40 points.
After the code change, the preview should display the image in each row.
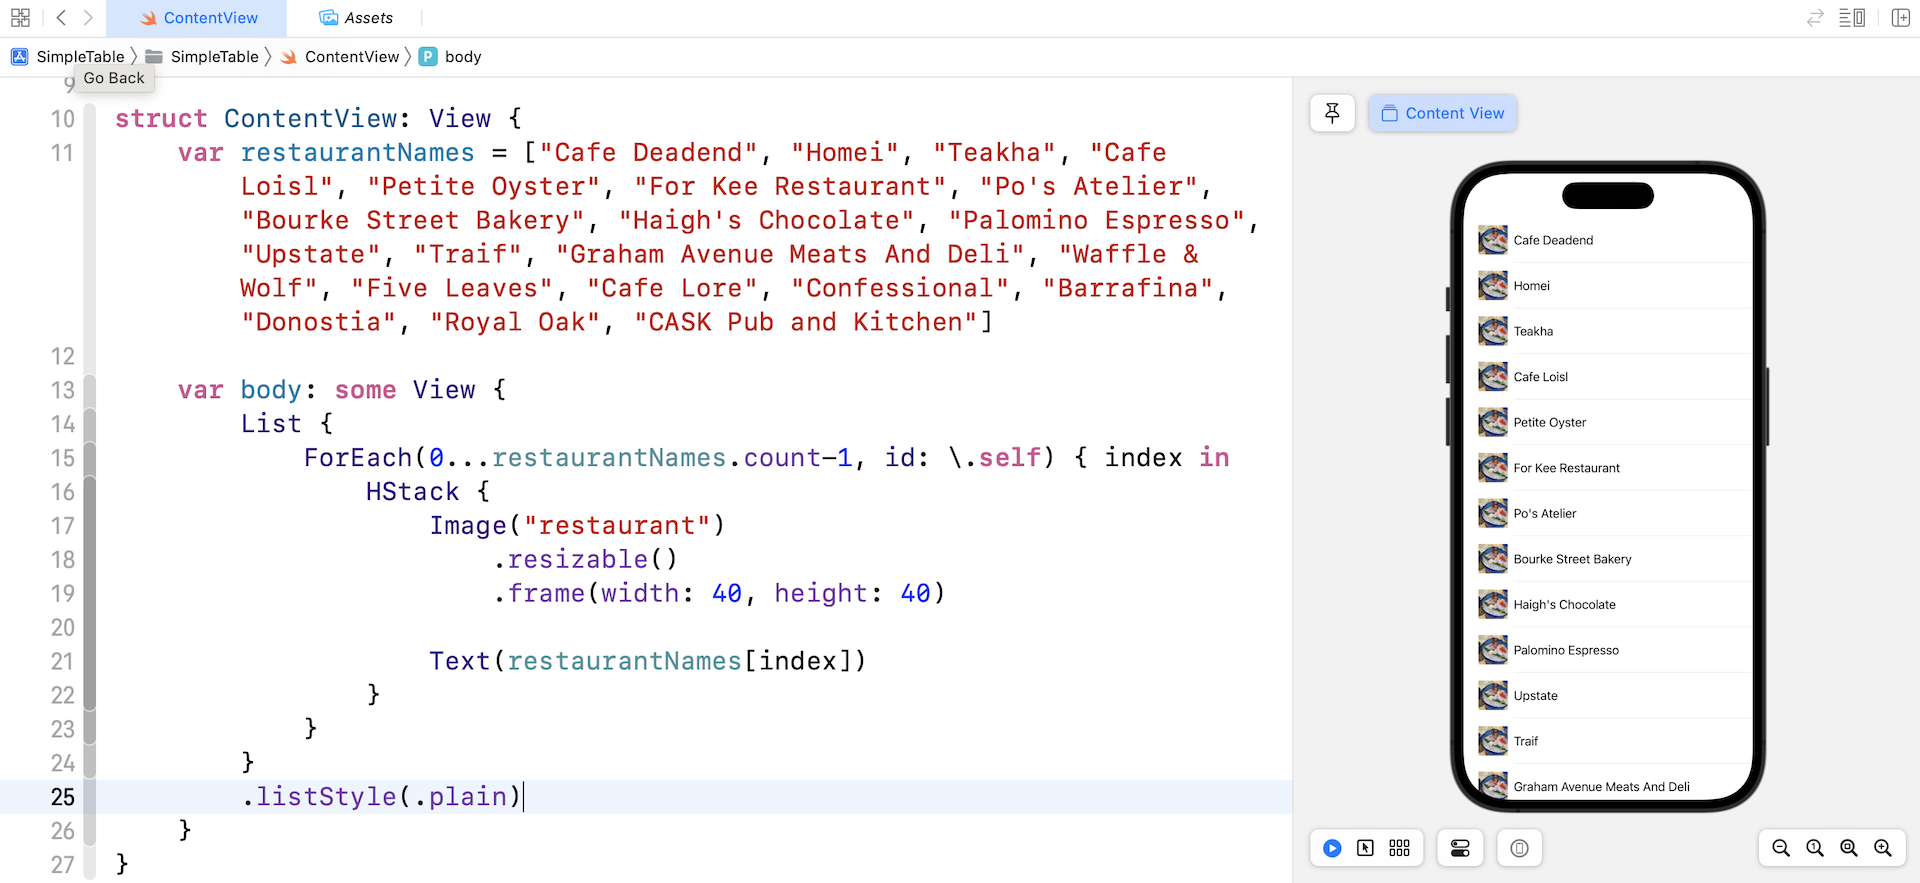
Changing the List View's Style
By default, the List view is set to use the inset grouped style on iOS 15. The inset grouped list style displays a background color and adds padding around the list view. To change the list style, you can attach the listStyle modifier to the List view like this:
List {
    .
    .
    .
}
.listStyle(.plain)
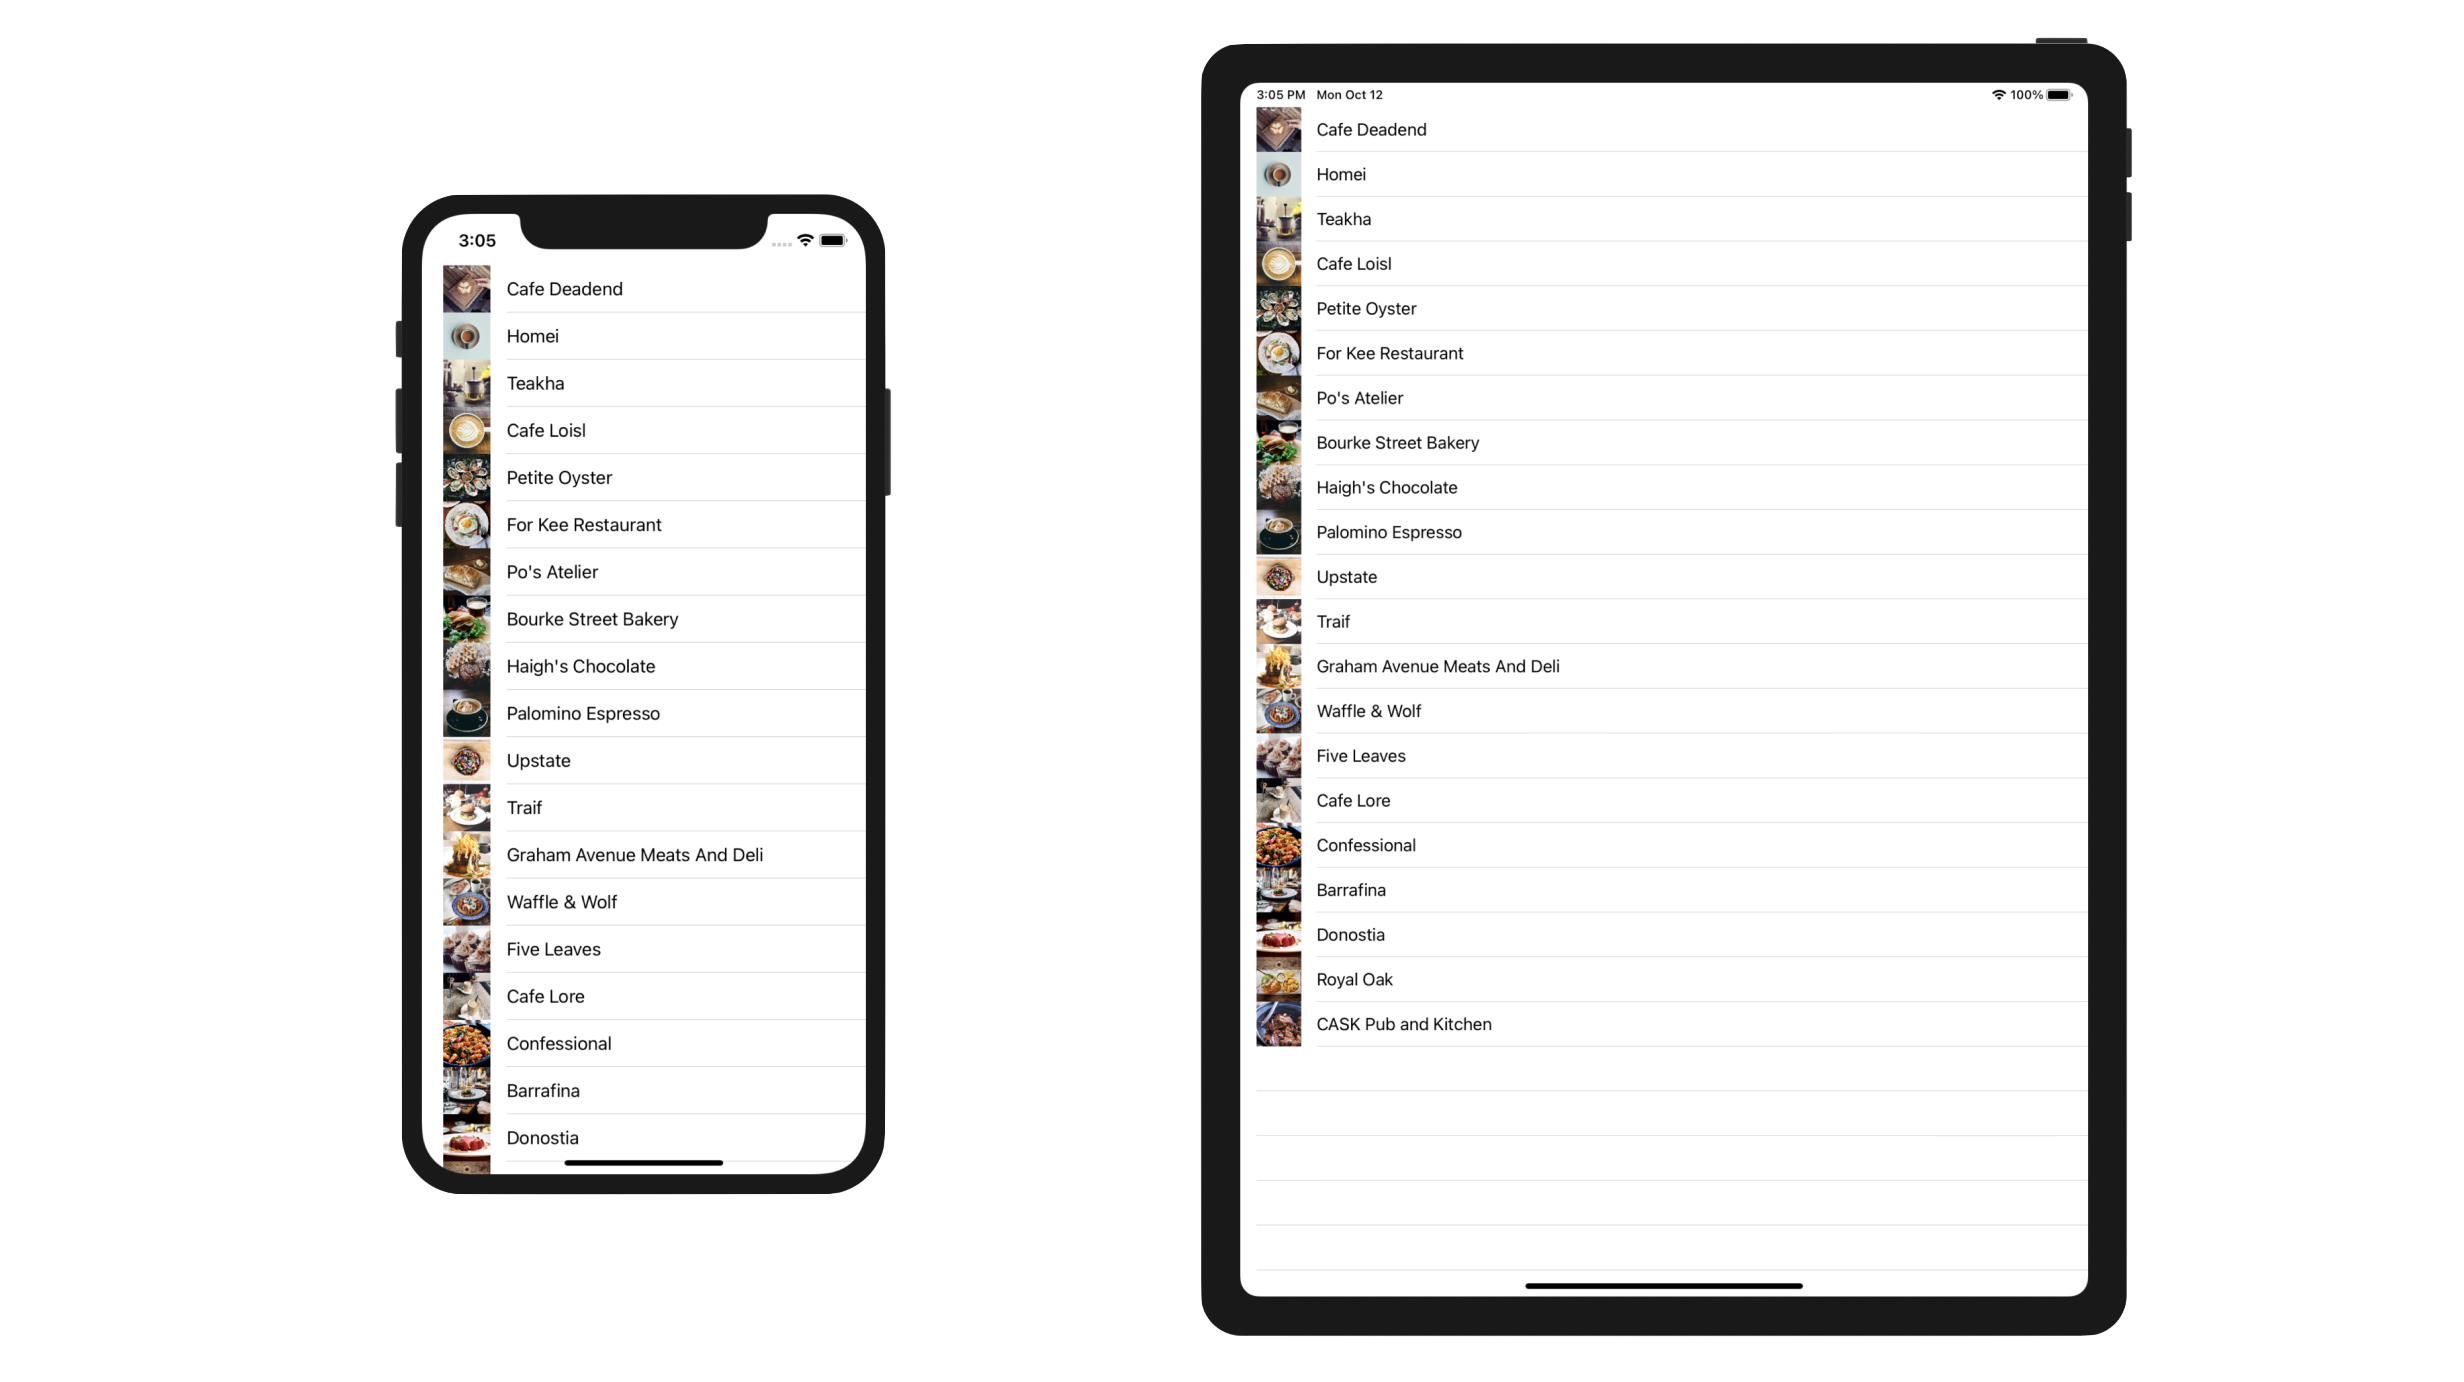
To use the plain style, you can set it to .plain or PlainListStyle(). The figure below shows you the result.
Alternative Ways to Present the List
Before we close the chapter, I hope you understand that there are multiple ways to implement a list (and other features). For now, we specify the range of indices of restaurantNames in the ForEach like this:
ForEach(0...restaurantNames.count-1, id: \.self) { index in
  .
  .
  .
}
Actually, you can rewrite the code using the .indices property to get the range of the available items:
ForEach(restaurantNames.indices, id: \.self) { index in
   .
   .
   .
}
You will achieve the same result if you update the code in your program. There is another way to loop through the items in the restaurantNames array. Instead of using indices, you can pass the whole array to ForEach like this:
ForEach(restaurantNames, id: \.self) { restaurantName in
    HStack {
        Image("restaurant")
            .resizable()
            .frame(width: 40, height: 40)

        Text(restaurantName)
    }
}
In the closure, we have a parameter named restaurantName. This restaurantName parameter stores the current name of the loop, so we can simply use it in the Text view.
You can give it a try and change your code. The preview should stay the same.
Exercise #1
The demo app displays the same image for all table cells. Try to tweak the app such that it shows a different image in each cell (hint: Create another array for the images). You can download the image pack from http://www.appcoda.com/resources/swift4/simpletable-images-2.zip. Figure 8-19 shows the resulting screen.
In case you do not know how to complete the exercise, no worries. I will go through it with you in the next chapter.
Credit: The images used in this demo project are provided by unsplash.com.
Summary
List view is one of the most commonly used elements in SwiftUI. If you thoroughly understood the materials and built the app, you should have a good idea of how to create your own list view.
I tried to keep everything simple in the demo app. In a real world app, the table data is generally not 'hard-coded'. Usually, it's loaded from a file, database or somewhere else. We'll talk about in later chapters. Meanwhile, make sure you thoroughly understand how the list view works. Otherwise, go back to the beginning and study the chapter again.
For reference, you can download the complete Xcode project from http://www.appcoda.com/resources/swift57/swiftui-list-view.zip.