- Made by AppCoda
- Contact us / Support
- Tweet this book
- Preface
- 1. The Development Tools, the Learning Approach, and the App Idea
- 2. Your First Taste of Swift with Playgrounds
- 3. Build Your First App in Swift and SwiftUI
- 4. Designing UI Using Stack Views
- 5. Introduction to Prototyping
- 6. Understanding List and ForEach
- 7. Customizing List Views
- 8. Displaying Confirmations and Handling List View Selection
- 9. Understanding Struct, Project Organization and Code Documentation
- 10. List Deletion, Swipe Actions, Context Menus and Activity Controller
- 11. Working with Navigation View
- 12. Detail View Enhancement, Custom Fonts and Navigation Bar Customization
- 13. Understanding Colors, Swift Extensions and Dynamic Type
- 14. Working with Maps
- 15. View Animations and Blur Effect
- 16. Working with Observable Objects and Combine
- 17. Working with Forms and Camera
- 18. Working with Core Data
- 19. Adding a Search Bar Using Searchable
- 20. Building Walkthrough Screens Using TabView
- 21. Working with Tab View and Tab Bar Customizations
- 22. Displaying Web Content with WKWebView and SFSafariViewController
- 23. Working with CloudKit
- 24. Localizing Your App to Support Multiple Languages
- 25. Deploying and Testing Your App on a Real iOS Device
- 26. Beta Testing with TestFlight and CloudKit Production Deployment
- 27. Submit Your App to App Store
- 28. Adopting Haptic Touch
- 29. Working with User Notifications
- 30. Appendix - Swift Basics
- Published with GitBook
Chapter 5
Introduction to Prototyping

If a picture is worth 1000 words, a prototype is worth 1000 meetings.
- @IDEO
How many times have you heard of someone say, "I got an app idea!"
Probably you already got one. So what's the next step?
Now that you have some basic concepts of iOS programming and SwiftUI, should you just open Xcode and start coding your app?
As I always said, coding is just a part of the app development process. Before you begin to code your app, you will have to go through other preparation stages. This is not a book about software engineering. I am not going to discuss every stage of the software development lifecycle. Instead, I want to focus on prototyping, which is an integral part of the mobile development process.
Every time I mentioned prototype to beginners, two questions pop up:
- What's a prototype?
- Why prototyping?
A prototype is an early model of a product used for testing a concept or visualizing an idea. Prototyping has been used in many industries. Before constructing a building, an architect needs to draw a plan of the building and make a model of the building. An aircraft company builds a prototype of an aircraft to test any design flaws before building and assembling an airplane. Software companies also build software prototypes to explore an idea before creating the actual application. In the context of app development, a prototype can be an early sample of an app which is not fully functional and contains a basic UI or even sketches.
Prototyping is the process of developing a prototype and offers many advantages. First, it helps you visualize your idea and better communicate your idea to your team members and users. While you are now learning and developing an app on your own, app development rarely happens like that in a real-world environment.
You probably work in a team of programmers and UI/UX designers to build apps for your clients. Even if you're an indie (or solo) developer, you're probably developing an app that targets a specific group of users or a niche market. Or you hire a designer to design the app UI for you. You have to find some ways to communicate the app idea with your designer or test your idea with your potential users. You can explain your idea in words, tell your users how the app works but this is not effective enough. There is no better way than showing your app idea as a fully functional demo.
By creating a prototype, you can involve everyone (developers, designers, and users) of the project earlier. All the involved parties will better understand how the app works and figure out what's missing at the early development stage, way ahead of the final product is built.
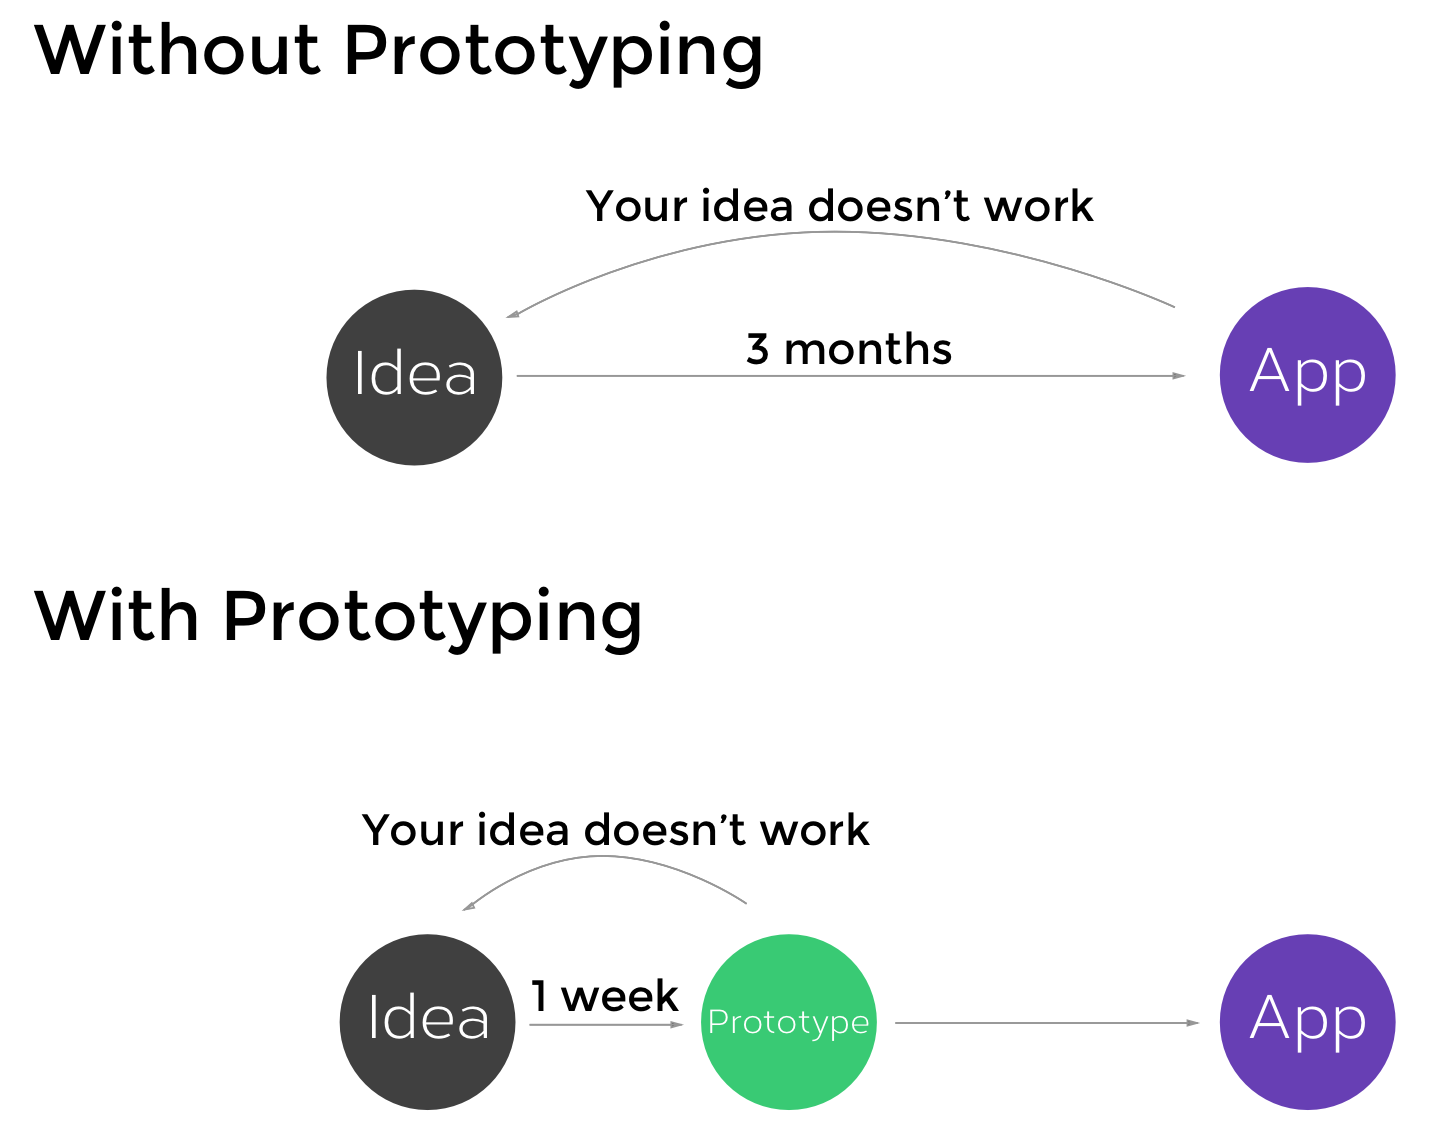
Prototyping also allows you to test an idea without building an actual app. You can show your prototype to your potential users and get early feedback before an app is built. This saves you both time and money. Figure 7-1 illustrates the benefits of prototyping.
Sketching Your App Ideas on Paper
Now that you have an app idea, how can you create a prototype for your app?
A prototype can take many forms. It can be paper-based or digital-based. I always start with hand-drawn concepts and highly recommend you use paper to sketch out your app design. It's the simplest way to create an app prototype. For me, paper sketching is still the best way to quickly record all the ideas in my head. Of course, you can argue that iPad is better for you. Just use whatever works the best for you.
Tips: You can find some good printable sheet templates at http://sneakpeekit.com
For example, I have an idea for building a food app that allows me to save my favorite restaurants. While Yelp is good, I want to build an app for me to create a personal restaurant guide. The app will have these features:
- List the favorite restaurant at home screen
- Create a restaurant record and import a photo from photo album as the restaurant image
- Save the restaurant locally and share it with other foodies in the world
- Show the location of a restaurant on maps
- View restaurants shared by other foodies
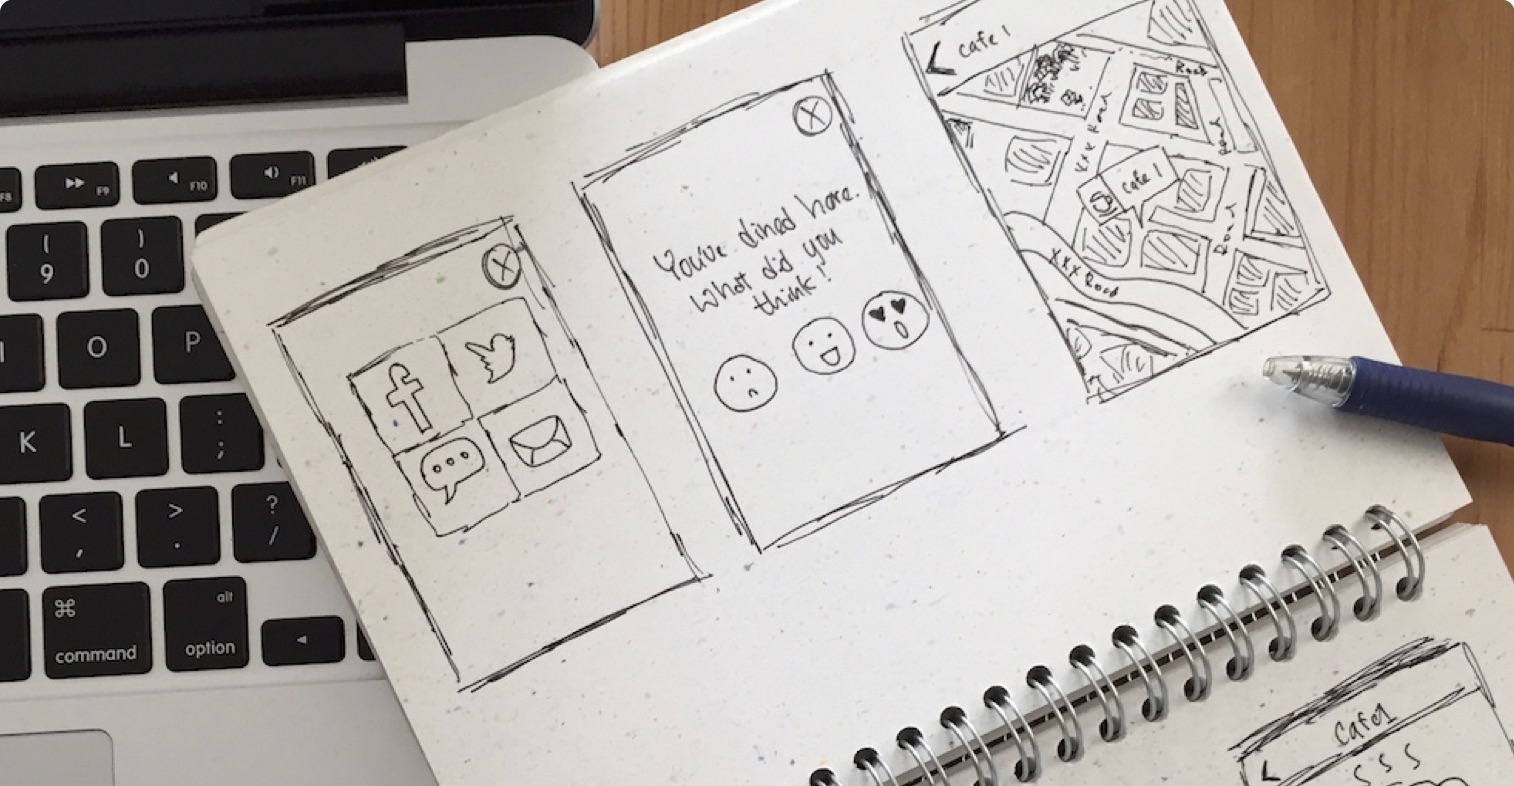
I think people may like this idea too. What I used to do is take out a piece of paper and draw my design. Some people said they're not good at drawing. You don't have to be an artist to draw your app design. My drawing did not look good either (see figure 7.2) but the point is to visualize your app idea and figure out the basic structure of your app.
Wireframing Your App
You ofter hear the term "wireframe". What I just demonstrated is a way to wireframe an app. The purpose of wireframing is not in the details. We focus on visualizing the structure and organization of the app without concerning about the color, graphics, and visual design. You can think of wireframes the foundation of your app. It lets you better understand the features you want to build and the navigation flow of the app.
Okay, you don't want to draw by hand. Are there any tools you can use to wireframe your mobile app?
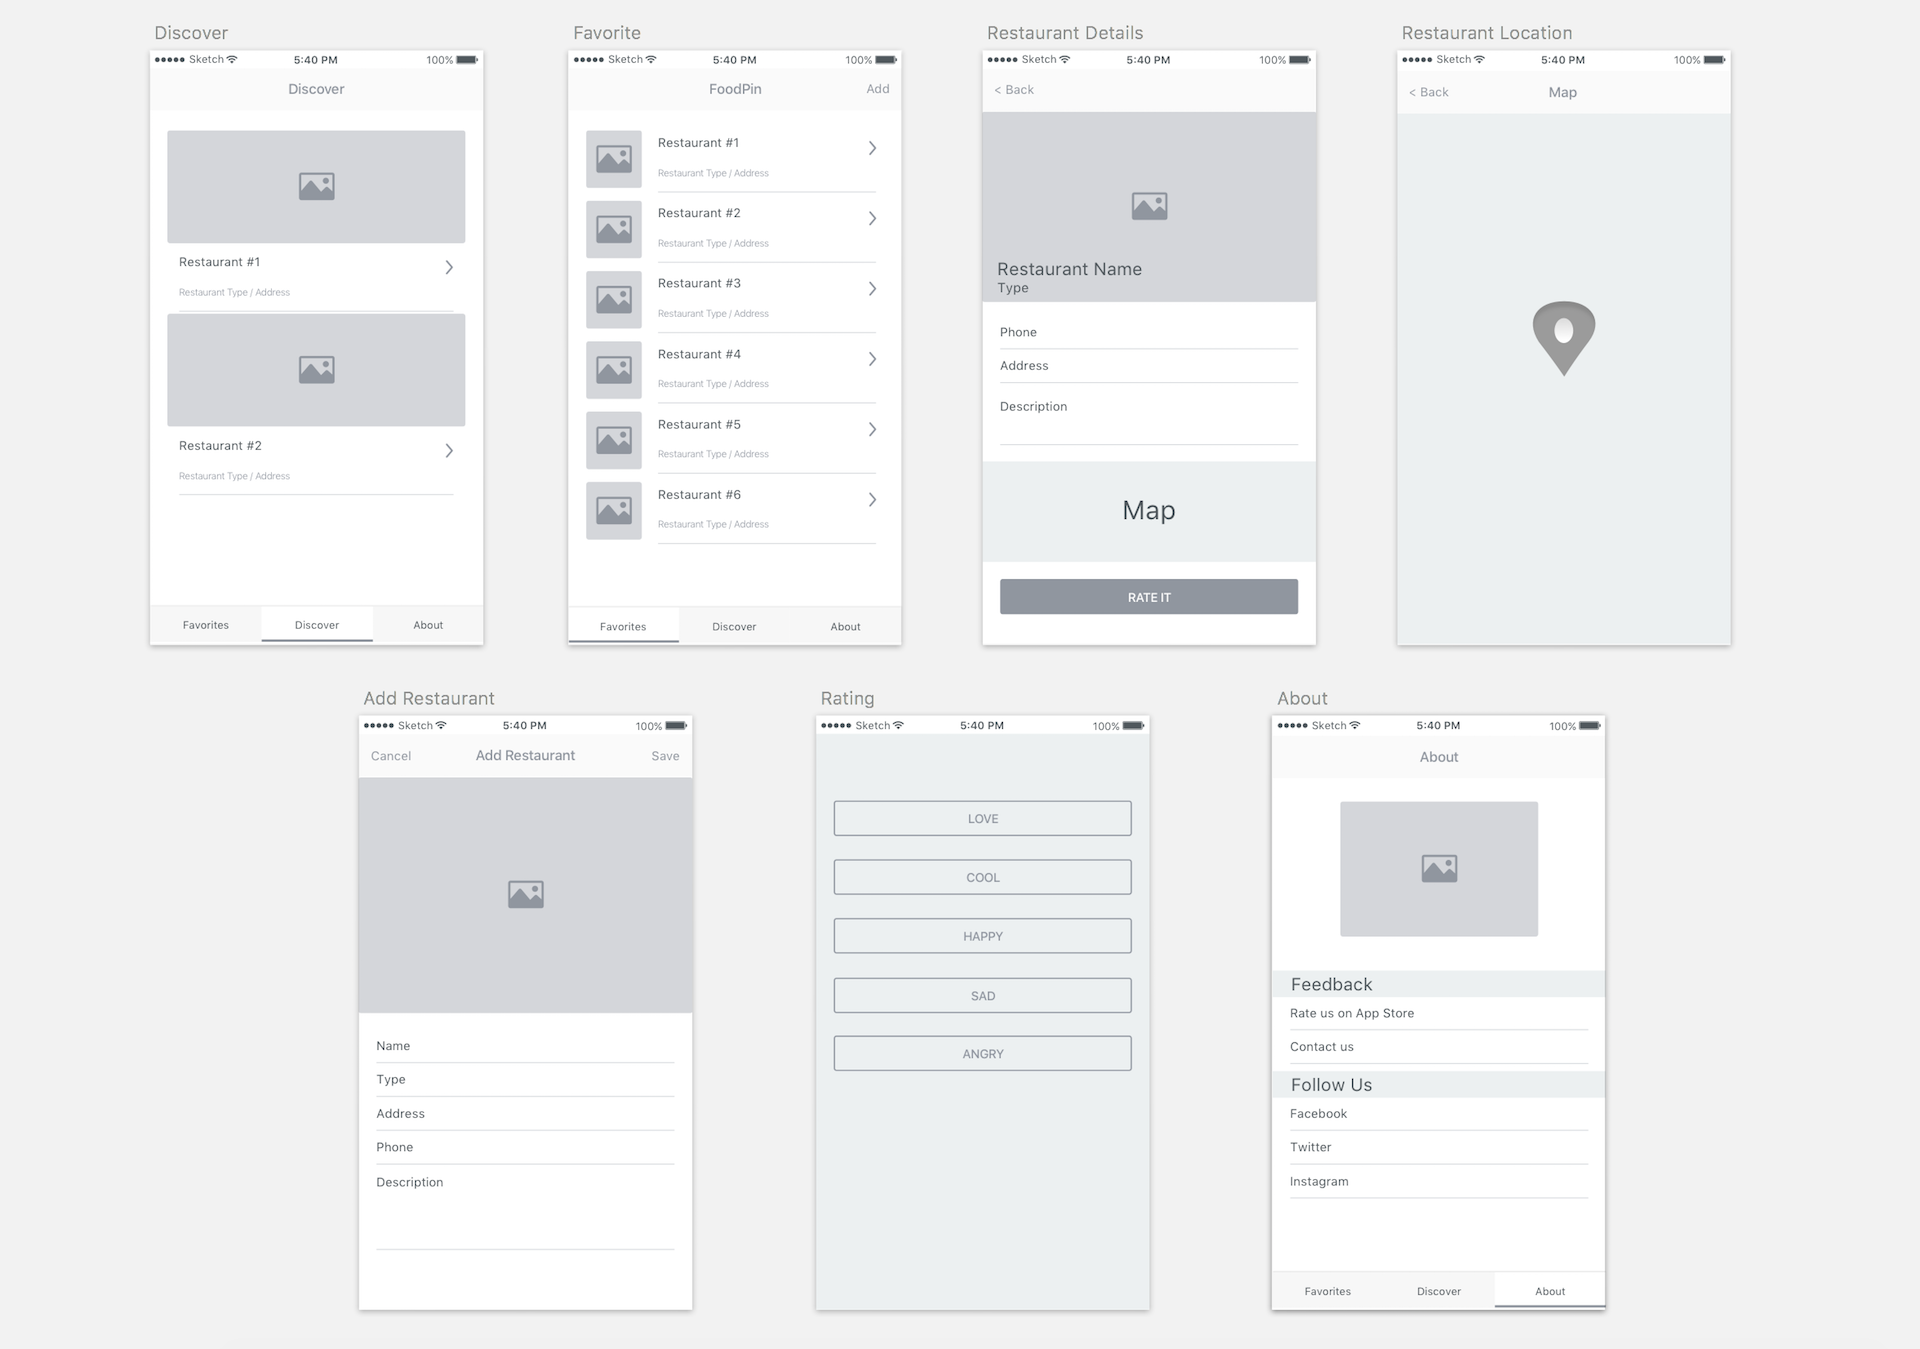
You use boxes, circles, and lines to wireframe an app. So basically, you can use whatever drawing tool you prefer to create the wireframe. For me, I use Sketch, which I will further introduce to you in the later section. Figure 7-3 shows a sample wireframe of a mobile app created using the software.
Make Your Sketch/Wireframe Interactive
You already sketch your app idea on paper. You may even wireframe your app. Can you make it even better to demonstrate how it works and show your potential users its workflow? There are a number of tools for developers to build interactive prototypes which I will further discuss in the next section. Meanwhile, I want to show you how to create a simple prototype using a very handy tool called POP (https://marvelapp.com/pop/) from Marvel.
POP was first developed by a Taiwan-based startup called Woomoo. This prototyping app is brilliant and has once been featured by Apple. Later, Woomoo's team was acquired by Priceline, while its flagship prototyping app POP found its new home at Marvel, a U.K. startup.
The POP app can easily turn your hand drawings or wireframes into a working prototype. It lets you capture your drawings using a camera or import them from your photo album. To interact with the images, the app offers various transitions for you to link your screens up. You'll understand what I mean in a while.
First, install the POP app on your iPhone and download the wireframe images from http://www.appcoda.com/resources/swift4/FoodPinWireframe.zip. You can unzip the images and import them to your iPhone via AirDrop.
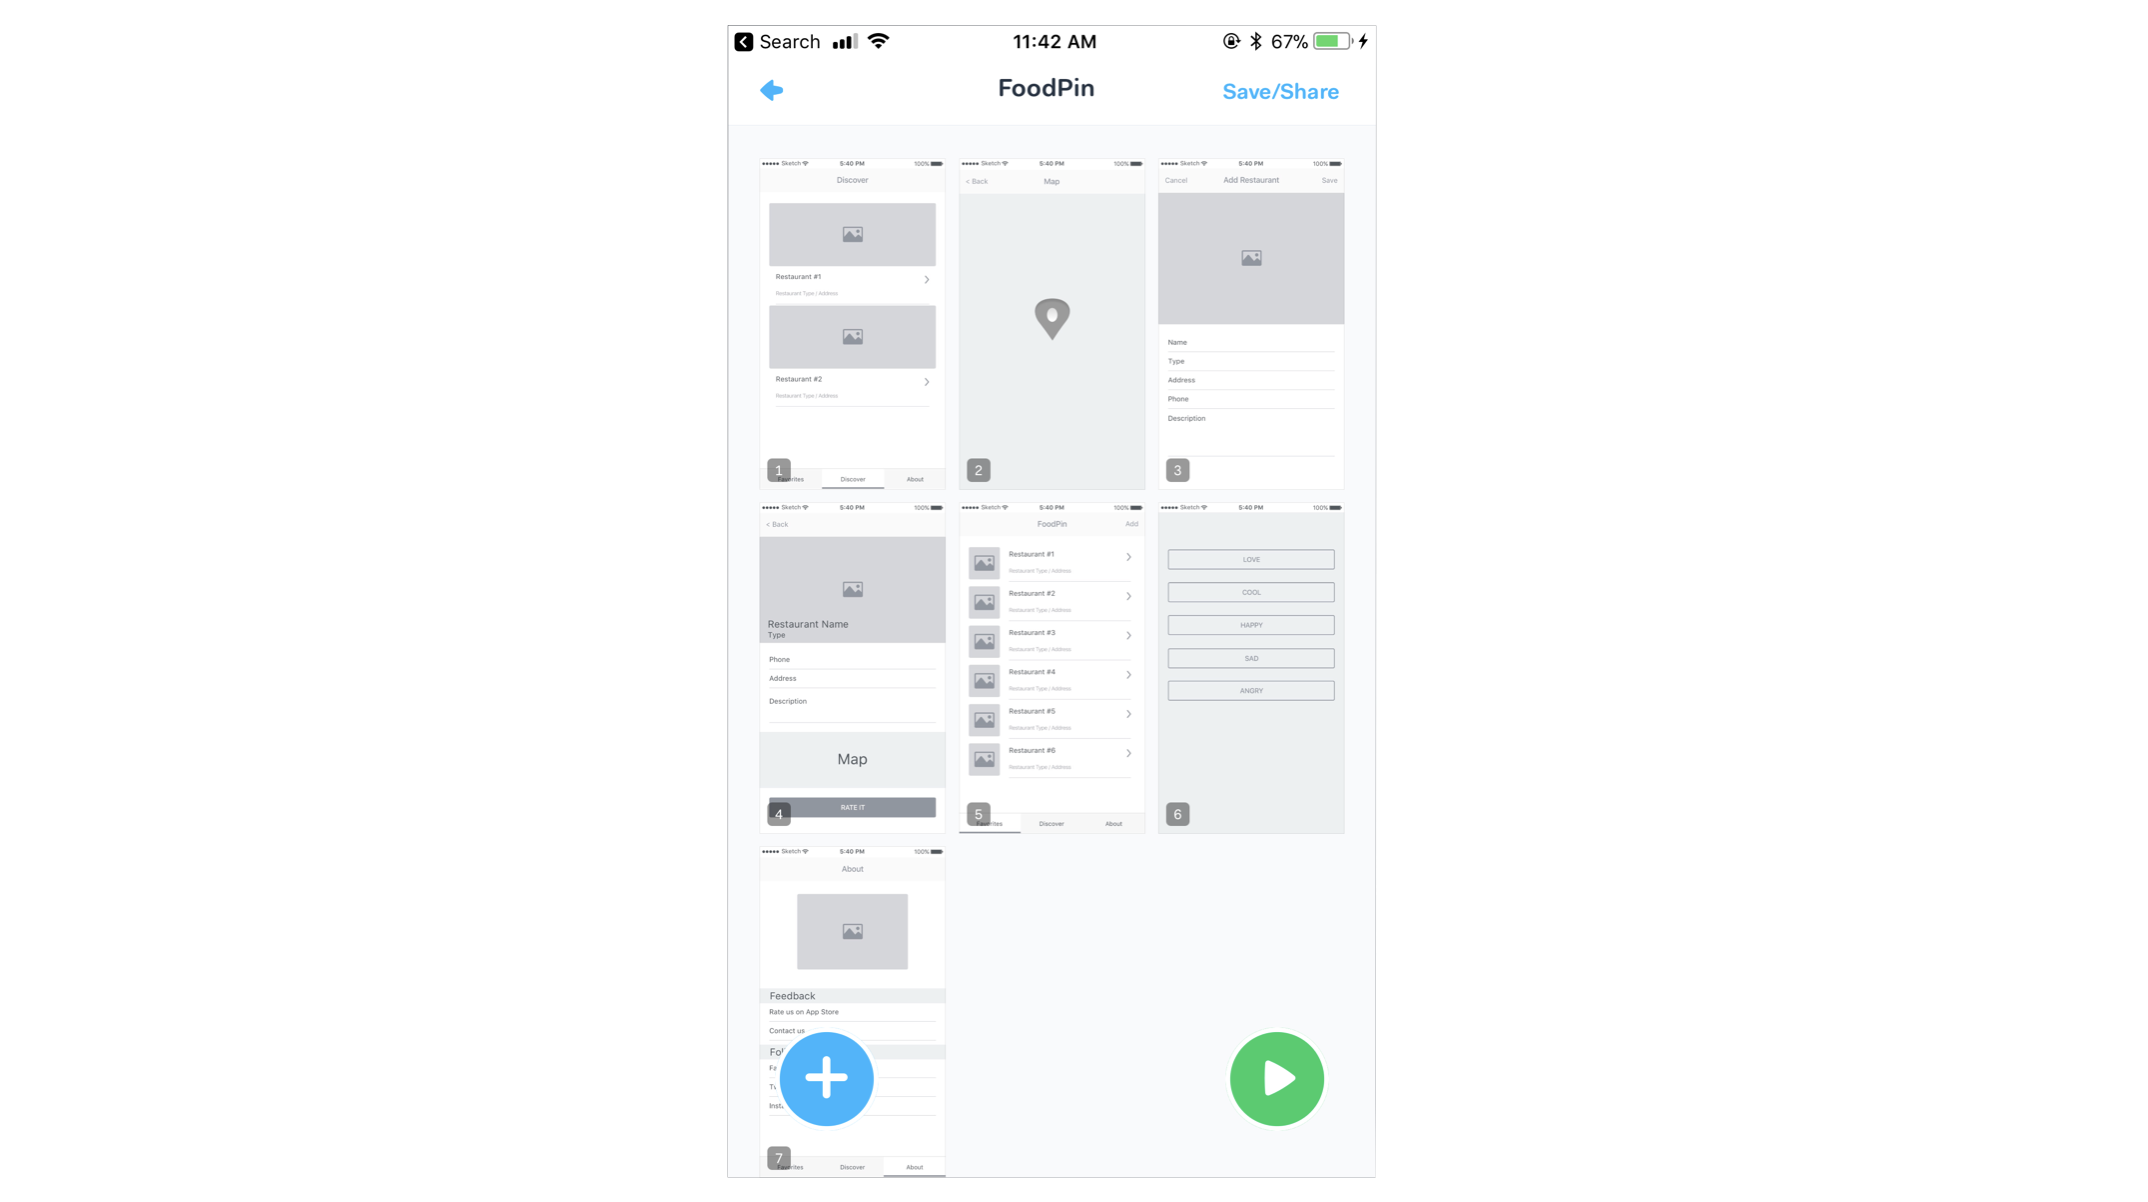
POP is very easy to use. When you launch it for the first time, you will see your project listing. Click the + icon to create a new project and select your preferred device. Give your project a name (e.g. Food Pin). Once the project is created, click the + icon and choose the Phone option to import your wireframe images. Alternatively, you can capture your sketches using the built-in camera. Figure 7-4 shows a sample POP project.
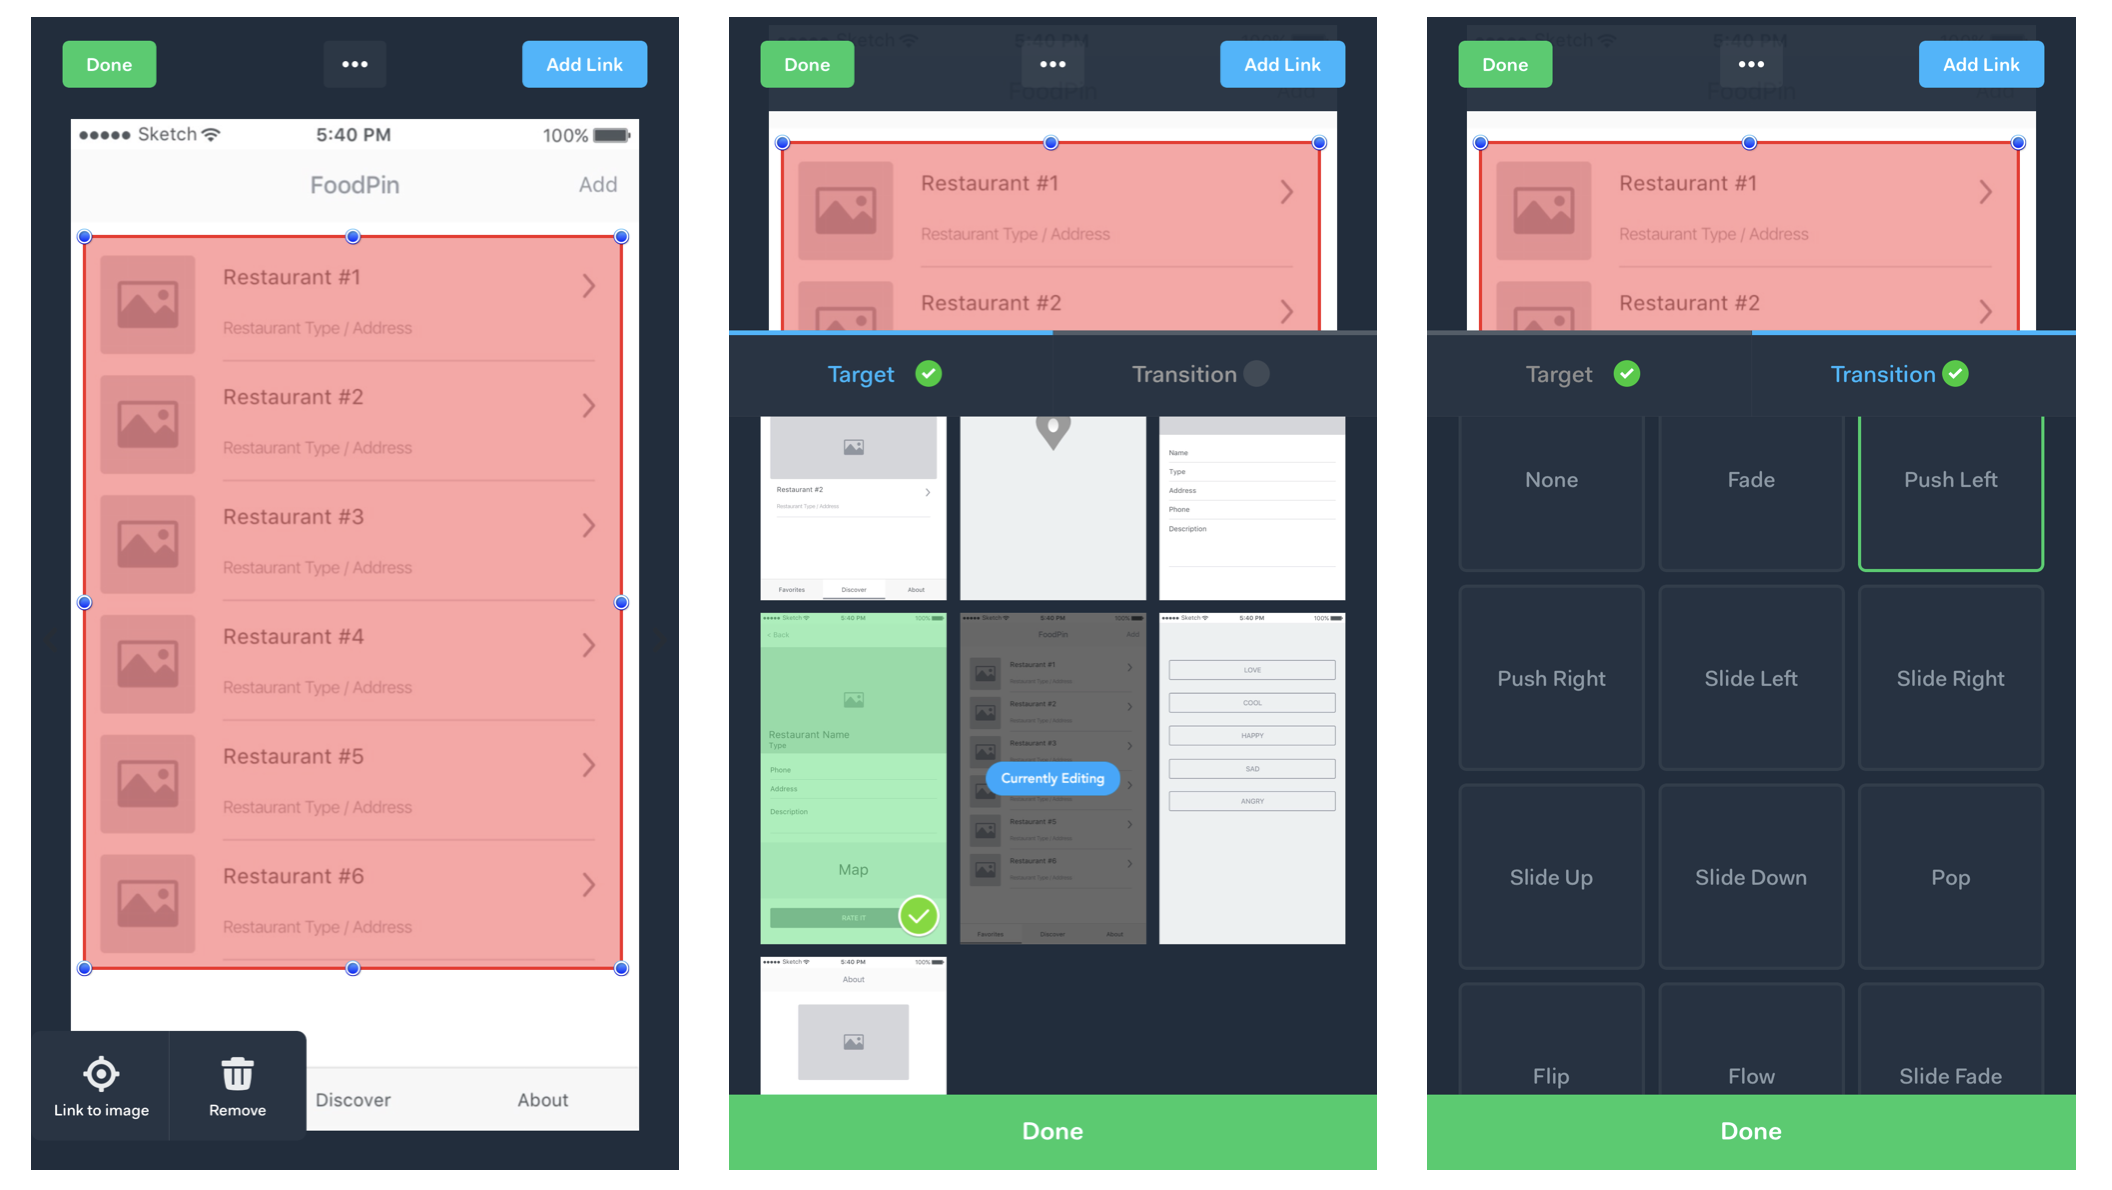
Start with the home screen of the app and define the screen transition. POP lets you highlight a specific area of the image and specify the target page when that area is tapped. Then define the transition type including fade, next, back, rise and dismiss. Say, for the home screen, the app should navigate to the detail screen when a user taps any of the records. To configure a screen transition, you can click the Add Link button to highlight the records and then click Link to image. Select the target image, which is the restaurant detail. Optionally, you can set up the screen transition animation.
Once you have made the change, go back to the project home. Tap the Play button to interact with the prototype. The app will transit to the detail screen when any of the records are tapped.
You just need to repeat the procedures to define the rest of the screen transitions. When the prototype is finished, you can share it with your team members and potential users using the Share option. Your users can try out the prototype using a web link:
https://marvelapp.com/10c52gg6
Prototyping Your App with App Prototyping Tools
This is how you visualize your idea. By building a simple prototype, it allows you to involve your users and solicit their feedback as early as possible. Wireframes are not visually pleasing. You can further build on the wireframes and add visual elements to turn it into a high-fidelity prototype. In this section, I will explore some of the popular app prototyping tools that can help you design a fully functional prototype, which looks almost the same as the final product.
Sketch
I am a big fan of Sketch (https://www.sketchapp.com). Even if I am not an app designer, the tool allows me easily to turn my paper sketches/wireframes into a professional app design. The Sketch app comes with iOS app template to help you layout your UI. Most importantly, you can find tons of free/paid Sketch resources online (http://www.sketchappsources.com) that can elevate your app design. Sketch also has a companion iPhone app which lets you easily view the design on a real device.
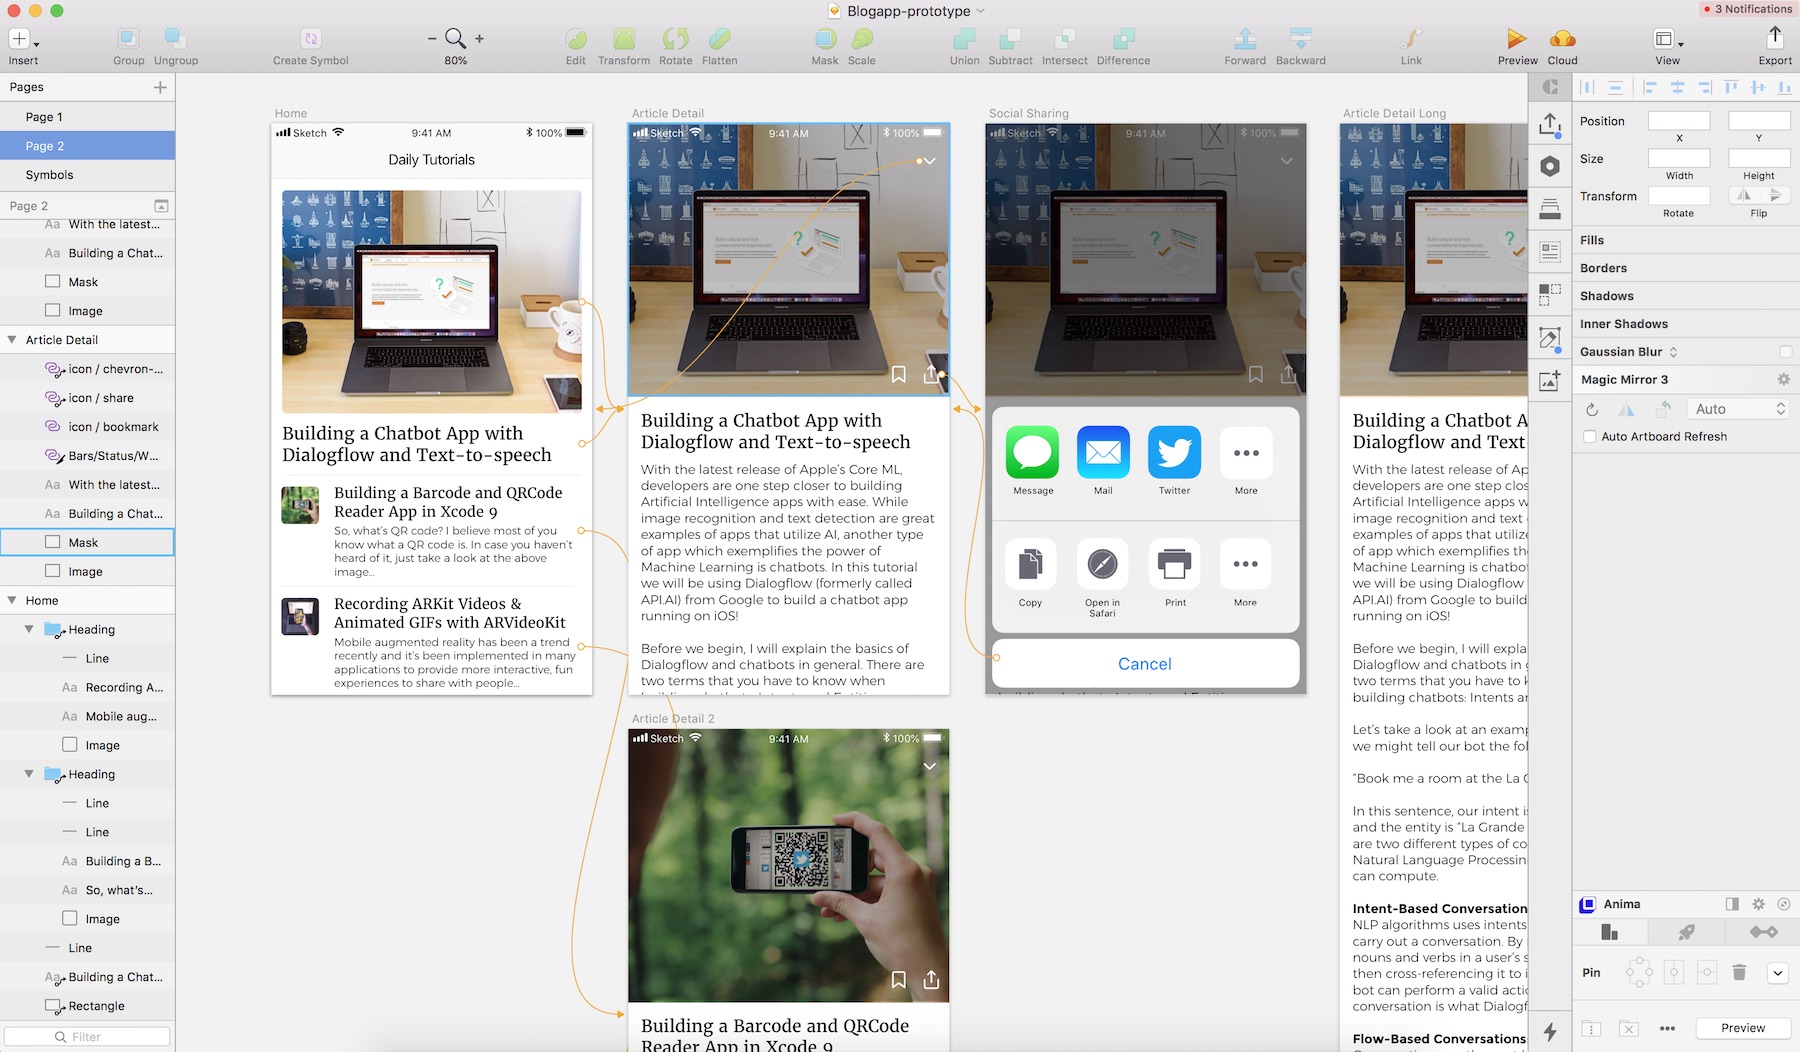
The latest version of Sketch comes with a built-in prototyping feature. You can easily link up multiple screens (or artboards) to create interactive workflows and see the app in action by using the preview mode. If you have the Sketch app and want to see how the prototyping feature works, you can check out this link: https://sketchapp.com/docs/prototyping.
Note: If you want to learn more about Sketch, I highly recommend you to check out Meng To's Design+Code book (https://designcode.io).
Figma
Sketch has dominated the mobile design tool space for some time. The most notable alternative is a cloud-based prototyping tool called Figma (https://www.figma.com). Unlike Sketch which is a Mac app, Figma is a web application that can be used with any browser and puts emphasis on collaboration. All your design projects are stored in the cloud, allowing you to easily access your projects from anywhere and multiple designers to simultaneously collaborate on a single document.
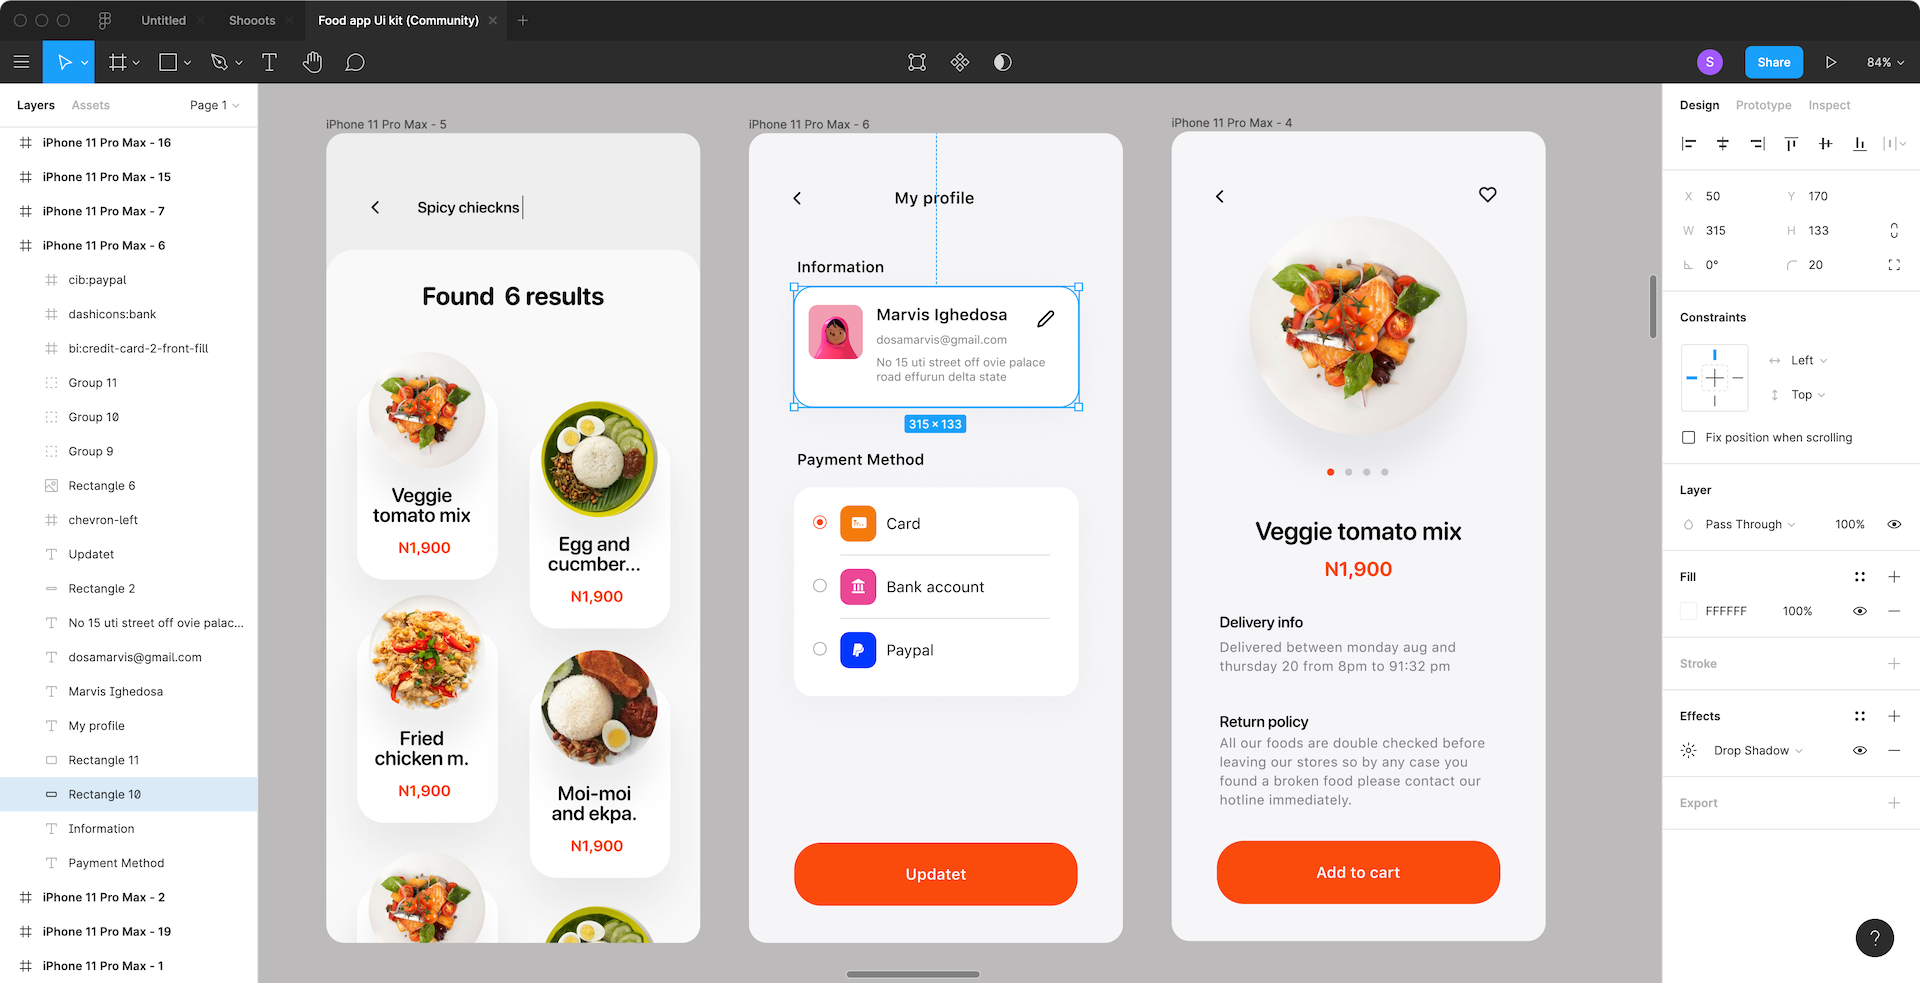
While Sketch doesn't have any free plan, Figma offers a free starter plan which allows you to create three prototyping projects. You will need to upgrade to other premium plans if you need to create more projects
If you've used Sketch before, it's not hard to switch to Figma. Both Sketch and Figma have their edges. However, if you need to work on a design with teams of remote designers, Figma is definitely a good choice.
Adobe Experience Design
In March 2016, Adobe announced a Sketch competitor called Adobe XD (short for Experience Design) for UI design. The company claimed it as an all-in-one tool for both web and mobile app design projects. At the time of writing, the app is free for download (http://www.adobe.com/products/experience-design.html).
If you've used Photoshop before, you will find Adobe XD a lot easier to use. The tool has two modes: design and prototype. In the Design mode, you can design the app UI with a set of layout tools. At a certain point, you can switch to the Prototype mode to build an interactive prototype with the app screens you just designed. It is pretty easy to connect one screen with the other. By clicking and dragging, you can create an app prototype with simple animations to demonstrate the workflow of your app.

I have built a prototype demo, which is the app we're going to build in this book, using Adobe XD. You can download the project file from http://www.appcoda.com/resources/swift3/FoodPinEn.zip.
Invision
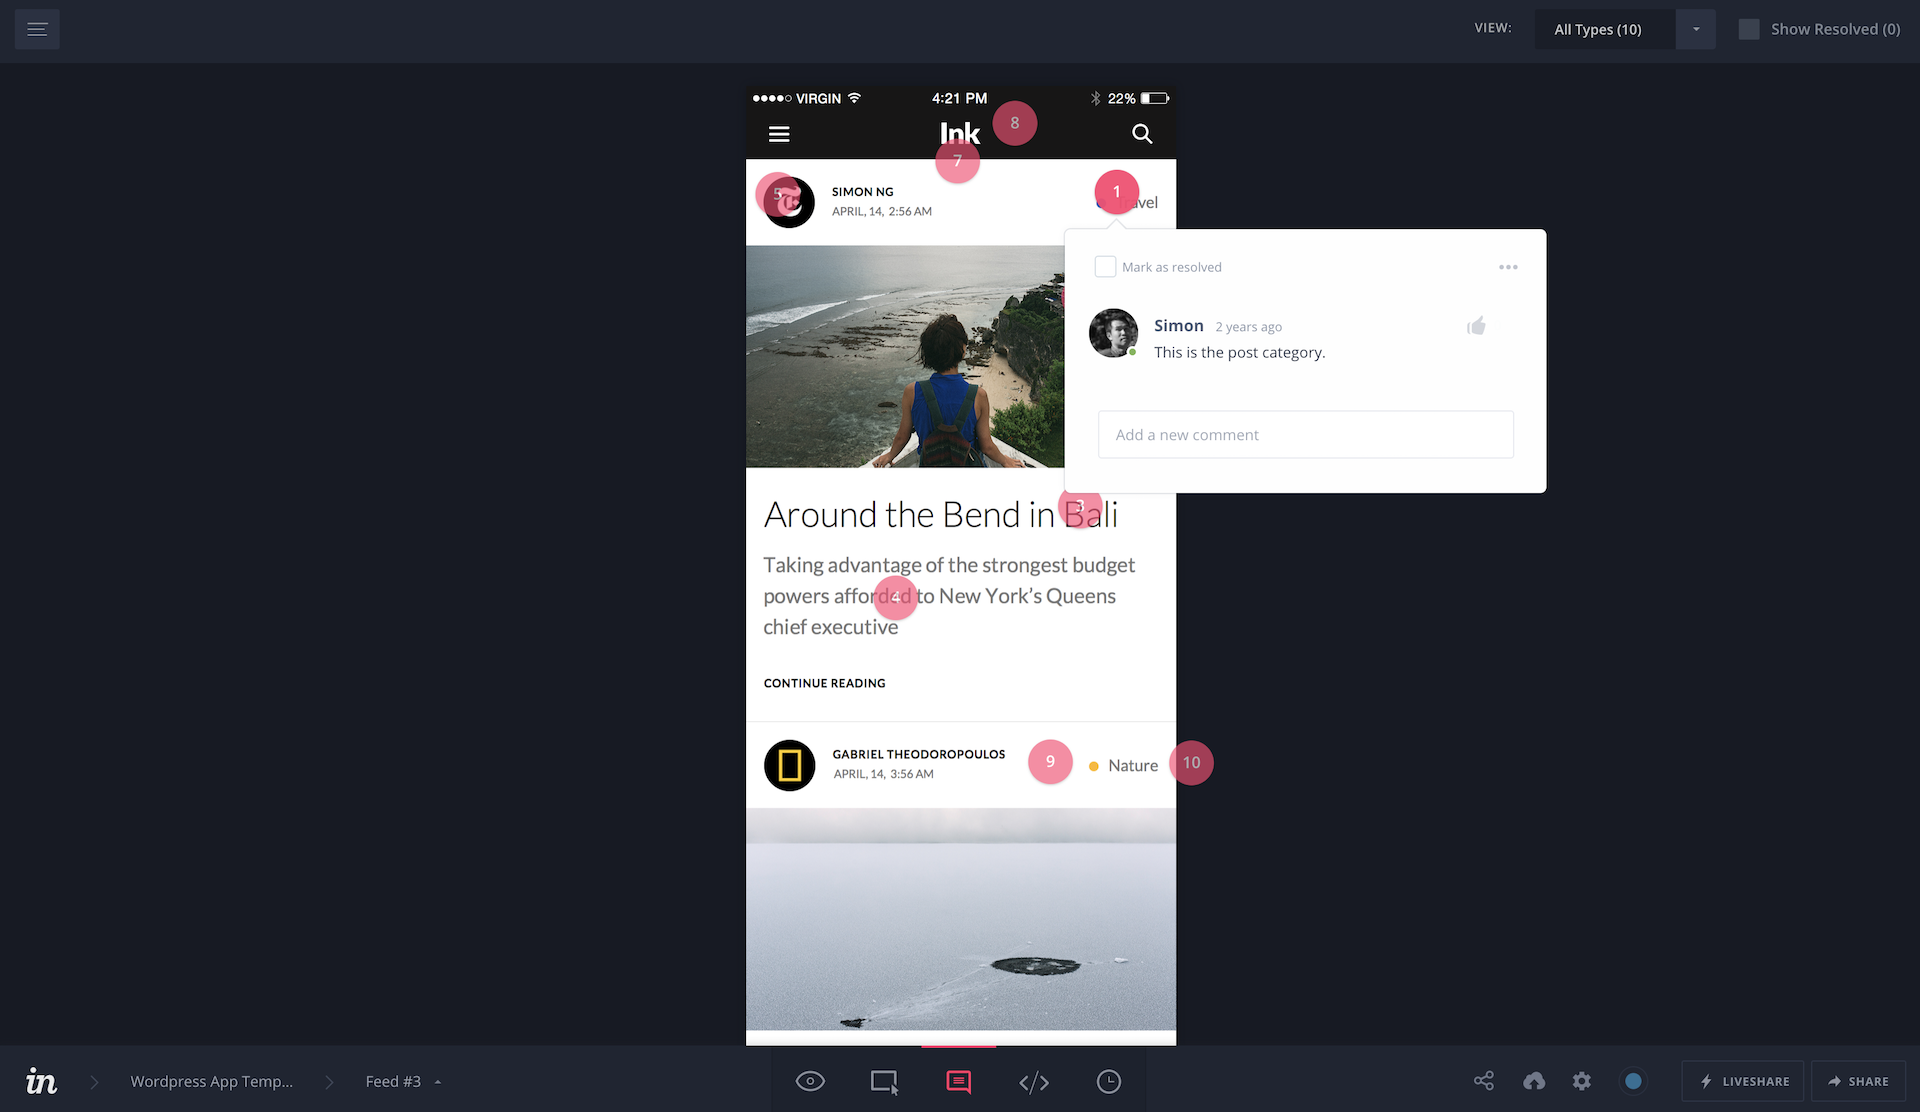
Invision (https://www.invisionapp.com/) is one of the leading prototyping and collaboration tools in the market. It allows you to quickly create interactive mockups without writing a single line of code. InVision supports Sketch files which means you can easily export your Sketch screens to InVision and turn them into an interactive prototype. Collaboration has been one of my favorite features of InVision. Let's say, you work with a UI designer to build the prototype. InVision lets you share feedback and add a comment to the screen design. This is particularly useful when you work with your design team or an external UI designer.
Flinto
Flinto (https://www.flinto.com) is another easy-to-use prototyping tool that lets you create realistic app prototype. The app is intuitive to use and pretty easy to learn. You can easily link up screens and create animated transitions.

Keynote
Keynote! Are you kidding me? You heard me right. Apple's Keynote can also be used to make quick prototypes. Actually, Apple's engineers mentioned in WWDC that they used the presentation tool to create a prototype for their app projects.
Keynote shouldn't be new to you if you've used it for creating presentations. The same set of drawing tools built in Keynote allow you to design a simple app UI. Keynotpia offers mock templates to streamline your sketches. Figure 7-10 shows a sample screen created using Keynote.

Not only can you design the app UI, interestingly, Keynote makes it very easy to animate the static mockups. The magic move transition lets you animate the screen transition to replicate the feel of native apps. I will not go into the details about how you can create a working prototyping with Keynote. If you want to learn more about how to prototype using Keynote, you can check out this article (http://webdesign.tutsplus.com/tutorials/how-to-demo-an-ios-prototype-in-keynote--cms-22279). You can also take a look at Apple's 60 Seconds Prototyping video (https://developer.apple.com/videos/play/wwdc2017/818/).
Summary
Prototyping is an essential process in app development. It allows you to quickly build something workable and show users. Prototyping is used to test an idea and get feedback as early as possible. If you're building an app for a client, building a prototype lets your client clearly understand the app design and how it works before seeing the final product.
Thus, no matter if you are a solo developer or a member of a development team, I want you to start prototyping today. Rather than jumping right in to build an app, lay out your idea on paper first and build a simple demo using POP or other prototyping tools. This will save you a lot of time and money creating a product with no appeal.