- Made by AppCoda
- Contact us / Support
- Tweet this book
- Preface
- 1. The Development Tools, the Learning Approach, and the App Idea
- 2. Your First Taste of Swift with Playgrounds
- 3. Build Your First App in Swift and SwiftUI
- 4. Designing UI Using Stack Views
- 5. Introduction to Prototyping
- 6. Understanding List and ForEach
- 7. Customizing List Views
- 8. Displaying Confirmations and Handling List View Selection
- 9. Understanding Struct, Project Organization and Code Documentation
- 10. List Deletion, Swipe Actions, Context Menus and Activity Controller
- 11. Working with Navigation View
- 12. Detail View Enhancement, Custom Fonts and Navigation Bar Customization
- 13. Understanding Colors, Swift Extensions and Dynamic Type
- 14. Working with Maps
- 15. View Animations and Blur Effect
- 16. Working with Observable Objects and Combine
- 17. Working with Forms and Camera
- 18. Working with Core Data
- 19. Adding a Search Bar Using Searchable
- 20. Building Walkthrough Screens Using TabView
- 21. Working with Tab View and Tab Bar Customizations
- 22. Displaying Web Content with WKWebView and SFSafariViewController
- 23. Working with CloudKit
- 24. Localizing Your App to Support Multiple Languages
- 25. Deploying and Testing Your App on a Real iOS Device
- 26. Beta Testing with TestFlight and CloudKit Production Deployment
- 27. Submit Your App to App Store
- 28. Adopting Haptic Touch
- 29. Working with User Notifications
- 30. Appendix - Swift Basics
- Published with GitBook
Chapter 11
Working with Navigation View

Just build something that you'd want to use today, not something you think people would use somehow.
– Paul Graham
First things first, what's navigation view? Like list views, navigation views are another common UI components in iOS apps. It provides a drill-down interface for hierarchical content. Take a look at the built-in Photos app, YouTube, and Contacts. They all use navigation views to display hierarchical content. Generally, you combine a navigation view with a stack of list views to build an elegant interface for your apps. Being that said, this doesn't mean you have to use both together. Navigation views can work with any types of views.
Creating Navigation Views
Let's head back to the FoodPin project (http://www.appcoda.com/resources/swift57/swiftui-foodpin-list-deletion.zip) and open the RestaurantListView.swift file.
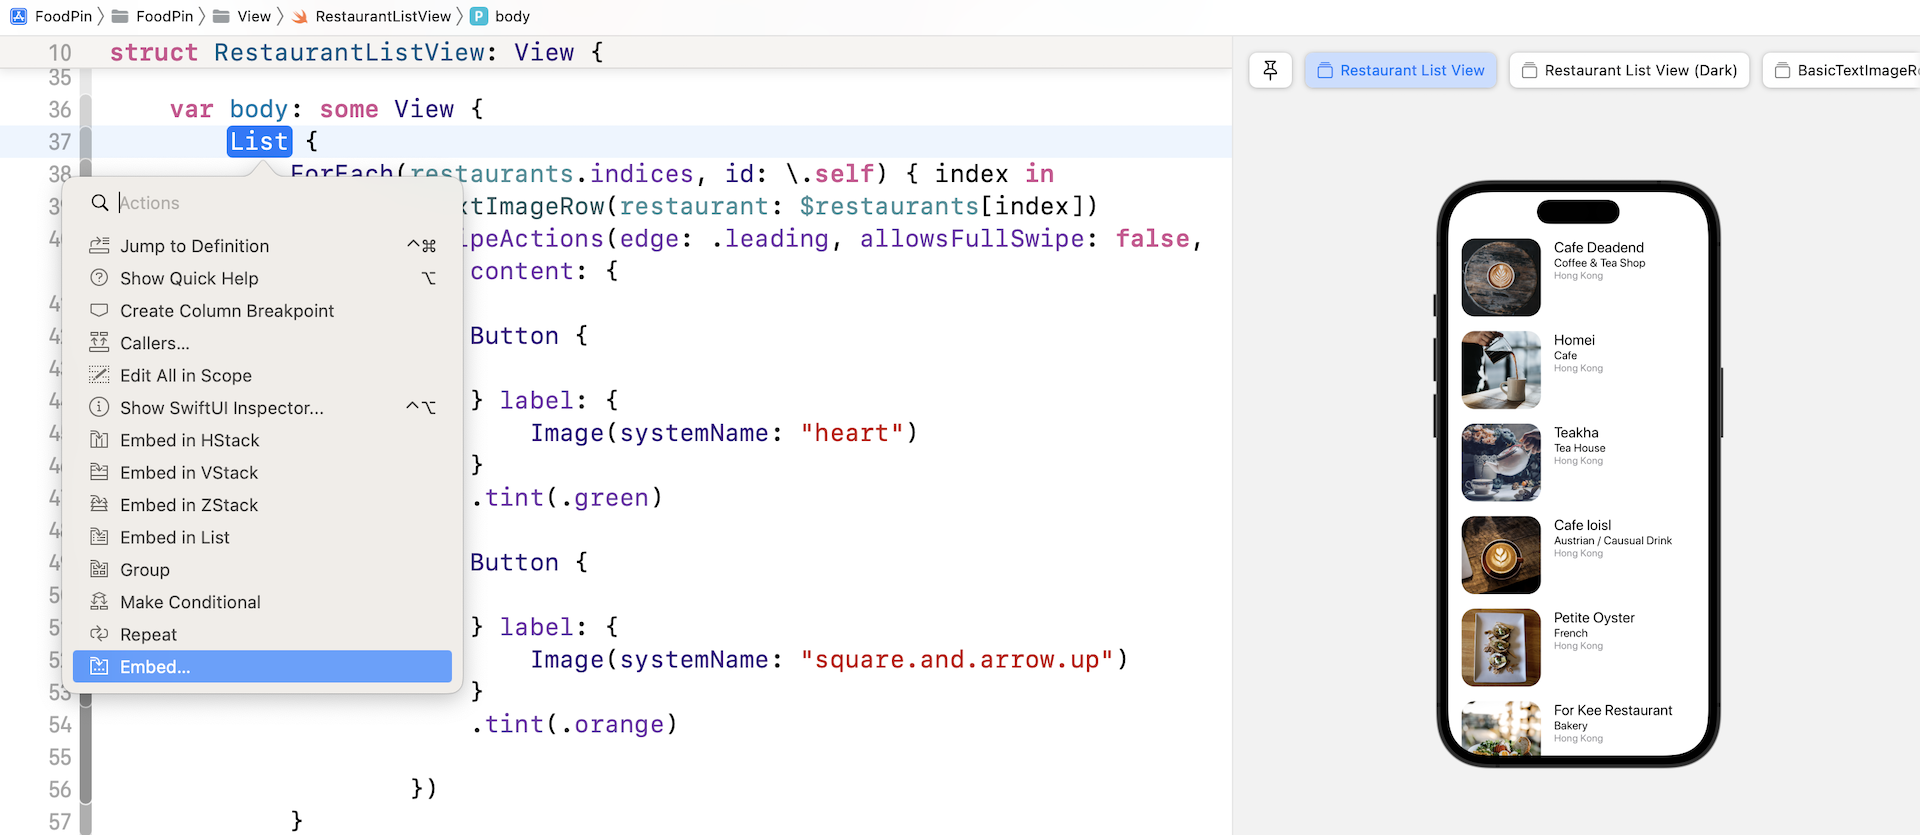
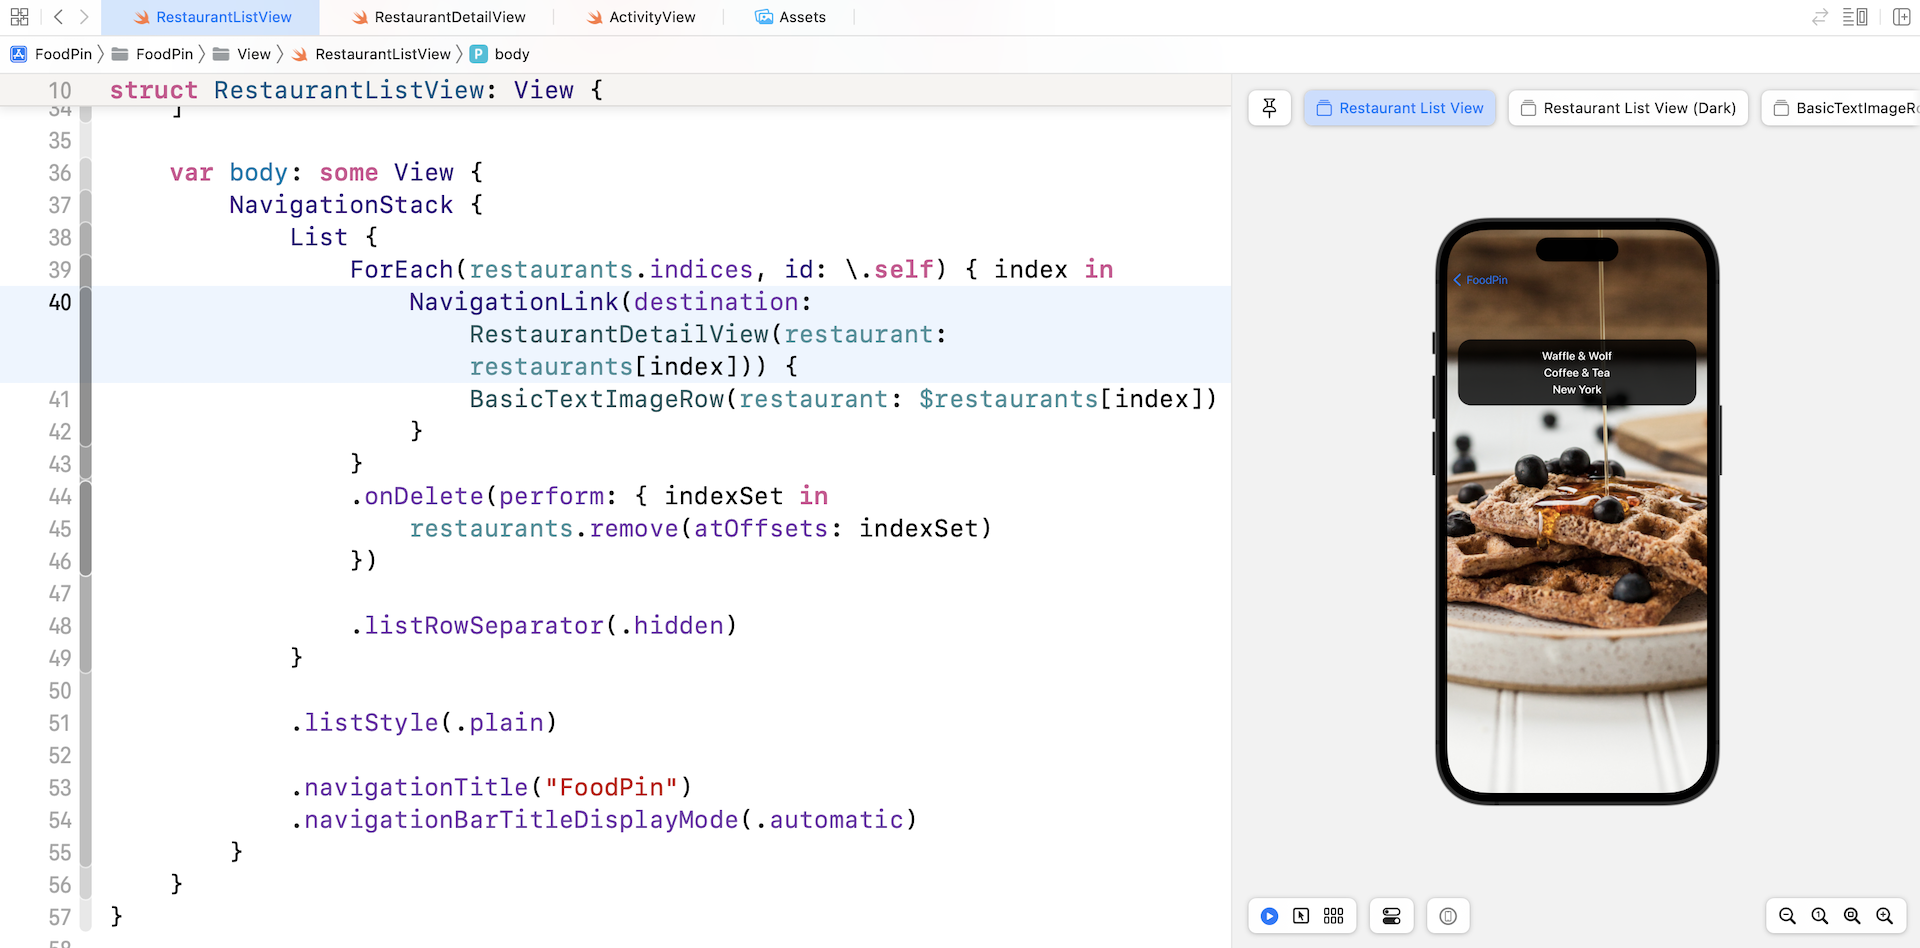
Hold the command key and click List in RestaurantListView. In the context menu, choose Embed.... Then change the default Container to NavigationStack. In iOS 16, you use NavigationStack to create a navigation view.
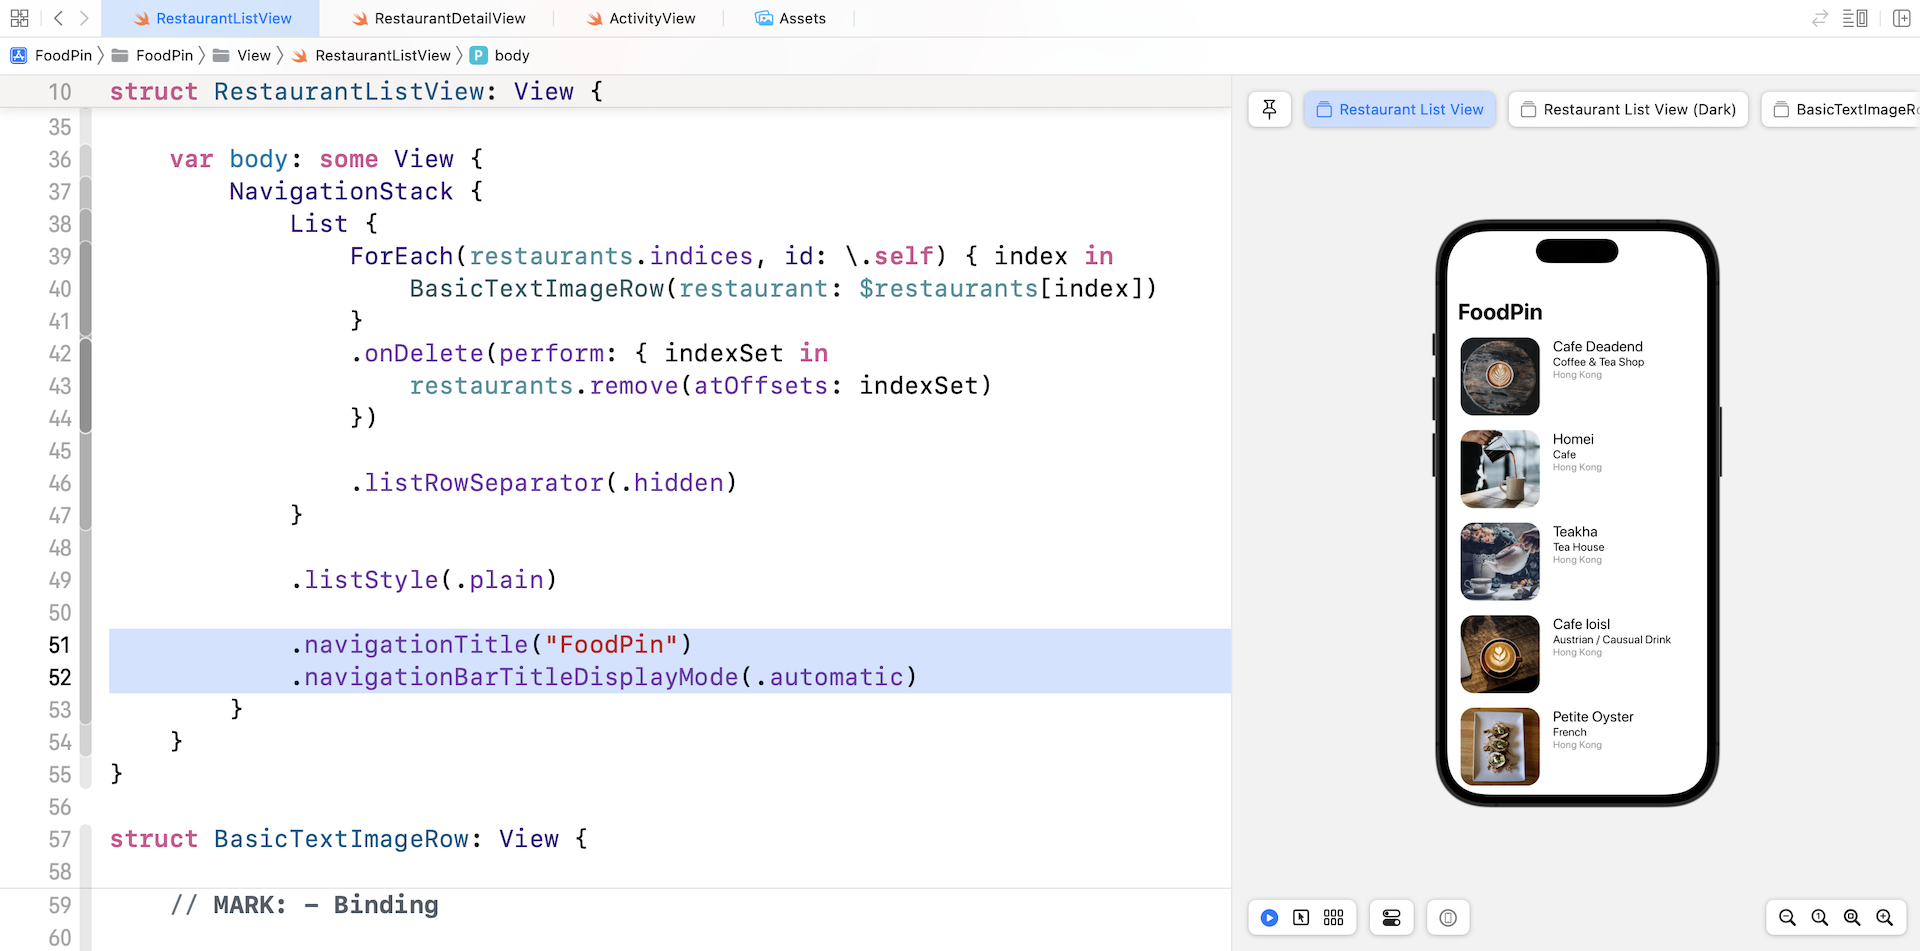
To set the title of the navigation, add the .navigationTitle modifier in the navigation stack. Your code should look like this after the changes:
NavigationStack {
    List {
        .
        .
        .
    }

    .listStyle(.plain)

    .navigationTitle("FoodPin")
    .navigationBarTitleDisplayMode(.automatic)
}
Optionally, you can configure the display mode of the navigation bar using .navigationBarTitleDisplayMode. By setting it to .automatic, you let iOS choose the suitable size of the navigation bar. If you want to fix the size of the navigation bar, you can set it to .large or .inline.
As soon as you complete the change, the preview should render the navigation view for you. The app UI is pretty much the same but you should see a navigation bar with a large title. If you run the app and scroll through the list, the navigation bar will be automatically minimized. This is how the .automatic mode works.
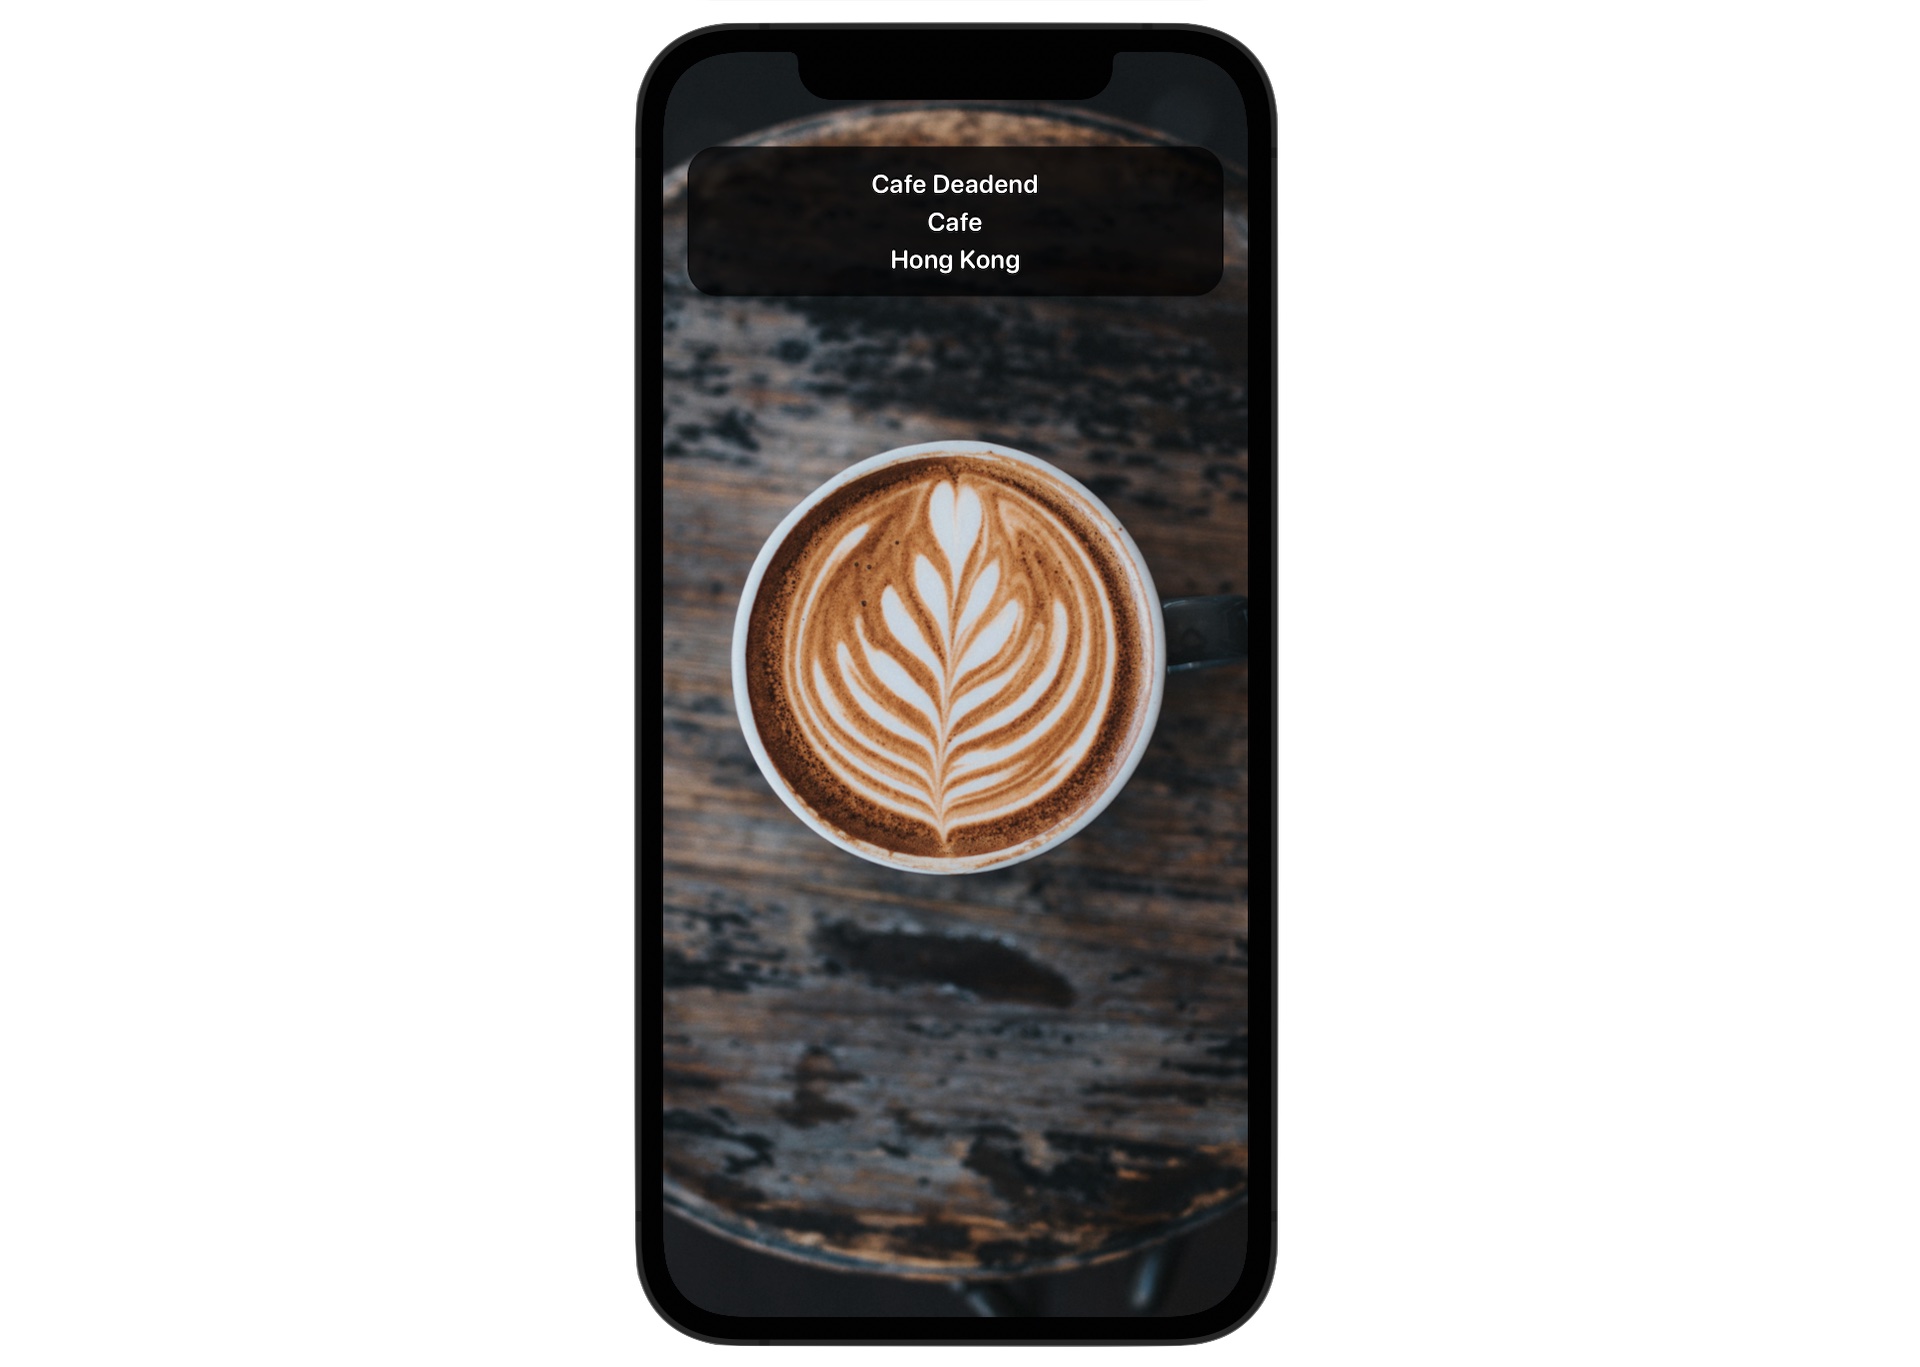
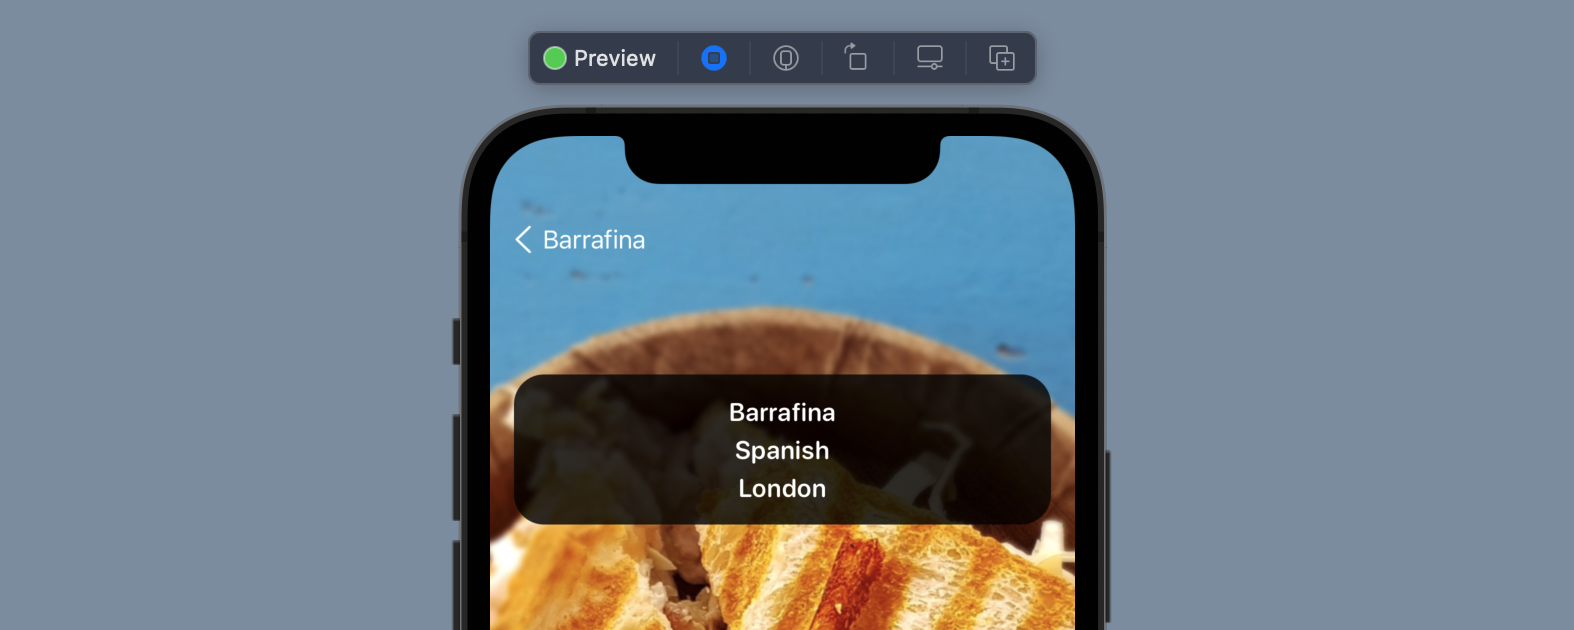
Adding the Restaurant Detail View
Next, let's add a detail view for the restaurants. When a user taps any of the items, the app navigates to another view displaying the details of the restaurant. The figure below shows the expected UI.
We will create a new file and implement the detail view there. In the project navigator, right click View and select New File.... Choose the SwiftUI View template and name it RestaurantDetailView.swift.
The detail view is designed to display the restaurant information, so let's first declare a variable to hold the restaurant object:
var restaurant: Restaurant
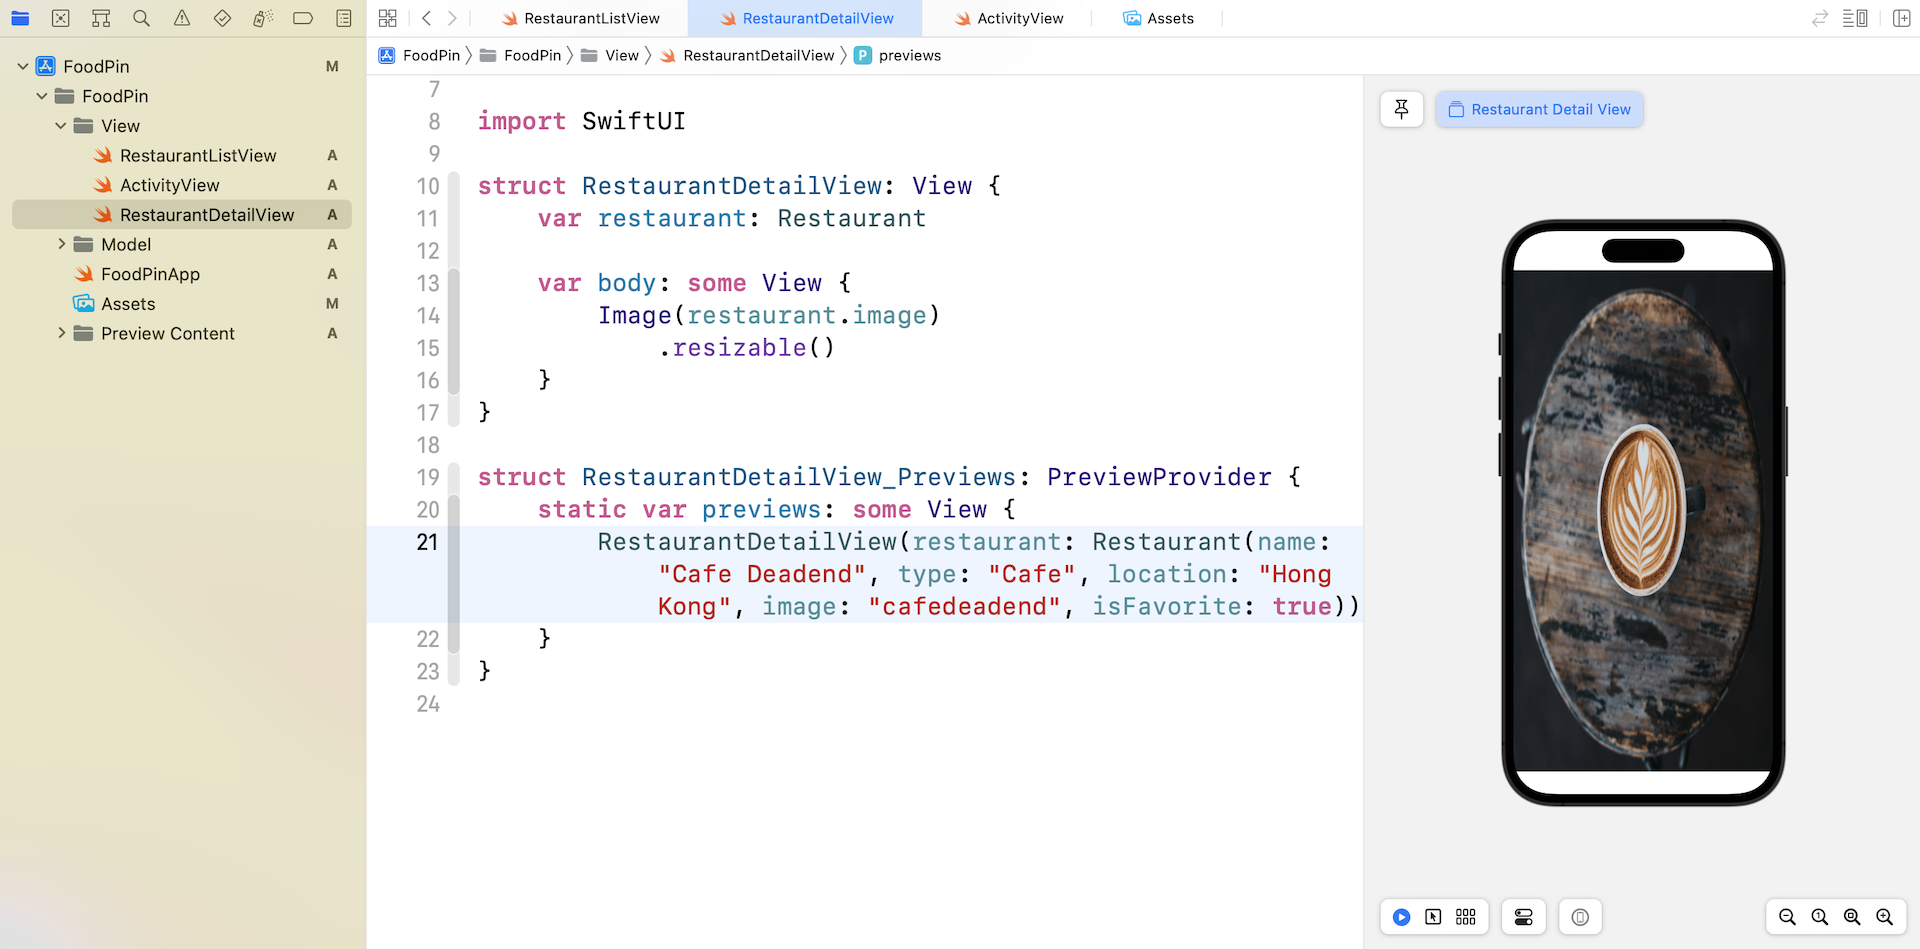
As soon as you add the variable, Xcode shows an error in the RestaurantDetailView_Previews struct. We will need to update the initialization of RestaurantDetailView and pass it a sample restaurant like this:
RestaurantDetailView(restaurant: Restaurant(name: "Cafe Deadend", type: "Cafe", location: "Hong Kong", image: "cafedeadend", isFavorite: true))
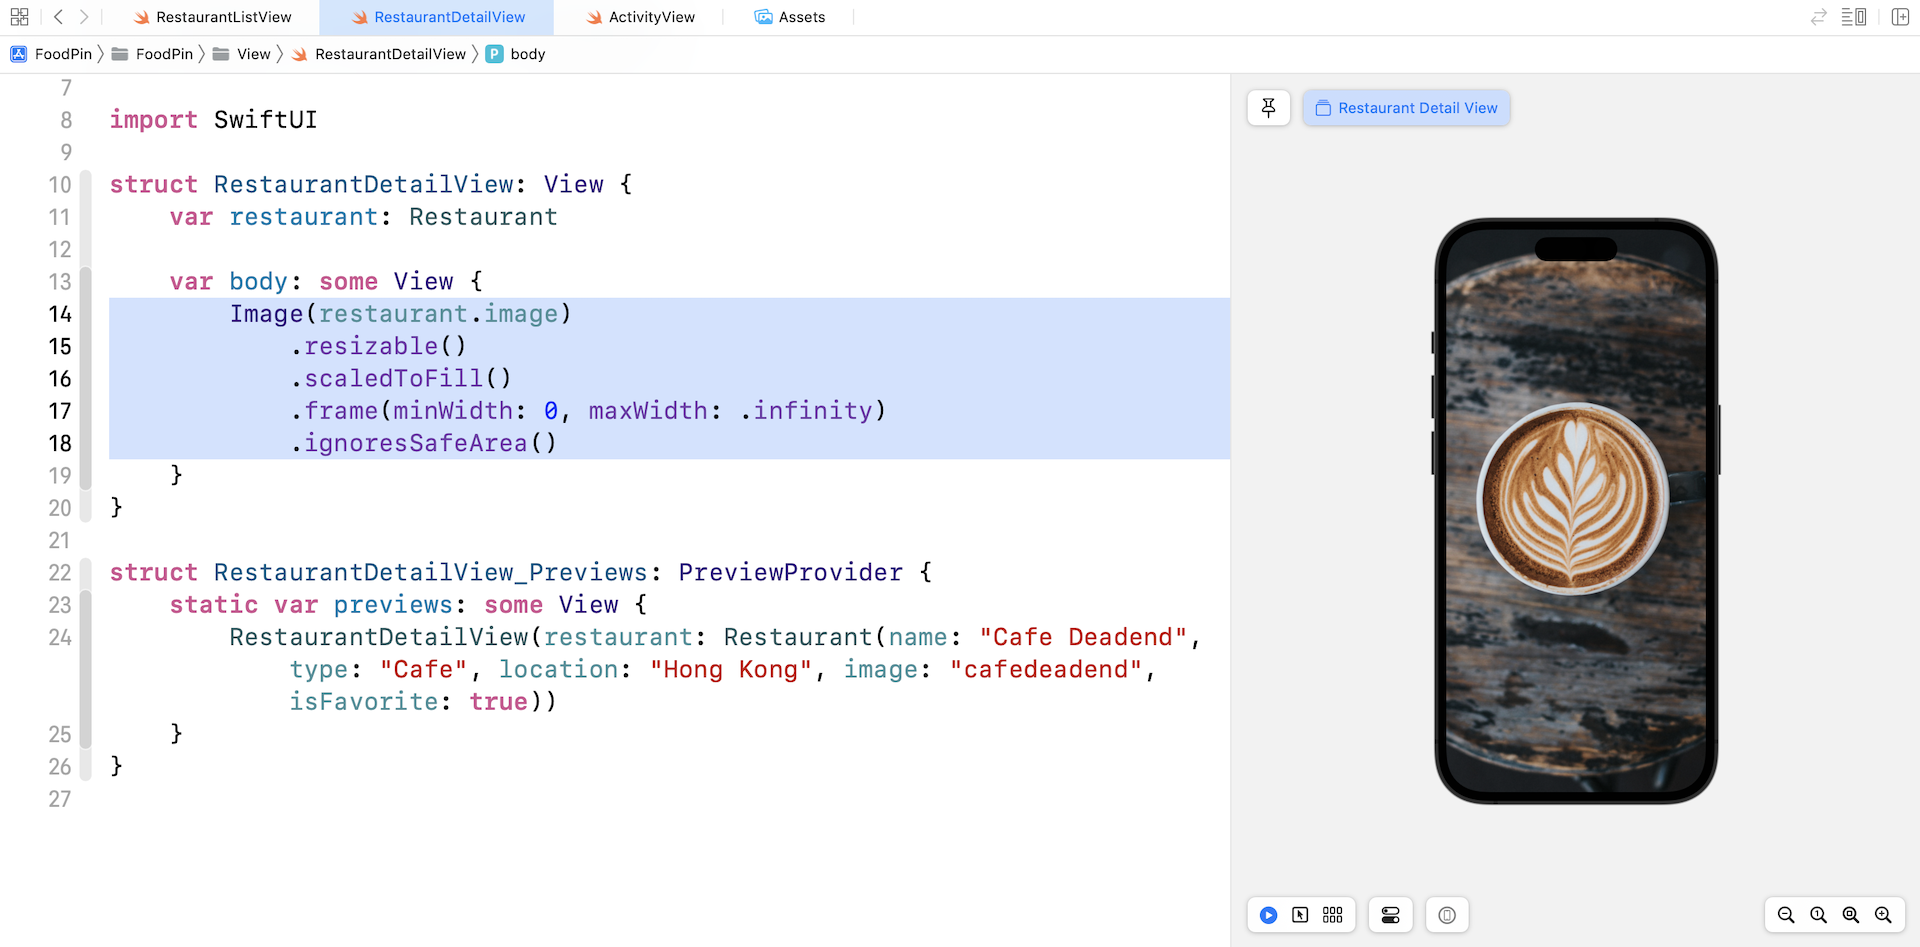
Now let's implement the layout of the detail view. How about we begin with the background image? You should already know how to load an image using the Image view. So replace the body variable like this:
var body: some View {
    Image(restaurant.image)
        .resizable()
}
By using the resizable modifier, the image stretches itself to fill the view. However, it doesn't scale with respect to the aspect ratio. And, there is one more issue. The image doesn't fill the whole screen.
To fix the scaling issue, we can attach the scaleToFill modifier to the Image view. For the second issue, we can attach the ignoresSafeArea modifier to resolve it.
Image(restaurant.image)
    .resizable()
    .scaledToFill()
    .frame(minWidth: 0, maxWidth: .infinity)
    .ignoresSafeArea()
The frame modifier specifies the size of the image frame. The .infinity value indicates that the image should take up the entire width of the screen.
Okay, we have implemented the background image. How can we overlay the restaurant infobox on top of the image? The answer is stack views.
I have introduced both HStack and VStack to you. There is one more type of stack views provided by SwiftUI, which is known as ZStack. By using ZStack, you can easily overlay one view on top of the others.
Now update the code in body like this:
ZStack {
    Image(restaurant.image)
        .resizable()
        .scaledToFill()
        .frame(minWidth: 0, maxWidth: .infinity)
        .ignoresSafeArea()

    Color.black
        .frame(height: 100)
        .opacity(0.8)
        .cornerRadius(20)
        .padding()
}
We embed the Image view in a ZStack and add a new Color view. The order of the views within ZStack determines the views are layered. In this case, the Color view is placed on top of the Image view.
For the Color view, we use the black color and set its frame height to 100 points. To make it translucent, we attach the opacity modifier and set its value to 0.8. After you made the change, the preview should show a rounded rectangle at the center of the screen.
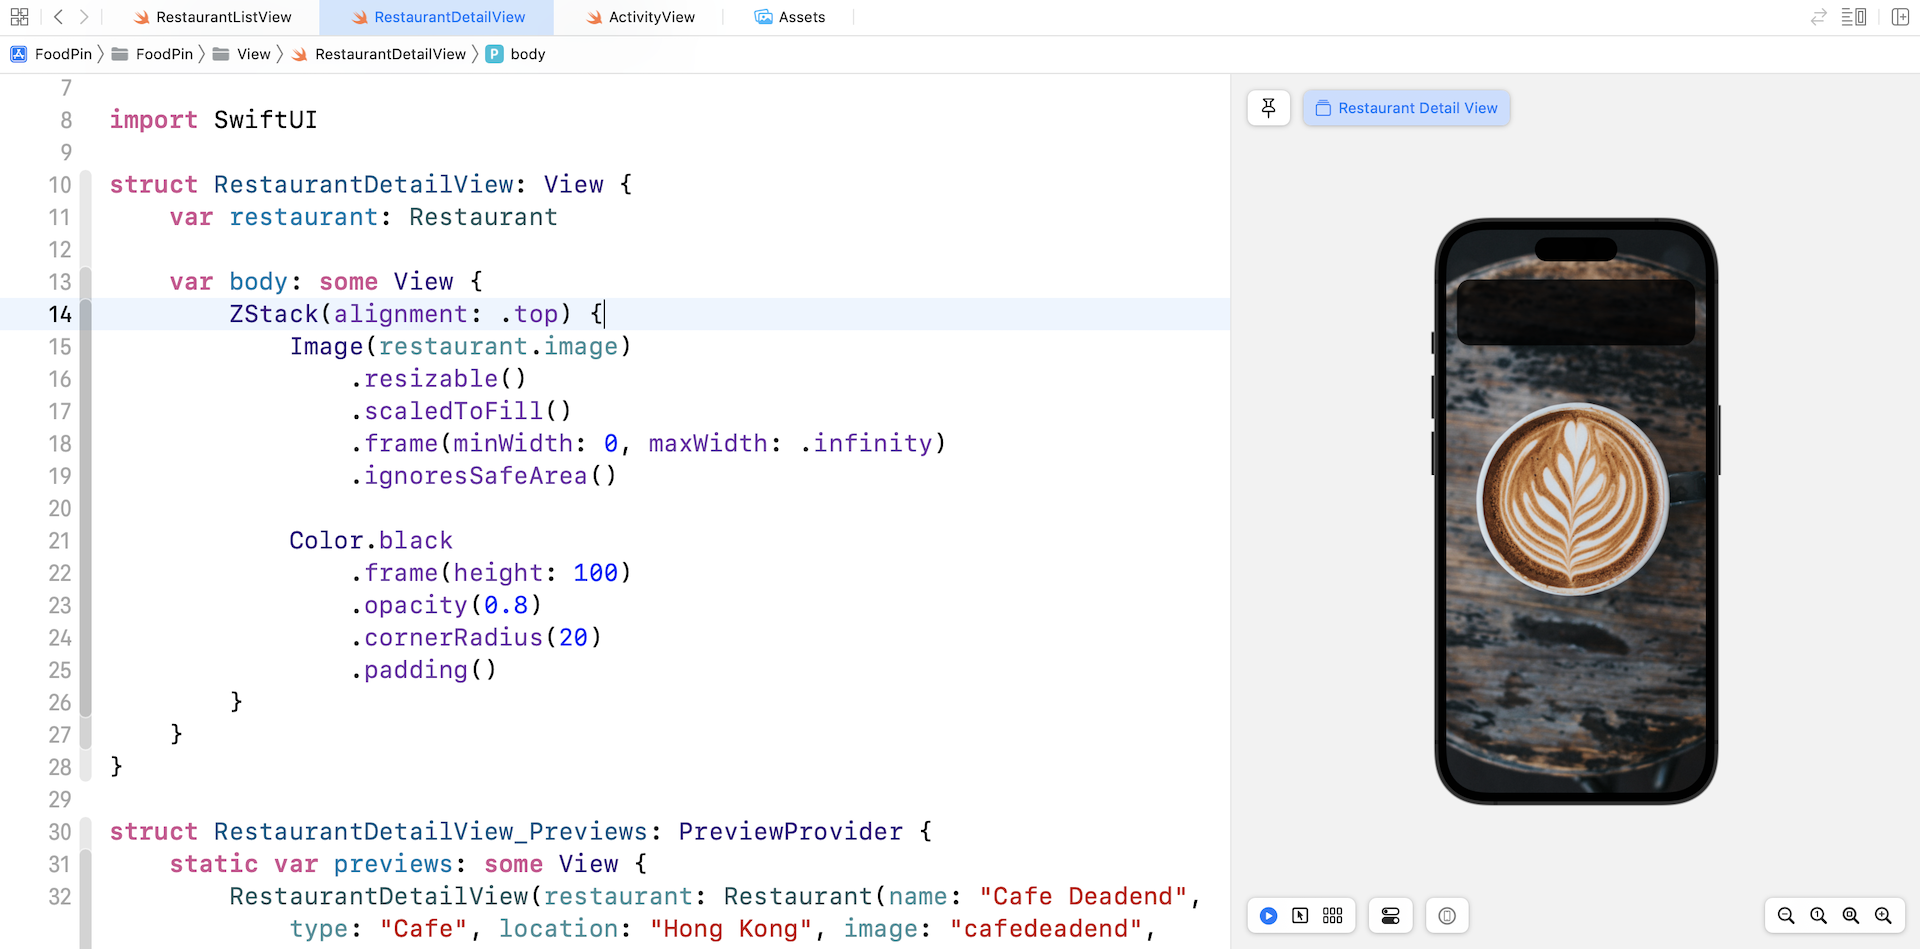
Next, how can we move the rectangular box to the top part of the screen? Similar to HStack (or VStack), the ZStack comes with the alignment parameter. You can change the initialization of ZStack like this:
ZStack(alignment: .top) {
  .
  .
  .
}
By setting the value of alignment to .top, the rectangular box moves to the top part of the screen.
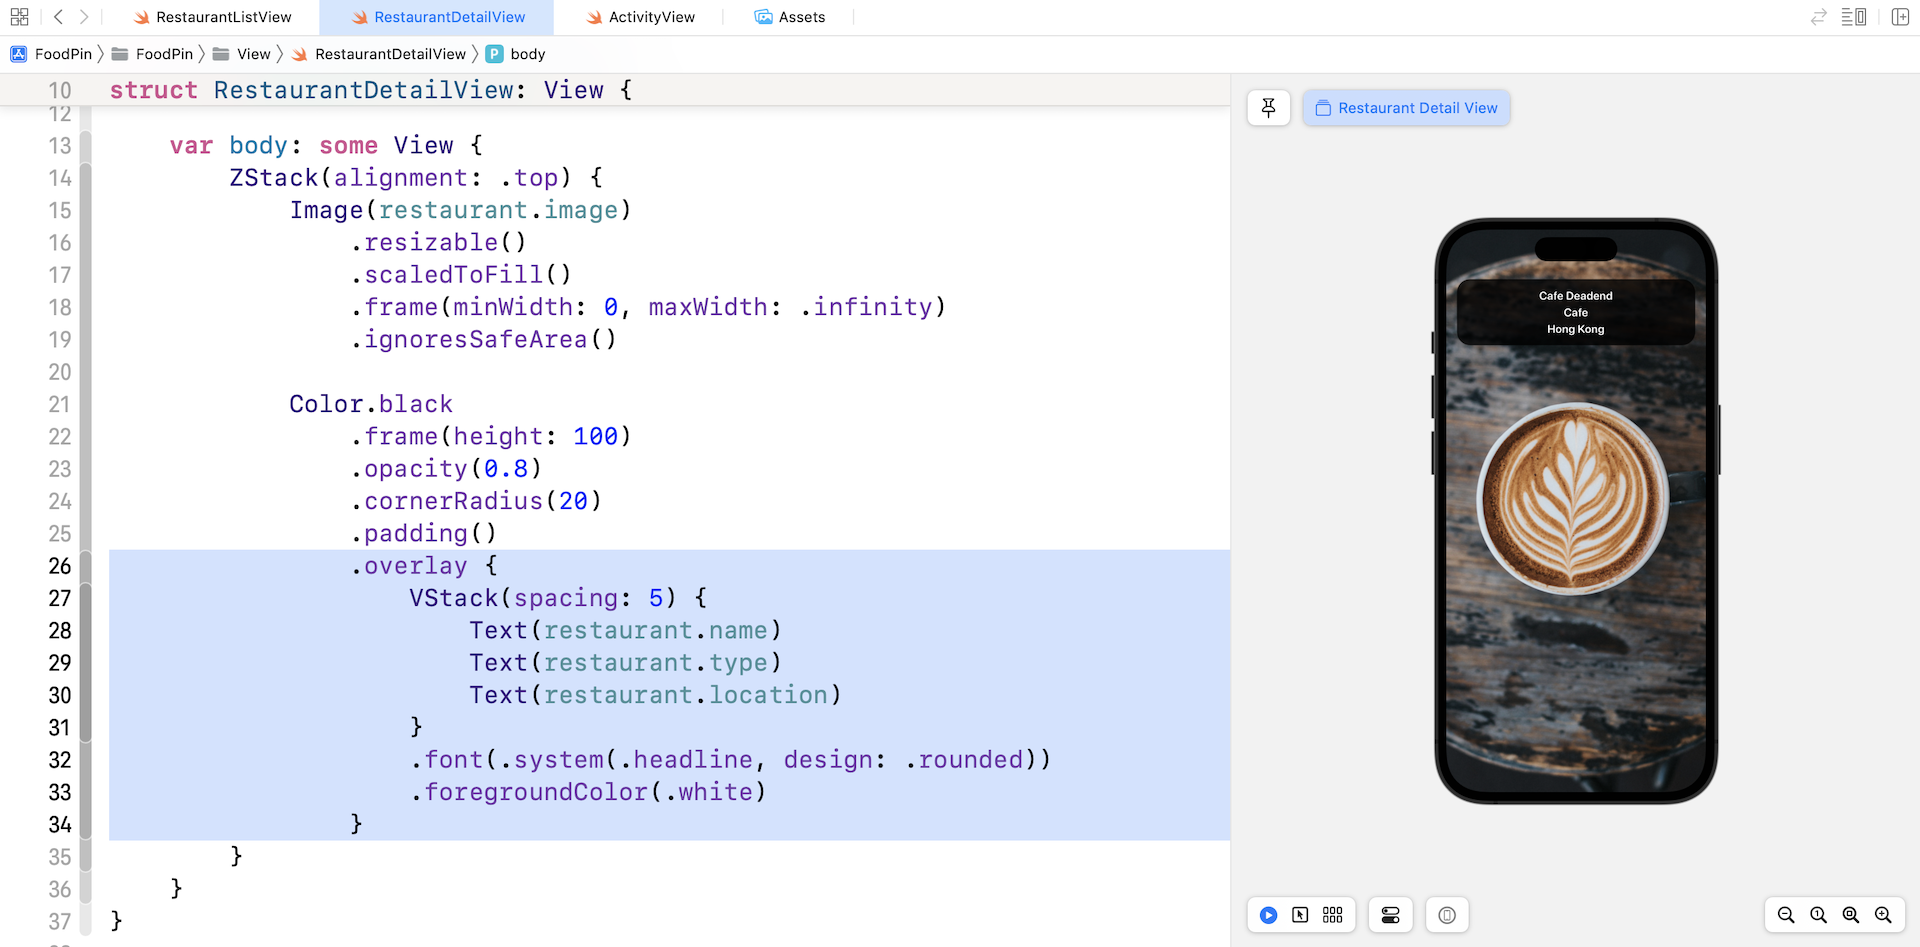
To present the restaurant information including name, type, and location, we can attach the overlay modifier to the Color view:
Color.black
    .frame(height: 100)
    .opacity(0.8)
    .cornerRadius(20)
    .padding()
    .overlay {
        VStack(spacing: 5) {
            Text(restaurant.name)
            Text(restaurant.type)
            Text(restaurant.location)
        }
        .font(.system(.headline, design: .rounded))
        .foregroundColor(.white)
    }
We use the overlay modifier to overlay the content within the Color view. To display the restaurant information, we use a VStack to present the restaurant name, type, and location.
Navigating from One View to Another
Now that we have created the detail view, how can you trigger the navigation from the list view to the detail view? Open RestaurantListView.swift and edit the RestaurantListView struct. Wrap the BasicTextImageRow view with NavigationLink like below:
NavigationLink(destination: RestaurantDetailView(restaurant: restaurants[index])) {
    BasicTextImageRow(restaurant: $restaurants[index])
}
You use NavigationLink to enable navigation for all items in the list view. The destination parameter specifies the destination view of the navigation. In this case, it's the RestaurantDetailView we just created.
Run the app to test it. Tapping any of the restaurants will navigate to the detail view.
Using Accent Color
By default, the back button is displayed in blue. If you want to change it to another color, you can attach the .accentColor modifier to NavigationStack and specify your preferred color. Here is an example:
NavigationStack {
  .
  .
  .
}
.accentColor(.white)
Customizing the Back Button
The back button is automatically generated by the system that is composed of a chevron left icon and the title of the original view (i.e. FoodPin). One way to customize the back button in SwiftUI is to create our own button. Let's say, you want to display the restaurant name in the back button. How can you do that?
You can attach the following modifiers to the ZStack view of RestaurantDetailView:
ZStack(alignment: .top) {

  .
  .
  .

}
.navigationBarBackButtonHidden(true)
.toolbar {
    ToolbarItem(placement: .navigationBarLeading) {
        Button(action: {
            dismiss()
        }) {
            Text("\(Image(systemName: "chevron.left")) \(restaurant.name)")
        }
    }
}
The navigationBarBackButtonHidden modifier is used to hide the original back button. We then create our own version of the back button by using the toolbar modifier. Inside the toolbar modifier, we create a ToolbarItem, which is actually a button with the restaurant name. We set its placement to the leading edge of the navigation bar.
Since the back button is created manually, we need to implement the button action on our own. This is why you wrote this line of code in the action closure:
dismiss()
But what's this dismiss() function? We haven't implemented it yet, so Xcode should show you some errors. To make the code work, declare the dismiss variable in RestaurantDetailView:
@Environment(\.dismiss) var dismiss
The SwiftUI framework provides a property wrapper named @Environment for developers to read a value from a view’s environment. For example, you can read the value of color scheme (dark/light mode) used in a view. The \.dismiss is an environment value for dismissing the current view.
The dismiss environment value was first introduced in iOS 15. If your app supports lower version of iOS, you can replace it with presentationMode:
@Environment(\.presentationMode) var presentationMode
And, you can call the dismiss() like this:
presentationMode.wrappedValue.dismiss()
Removing Disclosure Indicators
After adding the navigation links, the system by default adds a disclosure indicator for all items in the list view. How can you remove it? SwiftUI doesn't provide a modifier to control the visibility of disclosure indicators. A workaround is to make use of ZStack and EmptyView to disable the disclosure indicators.
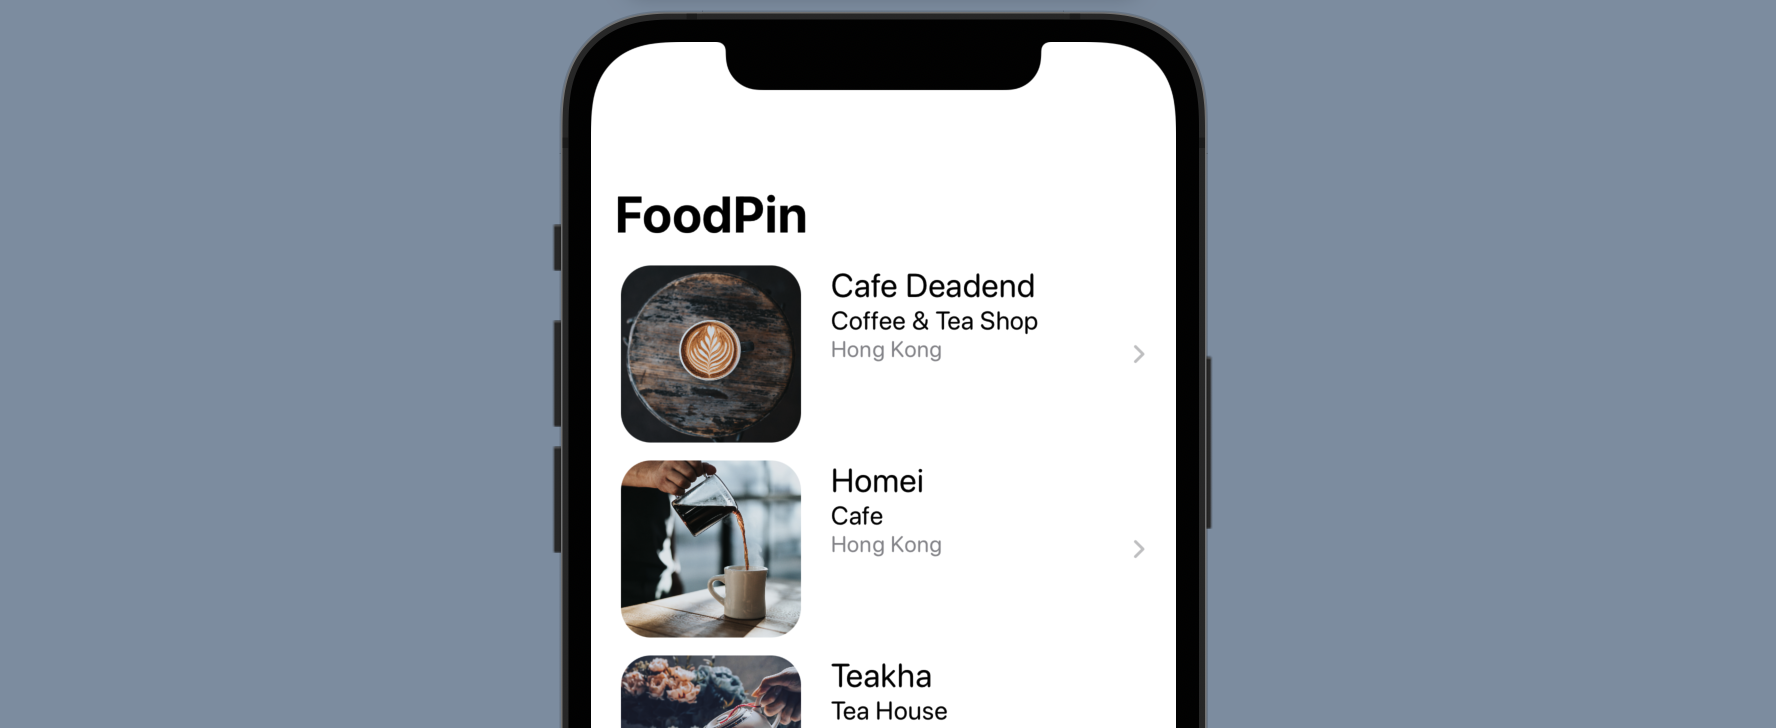
Go back to RestaurantListView.swift. In the RestaurantListView struct, modify the following code from:
NavigationLink(destination: RestaurantDetailView(restaurant: restaurants[index])) {
    BasicTextImageRow(restaurant: restaurant)
}
To:
ZStack(alignment: .leading) {
    NavigationLink(destination: RestaurantDetailView(restaurant: restaurants[index])) {
        EmptyView()
    }
    .opacity(0)

    BasicTextImageRow(restaurant: $restaurants[index])
}
After the changes, run the app again to have a test. The disclosure indicator should be disappeared.
Summary
In this chapter, I have walked you through the basics of navigation views and navigation links. With SwiftUI, you can easily build a navigation UI with just a few lines of code. I have also covered a few techniques on customizing the navigation bar. And by implementing the detail view, you now should know how to use ZStack to one view on the others.
For reference, you can download the complete Xcode project from http://www.appcoda.com/resources/swift57/swiftui-foodpin-navigation.zip.